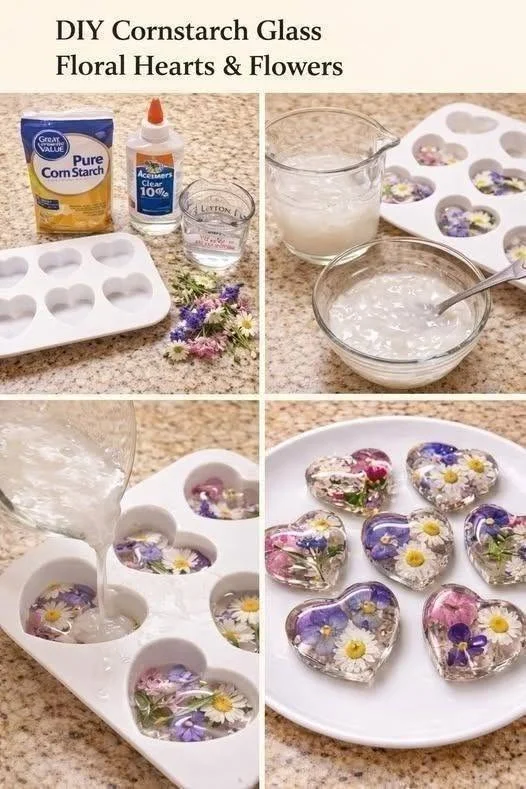
These translucent hearts and flowers catch the light like genuine stained or sea glass. Crafted from cornstarch, baking soda, water, and food coloring, this clay dough produces a smooth, frosted finish as it dries. These ornaments are ideal for displaying in sunlit windows, hanging as holiday accents, or stringing into decorative garlands.
Equipment & Ingredients
Component Breakdown
Section Ingredient / Tool Quantity / Type Functional & Craft Role
Ceramic-Mimic Base Cornstarch 1 cup Primary structural starch base delivering a fine, smooth surface.
Baking soda 1 cup Moderates dough elasticity, prevents cracking, and adds a frosted-glass look.
Filtered water ¾ cup Hydration medium required for thermal starch gelatinization.
Finishing Essentials Food coloring Gel or liquid drops Soft pastel tinting (light pastel colors maximize light diffusion).
Cookie cutters Hearts / Flowers Geometric and floral shaping.
Parchment paper 2 large sheets Non-stick surface for rolling and drying dough.
Perforation tool Straw or toothpick Cleanly punches hanging holes before the surface sets.
Sealant (optional) Mod Podge / Acrylic spray Protects the finished starch matrix from ambient atmospheric humidity. Science of Starch Gelatinization & Light Diffusion
Thermal Starch Gelatinization: Raw cornstarch consists of tightly packed crystalline starch granules. Heating the hydrated slurry to $144^\circ\text{F}\text{–}158^\circ\text{F}$ ($62^\circ\text{C}\text{–}70^\circ\text{C}$) causes starch granules to absorb water and swell until they burst. This releases amylose and amylopectin molecules into a continuous polymer network—a thick, pliable hydrogel dough.
The Frosted-Glass Optical Effect: As the sculpted dough air-dries over 24 to 48 hours, water completely evaporates. The starch and fine sodium bicarbonate (baking soda) molecules pack together into a dense, uniform matrix. Because this solid matrix allows light waves to pass through in a diffused state rather than reflecting them, it mimics the appearance of frosted sea glass.
The ¼-Inch Thickness Rule: Keeping rolled dough at a precise ¼-inch thickness ensures proper light transmission while preventing structural warping or cracking during evaporation.
1.Cold Slurry Emulsification:1 min.
In a medium saucepan (off heat), whisk 1 cup cornstarch, 1 cup baking soda, and ¾ cup filtered water for 60 seconds until completely smooth and lump-free.
2.Low-Heat Starch Gelatinization:5-10 min.
Place saucepan over low heat and stir constantly with a wooden spoon or spatula. As the mixture reaches its thermal threshold, it will rapidly thicken into a dense paste and pull away from the walls into a cohesive ball. Remove from heat immediately.
3.Humidity-Controlled Cooling:10-15 min.
Scrape hot dough onto parchment paper. Cover loosely with a clean, damp kitchen towel and let rest for 10 to 15 minutes until safe to handle (the damp towel prevents a hard outer skin from forming).
4.Integrate Pastel Pigment:3 min.
Divide dough into portions and knead a small drop of food coloring into each piece until uniform. Keep tints light and pastel-toned to maximize light diffusion.
5.Parchment-Laminated Rolling:2 min.
Place a colored dough ball between two sheets of parchment paper. Roll out evenly to a precise ¼-inch thickness.
6.Cut, Perforate, and Lift:3 min.
Press cookie cutters firmly into the dough. Transfer cut shapes onto a fresh sheet of parchment paper. Use a drinking straw to punch a clean hanging hole near the top edge of each piece.
7.Symmetric Drying and Evaporation Cycle:24-48 hr.
Let ornaments air-dry in a well-ventilated room. Gently flip every piece over after 12 hours to allow equal evaporation from both sides and prevent curling or warping.
8.Buff and Seal:Finish.
Once hard and ceramic-like, gently sand any rough edges using ultra-fine (400-grit) sandpaper. Coat all surfaces with Mod Podge or clear acrylic craft spray to lock out atmospheric moisture. Thread with ribbon and display.
 Creative Variations
Pressed Botanical Inlays: Place a tiny dried leaf or pressed flower on top of freshly cut dough and gently roll over it once with a rolling pin to embed it flush into the dough. As it dries, the flower is locked inside the translucent matrix.
Gilded Stained-Glass Edges: Paint a thin metallic gold or silver leaf border along the outer edges of the fully dried, sealed ornaments for a stained-glass lead effect.