How to Clean Tile Floors with Baking Soda: A Simple Deep-Cleaning Guide for a Brighter Home
A tiled floor can make a home look clean, fresh, and welcoming—but only when the tiles and grout are properly maintained. Over time, everyday foot traffic, cooking residue, dust, muddy shoes, pet hair, and cleaning-product buildup can leave floors looking dull. Even after regular mopping, you may notice that the tiles no longer shine as they once did or that the grout lines appear darker.
One simple household ingredient is often suggested as part of a tile-cleaning routine: baking soda. When used carefully, baking soda can help loosen surface grime, neutralize odors, and provide gentle scrubbing action. Combined with warm water and good cleaning techniques, it can be a useful addition to a regular floor-care routine.
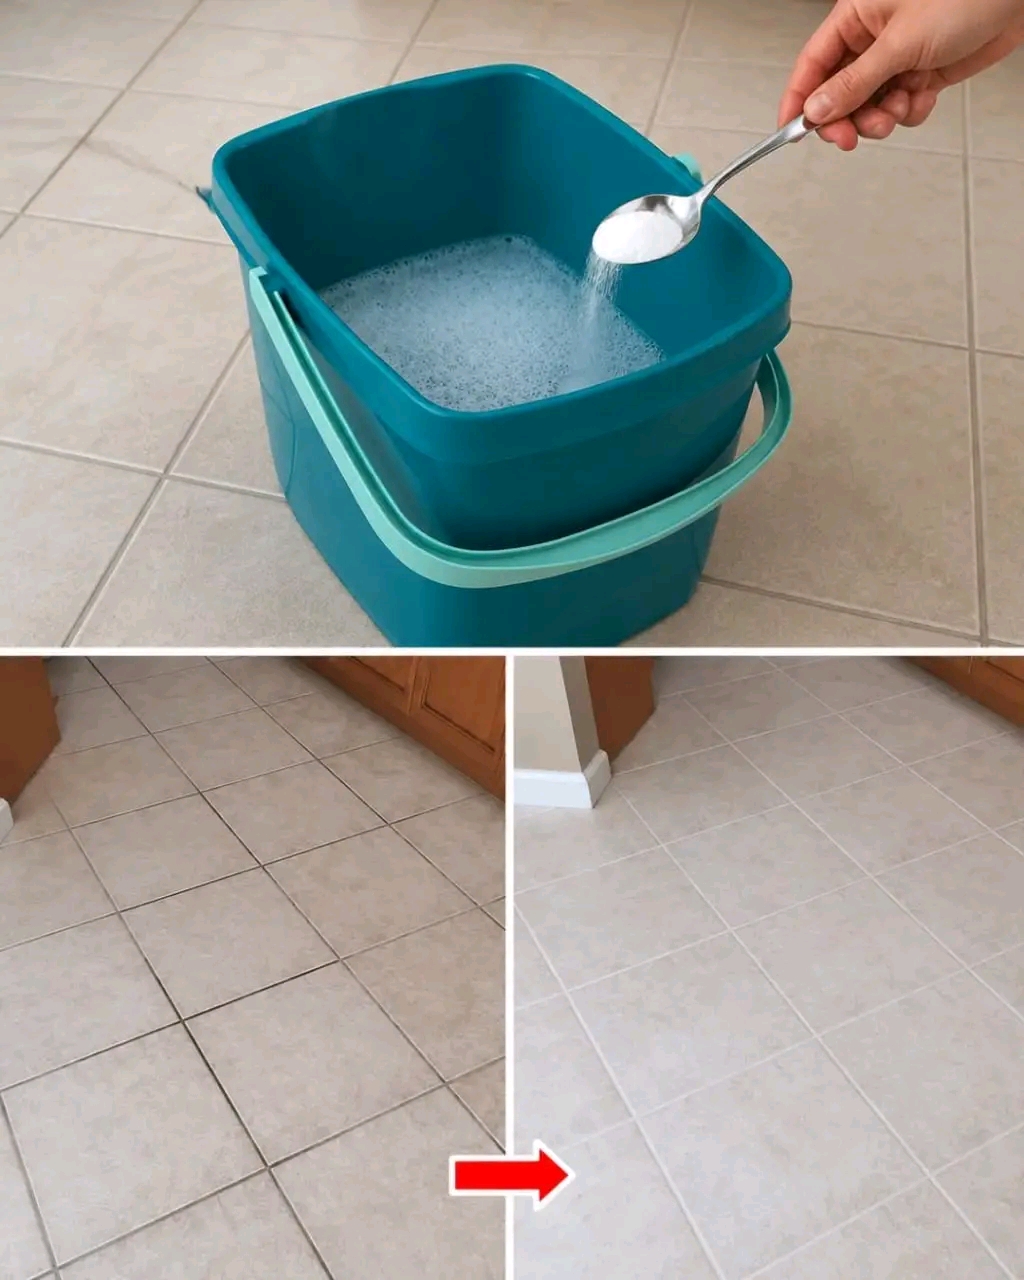
The image above shows a simple concept: adding a white powder, such as baking soda, to a bucket of cleaning water, followed by a comparison between a dull-looking tiled floor and a brighter, freshly cleaned surface.
However, it is important to remember that not every floor should be cleaned with the same method. Baking soda may be suitable for some ceramic and porcelain tile surfaces, but natural stone, delicate finishes, and certain specialty tiles require different care. Always check the manufacturer’s recommendations and test any cleaning solution in a small hidden area first.
This complete guide explains how to clean tile floors using baking soda, how to make a simple homemade cleaning mixture, how to tackle dirty grout, common mistakes to avoid, and how to keep your floors looking cleaner for longer.
Why Do Tile Floors Become Dull?
Tiles are generally durable, but they are not immune to dirt and buildup. A floor may gradually lose its clean appearance for several reasons.
Everyday Dust and Dirt
Tiny particles of dust, sand, and soil are carried into the home on shoes and can settle across the floor. In busy areas such as kitchens, hallways, bathrooms, and entrances, this happens quickly.
When people walk over a dirty floor, fine grit can be moved across the surface repeatedly. Even when the tiles are technically clean, a thin layer of dust can reduce their shine.
Grease and Kitchen Residue
Kitchen floors face a special challenge. Small amounts of oil and food residue can settle on the floor while cooking. These substances can mix with dust and form a sticky film that ordinary dry sweeping may not remove.
Regular maintenance is especially important in cooking areas.
Soap and Cleaning-Product Buildup
Ironically, using too much cleaning product can sometimes make a floor look dull. When concentrated cleaners are not rinsed away properly, they can leave a residue behind.
This residue may attract additional dust and make the floor look dirty again sooner.
Dirty Grout Lines
Grout is usually more porous and textured than tile. As a result, it can collect dirt more easily. Darkened grout lines can make an entire floor appear dirty even when the tile surface itself is reasonably clean.
Hard-Water Deposits
In some areas, minerals in water can leave behind a cloudy or chalky film. This may be particularly noticeable in bathrooms and near sinks.
Moisture and Mold
Bathrooms, laundry rooms, and other damp spaces may develop mildew or mold. These problems should be addressed according to the type of surface and the severity of the issue. Persistent or extensive mold may require professional advice.
What Is Baking Soda?
Baking soda, also known as sodium bicarbonate, is a common household product with many uses. It is a fine, mildly alkaline powder.
When used for cleaning, it can provide several useful properties:
- Gentle abrasive action
- Odor-neutralizing properties
- Ability to help lift certain types of dirt
- Easy availability
- Low cost
- Simple use in homemade cleaning mixtures
Unlike harsh abrasive powders, baking soda is relatively mild. Nevertheless, “mild” does not mean suitable for every material. Frequent or aggressive scrubbing can still damage delicate surfaces.
The best results come from using a small amount, the right amount of water, and gentle cleaning techniques.
A Simple Baking Soda Tile-Floor Cleaning Method
The basic method is easy to prepare.
Ingredients and Supplies
You will need:
- 1 bucket of warm water
- 2 to 4 tablespoons of baking soda
- A mop or microfiber mop
- A broom or vacuum suitable for hard floors
- A clean cloth
- A soft-bristled brush for grout, if necessary
- A second bucket or container of clean water for rinsing
For ordinary tile cleaning, more product is not necessarily better. Using excessive amounts of baking soda can leave powdery residue if the floor is not thoroughly rinsed.
Step 1: Remove Loose Dirt First
Before adding water, sweep or vacuum the floor.
This step is essential.
Many people make the mistake of immediately applying a cleaning solution to a dusty floor. Once water is added, loose dirt can turn into muddy streaks.
Use a broom, dry microfiber mop, or vacuum designed for hard surfaces.
Pay attention to:
- Corners
- Edges of cabinets
- Under furniture
- Behind doors
- Entryways
- Areas near kitchen appliances
Removing loose dirt first makes the wet-cleaning stage easier.
Step 2: Prepare the Cleaning Water
Fill a bucket with warm—not extremely hot—water.
Add approximately 2 to 4 tablespoons of baking soda and stir well.
The amount can be adjusted according to the size of the bucket and the condition of the floor. The goal is to create a gentle cleaning solution rather than a thick paste.
Warm water can help loosen everyday dirt. Baking soda may provide additional cleaning and deodorizing benefits.
Do not assume that adding half a box of baking soda will produce better results. Excessive powder may remain behind and create a cloudy appearance.
Step 3: Mop the Floor Gently
Dip your mop into the solution and wring it out well.
A soaking-wet mop is not always the best choice. Excess water can collect in grout lines and may create problems around baseboards, cabinets, and certain types of flooring.
Mop in small sections.
A good technique is to:
- Start at the farthest corner of the room.
- Work toward the exit.
- Use smooth, overlapping strokes.
- Rinse the mop regularly.
- Change the cleaning water if it becomes visibly dirty.
A microfiber mop can be particularly helpful because it can collect fine particles without requiring excessive water.
Step 4: Pay Attention to Problem Areas
Some parts of the floor may need more attention.
These include:
- The space in front of the stove
- Areas around garbage bins
- Entryways
- Bathroom floors
- Corners
- Areas beneath tables
- Places where pets eat
Instead of scrubbing the entire floor aggressively, focus additional effort on visibly dirty areas.
For small marks, make a paste using baking soda and a small amount of water. Apply the paste to the spot and gently rub it with a soft cloth or soft brush.
Avoid aggressive scouring pads unless you are certain the tile can tolerate them.
Step 5: Rinse the Floor
This is one of the most important steps.
Even a useful cleaning ingredient can leave residue when too much is used. After cleaning, go over the floor with a clean, damp mop and fresh water if necessary.
This can help remove remaining powder and loosened dirt.
A properly rinsed floor may look clearer and less cloudy than a floor that has been covered with too much cleaning solution.
Step 6: Let the Floor Dry
Allow the floor to air-dry.
If you want to reduce water spots, you can dry the surface with a clean microfiber cloth.
Good ventilation may help the floor dry more quickly, especially in bathrooms and humid areas.
Make sure the floor is completely dry before walking on it to reduce the risk of slipping.
How to Clean Tile Grout with Baking Soda
Grout often requires a different approach from the tile surface.
Because grout is textured and may be porous, dirt can become trapped inside it.
Simple Grout Paste
A basic mixture can be made with:
- Baking soda
- A small amount of water
Mix the ingredients until they form a thick paste.
Apply the paste carefully to the grout lines and allow it to sit briefly. Then use a soft grout brush or an old soft toothbrush to gently scrub the area.
Avoid excessive force.
After cleaning, rinse thoroughly and wipe away the residue.
For deeply stained, cracked, or permanently discolored grout, a homemade cleaner may not completely restore the original appearance. Professional cleaning, grout repair, or other maintenance may sometimes be necessary.
Why the Right Amount of Water Matters
Too little water may leave too much powder on the floor.
Too much water may:
- Spread dirt around
- Make the floor take longer to dry
- Leave water in grout lines
- Cause problems near certain flooring transitions
- Create slippery conditions
The goal is not to flood the floor.
A damp mop is usually more effective than a dripping-wet mop for routine cleaning.
Can Baking Soda Remove Bad Odors?
One reason baking soda is popular for household cleaning is its ability to help reduce unpleasant odors.
A floor may develop odors because of:
- Food spills
- Pet accidents
- Dampness
- Trash bins
- Dirty shoes
- Organic material
- Poor ventilation
Cleaning the actual source of the odor is the most important step. Baking soda should not be used as a substitute for removing spilled material or addressing a moisture problem.
If a smell persists, investigate the cause.
For example, a continuing musty smell may indicate moisture beneath or around the floor. In such cases, simply mopping with a household cleaner may not solve the underlying problem.
Should You Add Vinegar to Baking Soda?
A popular household-cleaning trend involves combining baking soda and vinegar.
The mixture creates visible fizzing, which can make it seem especially powerful. However, the bubbling reaction does not automatically mean the mixture is more effective for routine cleaning.
Because vinegar is acidic and baking soda is alkaline, combining them causes a chemical reaction that eventually produces mostly water, carbon dioxide, and other dissolved components.
For many everyday cleaning tasks, using a suitable cleaner correctly is more important than creating a dramatic chemical reaction.
There is another important consideration: vinegar may not be suitable for every type of tile or grout.
Acidic cleaners can damage or dull natural stone surfaces, including certain marble, limestone, travertine, and other calcareous materials.
Always identify your flooring before selecting a cleaner.
What Types of Tile Can Be Cleaned This Way?
Many ceramic and porcelain tile floors are durable and relatively easy to maintain.
A gentle baking soda solution may be suitable for these surfaces when used appropriately.
However, caution is necessary with other materials.
Ceramic Tile
Ceramic tile is generally durable, but finishes can vary.
A mild cleaning approach is often sufficient.
Porcelain Tile
Porcelain is commonly used for floors because it is hard and relatively resistant to moisture.
Routine cleaning generally does not require harsh products.
Natural Stone
Natural stone requires more care.
Examples include:
- Marble
- Travertine
- Limestone
- Granite
- Slate
Some stones are sensitive to acidic or abrasive cleaning methods.
Do not assume that a homemade cleaner is automatically safe for natural stone.
Specialty and Coated Surfaces
Some tiles have special coatings, finishes, or decorative treatments.
Always check the manufacturer’s instructions.
Common Tile-Cleaning Mistakes to Avoid
Using Too Much Cleaning Product
More cleaner does not always mean more cleanliness.
Too much product can leave a film behind.
Skipping the Dry Sweep
Mopping over a dusty floor can create streaks and muddy residue.
Sweep first.
Using Abrasive Tools on Delicate Surfaces
Metal scrubbers and harsh pads may scratch or dull certain tiles.
Use soft brushes and microfiber cloths whenever possible.
Ignoring the Grout
Dirty grout can make a clean floor appear neglected.
Clean it regularly rather than waiting for heavy staining.
Leaving Standing Water
Standing water is unnecessary for most routine tile cleaning.
Use a well-wrung mop.
Mixing Random Household Chemicals
Never mix cleaning products without understanding the risks.
Some household chemicals can create dangerous fumes when combined. In particular, bleach should never be mixed with ammonia or acidic cleaners.
Use one appropriate cleaning product at a time, follow product labels, and ensure good ventilation.
A Weekly Tile-Floor Cleaning Routine
A simple routine can prevent heavy dirt from building up.
Daily or As Needed
- Sweep visible dirt.
- Clean spills promptly.
- Remove food residue.
- Wipe muddy footprints.
Once or Twice a Week
- Sweep or vacuum thoroughly.
- Mop high-traffic areas.
- Clean around kitchen work zones.
Monthly
- Inspect grout.
- Clean corners and edges.
- Move light furniture if necessary.
- Look for hidden dirt around appliances.
Every Few Months
Consider a deeper cleaning session, especially in busy rooms.
You may also inspect the floor for:
- Cracked grout
- Loose tiles
- Water damage
- Mold or mildew
- Persistent stains
Preventive maintenance is often easier than dealing with severe buildup later.
How to Make Tile Floors Look Brighter
Cleanliness and shine are not always the same thing.
A dull-looking floor may have residue rather than dirt.
To improve the appearance:
Rinse Properly
Remove cleaning-product residue.
Change Dirty Water
Mopping with dirty water can simply spread grime across the floor.
Use a Clean Mop
A dirty mop cannot produce a clean floor.
Buff After Drying
For suitable smooth tile surfaces, a dry microfiber cloth can help remove remaining streaks.
Clean Spills Quickly
The longer some spills remain, the harder they may be to remove.
The Importance of Clean Tools
Cleaning tools themselves can become dirty.
Your mop should be washed after use.
Buckets should also be rinsed and dried.
If you use a reusable mop pad, follow the manufacturer’s washing instructions.
A dirty mop may:
- Spread bacteria
- Redistribute grease
- Leave streaks
- Produce unpleasant odors
For a cleaner floor, clean the cleaning tools too.
A Gentle Cleaning Method for Busy Kitchens
Kitchen floors often collect grease.
Before using a baking soda solution, sweep thoroughly.
Then prepare warm water with a moderate amount of baking soda.
Focus on:
- In front of the stove
- Near the refrigerator
- Around the trash area
- Under the table
- Near pet bowls
For sticky spots, use a damp cloth first. If needed, apply a small amount of baking soda paste and gently clean the affected area.
Rinse afterward.
A Bathroom Tile-Cleaning Routine
Bathrooms require frequent attention because of moisture.
A good routine includes:
- Removing hair and dust.
- Cleaning the floor regularly.
- Allowing the room to ventilate.
- Drying wet areas.
- Checking grout and corners for moisture problems.
Ventilation is important. Open windows when practical or use an appropriate bathroom exhaust fan.
If there is significant mold growth, repeated water damage, or a persistent musty odor, investigate the moisture source rather than repeatedly applying cleaning products.
Is Baking Soda an Environmentally Friendly Choice?
Baking soda is often considered a simple household ingredient with relatively low environmental impact compared with some heavily fragranced cleaning products.
However, environmentally responsible cleaning is not only about the ingredient.
Good practices include:
- Using only the amount you need
- Avoiding unnecessary chemicals
- Using reusable cleaning cloths
- Reducing excessive water use
- Following local waste-disposal guidelines
- Selecting appropriate products for the specific surface
The simplest effective cleaning method is often the best choice.
Can You Use Essential Oils in the Cleaning Water?
Some people enjoy adding essential oils to homemade cleaning mixtures for fragrance.
However, fragrance is not the same as cleaning power.
Some oils may:
- Leave residue
- Make floors slippery if overused
- Trigger allergies or sensitivities
- Be unsafe around certain pets or children depending on the oil and exposure
If fragrance is desired, use a very small amount and ensure the product is appropriate for your household.
For routine floor cleaning, plain warm water and a suitable cleaner may be sufficient.
How to Prevent Floors from Getting Dirty So Quickly
The best cleaning routine begins before the dirt reaches the floor.
Use Doormats
Place a good mat at entrances.
This can reduce the amount of dust, sand, and soil brought indoors.
Remove Shoes
Where practical, removing outdoor shoes can significantly reduce floor dirt.
Clean Spills Immediately
Fresh spills are usually easier to remove than dried ones.
Use Rugs in High-Traffic Areas
Rugs can protect floors, although the rugs themselves should be cleaned regularly.
Maintain Pets
Keeping pets’ paws clean after outdoor walks can reduce mud and debris.
Homemade Cleaning Is Not Always the Best Choice
Homemade methods can be convenient, but they are not automatically superior to commercial products.
Some problems require specialized solutions.
Consider an appropriate commercial cleaner or professional advice when dealing with:
- Severe grease
- Heavy mineral buildup
- Mold problems
- Cracked grout
- Deep stains
- Natural stone
- Specialty tile finishes
Always select products designed for the surface you are cleaning.
A Quick Before-and-After Floor Cleaning Checklist
Before Cleaning
- Identify the flooring material.
- Check the manufacturer’s recommendations.
- Sweep or vacuum.
- Remove loose objects.
- Test a new cleaner in a hidden area.
During Cleaning
- Use moderate amounts of cleaning ingredients.
- Avoid soaking the floor.
- Clean in sections.
- Rinse the mop frequently.
- Focus on dirty areas.
After Cleaning
- Rinse away residue when necessary.
- Allow the floor to dry.
- Inspect for streaks.
- Wash the mop.
- Empty and rinse the bucket.
Frequently Asked Questions
Can I pour dry baking soda directly onto the floor?
It is generally better to use baking soda in a controlled way, such as dissolved in water for routine cleaning or made into a paste for a small targeted area. Excess dry powder may be difficult to remove.
Will baking soda make every floor shiny?
No. The final appearance depends on the type and condition of the floor. A cleaner surface may look brighter, but baking soda cannot repair damaged finishes, deep scratches, or permanently worn surfaces.
How often should I deep-clean tile floors?
The frequency depends on the room. A busy kitchen may need attention more often than a guest bathroom. Regular light cleaning can reduce the need for intensive deep cleaning.
Can I use the same cleaning method on marble?
Natural stone requires special care. Check the manufacturer’s recommendations or use a cleaner designed specifically for the stone.
Why does my floor look cloudy after cleaning?
Possible causes include:
- Too much cleaning product
- Insufficient rinsing
- Hard-water residue
- Dirty mop water
- A damaged surface finish
Try rinsing the floor with clean water and using a fresh microfiber mop.
Final Thoughts
A clean tile floor can completely change the appearance of a room. While regular sweeping and mopping are the foundation of floor care, simple household ingredients such as baking soda can sometimes help with routine dirt, odors, and targeted cleaning.
The key is not to use the largest possible amount of product. Instead, focus on a balanced method:
Sweep first. Use a gentle cleaning solution. Mop with a well-wrung mop. Clean problem areas carefully. Rinse away residue. Allow the floor to dry completely.
For many households, this approach can help maintain a fresher and brighter-looking floor without relying on an unnecessarily complicated cleaning routine.
Remember that different flooring materials require different care. Ceramic and porcelain may tolerate routine homemade cleaning methods well, while natural stone and specialty surfaces may require dedicated products.
A beautiful floor is not usually the result of one “miracle” ingredient. It comes from regular maintenance, the right cleaning technique, clean tools, and consistent care.
With a bucket, warm water, a modest amount of baking soda, and a good mop, you can create a simple cleaning routine that may help keep suitable tile floors looking fresh, tidy, and welcoming for everyday life.