The Ultimate Guide to Perfect Butter-Basted Beef Tenderloin
The Philosophy of the Perfect Steak
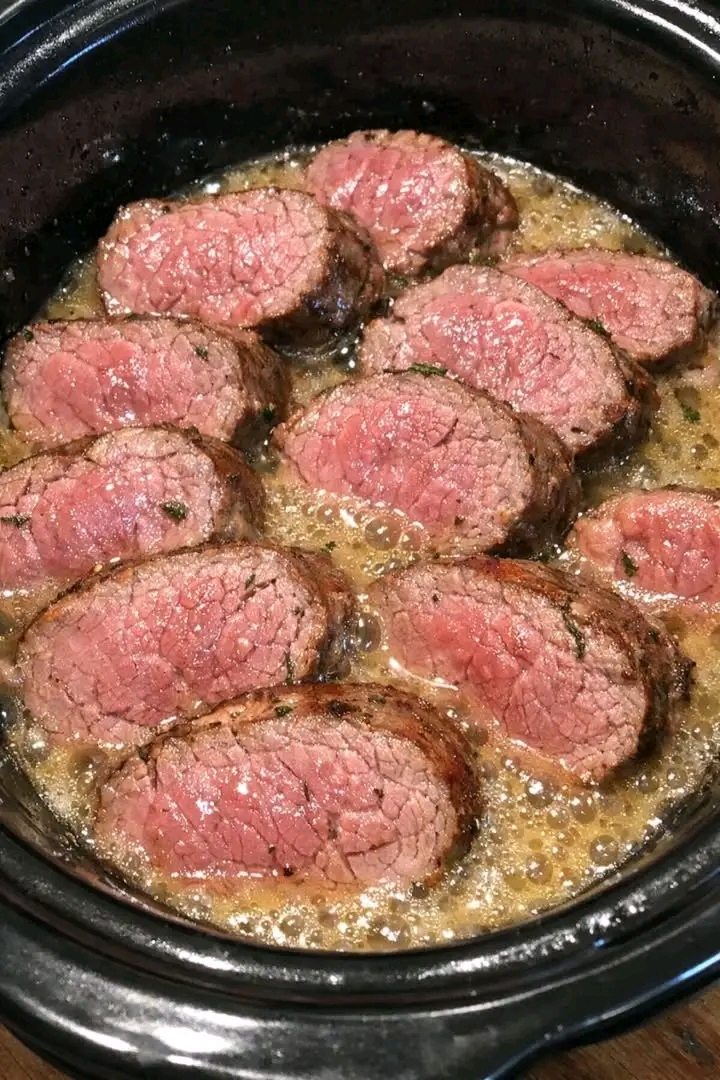
Cooking a beef tenderloin is more than just a culinary task; it is an exercise in precision, patience, and respect for the ingredient. The image you see—a collection of perfectly medium-rare medallions simmering in a pool of golden, frothy garlic butter—represents the pinnacle of home cooking. This recipe is designed to take you from a novice with a pan to a master of the Maillard reaction.
Beef tenderloin is the most prized cut of the cow for a reason: its unparalleled tenderness. However, because it is so lean, it lacks the internal fat (marbling) of a ribeye. This means it requires a specific technique to ensure it doesn’t dry out. By using a butter-basting method, we infuse the meat with richness, aromatics, and a crust that provides a necessary textural contrast to the buttery interior.
Ingredients and Sourcing
Before we touch the stove, we must discuss the meat. A recipe is only as good as its primary component.
1. The Beef
For this preparation, you want a center-cut beef tenderloin, often referred to as the Chateaubriand. You can cook it as a whole roast or slice it into individual Filet Mignons.
- Grade: Aim for USDA Prime or High-Choice. Prime has the most intramuscular fat, which provides better flavor.
- Aging: If your butcher offers dry-aged tenderloin, the flavor will be more concentrated and “nutty.”
2. The Fat
We use a two-stage fat process:
- High-Smoke Point Oil: Avocado oil or Grapeseed oil for the initial sear.
- Unsalted European-Style Butter: European butter (like Kerrygold) has a higher fat content and lower water content, which means it browns more beautifully without splattering as much.
3. The Aromatics
- Garlic: Whole cloves, smashed but not peeled. This prevents them from burning while releasing their oils.
- Fresh Thyme and Rosemary: These are non-negotiable. Dried herbs will burn and taste bitter.
- Shallots: Half a shallot, thinly sliced, adds a subtle sweetness to the butter.
The Preparation: Science Over Luck
The secret to the even pink color seen in the photo is temperature control.
The Dry Brine
At least 2 hours (and up to 24 hours) before cooking, season your meat liberally with Kosher salt. Place it on a wire rack in the fridge. This does two things:
- Osmosis: Salt draws moisture out, dissolves into a brine, and is reabsorbed, seasoning the meat deeply.
- Surface Dehydration: A dry surface sears faster. If your meat is wet, it will steam rather than crust.
Tempering
Remove the meat from the fridge 60 minutes before cooking. If you drop a cold steak into a hot pan, the outside will overcook before the center even begins to warm. We want the meat to reach near room temperature.
The Cooking Process
Step 1: The Initial Sear
Use a heavy-bottomed skillet, preferably Cast Iron. Cast iron holds heat better than stainless steel, ensuring the temperature doesn’t drop when the meat hits the pan.
- Heat the skillet over high heat until the oil is shimmering and just starting to wisps of smoke.
- Pat the meat dry one last time with paper towels.
- Place the tenderloin in the pan. Press down slightly to ensure contact.
- Do not move it. Let it sit for 2-3 minutes until a deep, mahogany crust forms. Flip and repeat on all sides, including the edges.
Step 2: The Butter Basting (Arrosé)
This is where the magic happens. Turn the heat down to medium.
- Add 4-6 tablespoons of butter, the smashed garlic, and the herb sprigs.
- As the butter melts and begins to foam, tilt the pan so the butter pools at the bottom with the herbs.
- Use a large spoon to continuously pour that hot, flavored butter over the beef.
- The foam acts as an insulator, cooking the meat gently while the solids in the butter caramelize, creating a “nutty” flavor profile.
Step 3: Monitoring Temperature
Forget “poking” the meat to check for doneness. Use a digital instant-read thermometer.
- Rare: 120°F to 125°F
- Medium-Rare (The Gold Standard): 130°F to 135°F
- Medium: 140°F to 145°F
Pull the meat off the heat when it is 5 degrees below your target temperature.
The Most Important Step: The Rest
When meat cooks, the muscle fibers contract and push juices toward the center. If you cut it immediately, those juices will run out onto your cutting board, leaving the meat dry.
Place the beef on a warm plate and pour the remaining pan butter over it. Tent it loosely with foil. Wait 10 to 15 minutes. This allows the fibers to relax and reabsorb the juices.
Side Dish Pairings
To complement the richness of the butter-basted beef, consider these accompaniments:
- Pomme Purée: A 50/50 ratio of potatoes to butter, passed through a fine-mesh sieve for a silk-like texture.
- Charred Asparagus: Finished with lemon zest to cut through the fat of the beef.
- Red Wine Reduction: Use the same pan (after wiping out the burnt butter) to deglaze with Cabernet Sauvignon and beef bone broth.
Troubleshooting Common Issues
Why is my crust grey?
Your pan wasn’t hot enough, or the meat was too wet. High heat and dry surfaces are the laws of the Maillard reaction.
Why does my butter taste burnt?
If the butter turns black instead of brown, your heat is too high. Butter has a low smoke point. If it starts to smoke aggressively, add a splash of fresh oil or a cold knob of butter to bring the temperature down instantly.
My steak is “bullseye” (grey edges, red center).
This happens when the meat is too cold when it hits the pan. Ensure you temper the meat for at least an hour.
Conclusion
Looking at the photo, you can see the results of this labor-intensive process. Each medallion is glistening, indicating that the fats have rendered and the butter has emulsified with the meat’s natural juices. By following these steps—sourcing quality beef, dry-brining, and mastering the butter baste—you aren’t just making dinner; you are creating an experience.
Enjoy your meal, and remember: the secret ingredient is always a thermometer and a little bit of patience.