The Ultimate Guide to the Perfect Lemon Bundt Cake with Tangy Glaze
There are few things in the culinary world as universally beloved, profoundly comforting, and visually striking as a perfectly baked Lemon Bundt Cake. Picture this: a beautifully sculpted ring of tender, golden-yellow cake, infused with the bright, sunshine-filled essence of fresh citrus, and crowned with a thick, opaque cascade of sweet and tart lemon glaze. The aroma alone—a heady mixture of toasted vanilla, rich butter, and zesty lemon oils—is enough to instantly lift the spirits and transform any ordinary kitchen into a world-class bakery.
This is not just another quick cake recipe you whip up as an afterthought. This is a comprehensive masterclass. Whether you are baking for a lively spring brunch, preparing a centerpiece for a holiday dessert table, or simply looking to master the art of the perfect afternoon tea cake, this guide will provide you with every ounce of knowledge you need. We are going to explore the fascinating history of the Bundt pan, dive deep into the food science of baking with acidic citrus, break down every single ingredient to understand its precise role, and master the techniques required to guarantee your cake releases from its intricate pan flawlessly every single time. Prepare to elevate your baking repertoire to unprecedented heights.
The Cultural and Historical Significance of the Bundt Cake
Before we begin zesting our lemons and creaming our butter, it is essential to understand the heritage of the vessel that gives this cake its iconic shape and name. The Bundt cake is a relatively modern American invention with deep European roots.
The European Ancestry
The shape of the Bundt cake is heavily inspired by a traditional central European cake known as the Gugelhupf (or Kugelhopf). This was a sweet, yeasted bread, often studded with raisins, candied fruits, and nuts, baked in a distinctive ring-shaped pan with fluted sides and a central tube. The central tube was a stroke of engineering genius; it allowed hot oven air to circulate through the center of the heavy, dense dough, ensuring that the middle baked evenly at the same rate as the outside edges.
The Birth of the Bundt Pan
The modern Bundt pan as we know it was born in 1950 in Minneapolis, Minnesota. A group of Jewish women from the Hadassah Society approached an engineer named H. David Dalquist, the founder of Nordic Ware. They asked him if he could produce a modern, lightweight aluminum version of the heavy cast-iron or ceramic Gugelhupf pans their mothers and grandmothers used in Europe. Dalquist agreed, cast the pan in aluminum, added some elegant folds to the design, and trademarked the name “Bundt” (adding the “t” to the German word “Bund,” which means an alliance or gathering).
The 1966 Bake-Off Phenomenon
For over a decade, the pan sold relatively poorly. It was a niche item. However, the trajectory of American baking history changed forever at the 1966 Pillsbury Bake-Off. A contestant named Ella Helfrich entered her recipe for the “Tunnel of Fudge Cake,” baked in a Nordic Ware Bundt pan. She won second place, but the cake was a sensation. Millions of housewives across America suddenly wanted to bake this incredibly moist, beautifully shaped cake, leading to an absolute explosion in demand for Bundt pans. Nordic Ware had to run their factory round the clock to keep up. Today, the Bundt pan is a staple in almost every American kitchen, a symbol of hospitality, warmth, and effortless elegance.
The Complex Science of Baking with Lemon
Baking is chemistry, and introducing a highly acidic ingredient like fresh lemon juice and lemon zest into a batter requires a fundamental understanding of how these elements interact with your other ingredients.
The Power of Lemon Zest vs. Lemon Juice
When we talk about “lemon flavor” in baking, we are actually talking about two entirely different components of the fruit, each serving a distinct purpose.
1. The Zest (Essential Oils): The bright yellow outer layer of the lemon peel contains the highest concentration of the fruit’s natural essential oils (primarily a compound called limonene). This is where the pure, unadulterated, floral, and highly aromatic lemon flavor lives. It contains almost zero acidity. To extract the maximum flavor, we employ a crucial culinary technique: rubbing the zest directly into the granulated sugar before mixing. The abrasive sugar crystals burst the microscopic oil glands in the zest, releasing the oils directly into the sugar, which then acts as a carrier, dispersing that intense flavor evenly throughout the entire batter.
2. The Juice (Acidity and Tang): The juice of the lemon provides the sharp, acidic bite and the tanginess we associate with citrus. However, lemon juice is mostly water and citric acid. While it adds a wonderful sour note, if you rely solely on juice for flavor, you will end up adding too much liquid to your batter, which can alter the crumb structure and make the cake dense or gummy. Furthermore, the heat of the oven actually dulls the flavor of the juice. Therefore, the perfect lemon cake relies on a massive amount of zest for the primary flavor profile, and a carefully measured amount of juice for the acidic bite.
Acid and Leavening Agents
Lemon juice is highly acidic (with a pH around 2.0). When this acid is introduced to the batter, it immediately reacts with alkaline leavening agents, specifically baking soda (sodium bicarbonate). This chemical reaction produces carbon dioxide gas bubbles, which expand in the heat of the oven, providing lift and a tender crumb. However, because we are using a substantial amount of heavy ingredients like butter and sour cream, baking soda alone isn’t enough. We also use baking powder (which contains both an acid and a base and reacts twice—once when wet, and once when heated) to ensure this heavy, dense cake rises beautifully.
The Master Ingredient Breakdown
A Bundt cake is inherently a pound cake variation. It relies on a high ratio of fat and sugar to create a incredibly moist, dense, yet soft crumb that can support its own weight in a large pan. Let us examine the anatomy of our ingredient list.
Flour: The Structural Framework
For a lemon Bundt cake, the goal is a crumb that is tight and velvety, not airy and full of large holes like a sponge cake, but also not tough or bready.
All-Purpose Flour: This provides the perfect middle ground of protein content (around 10-12%). It develops just enough gluten to give the cake the structural integrity needed to hold its shape when inverted out of the pan, but not so much that the cake becomes tough.
Cake Flour (Alternative): If you prefer an exceptionally tender, almost melt-in-your-mouth texture, you can substitute a portion of the all-purpose flour with cake flour (which has a lower protein content of around 7-9%). However, using 100% cake flour might make the cake too delicate to release from an intricate Bundt pan without tearing.
Fats: The Battle of Butter vs. Oil
Unsalted Butter: Butter is non-negotiable for flavor. It provides a rich, complex dairy note that complements the bright lemon perfectly. We use unsalted butter so we can strictly control the sodium content of the cake. The butter must be properly softened to room temperature (about 65°F to 70°F) so it can be creamed effectively.
Neutral Oil (The Secret Weapon): Here is the baker’s secret for a cake that stays exceptionally moist for days: adding a small amount of neutral oil (like canola, vegetable, or grapeseed oil) in addition to the butter. Butter is about 80% fat and 20% water, and it solidifies at room temperature. Oil is 100% fat and remains liquid at room temperature. A cake made with a touch of oil will physically feel softer and moister on the palate, even three days after baking.
Sugar: More Than Just Sweetness
Granulated white sugar does much more than just make the cake sweet.
Moisture Retention: Sugar is hygroscopic, meaning it attracts and holds onto water molecules. A high sugar ratio ensures the cake does not dry out in the oven.
Tenderization: Sugar interferes with the coagulation of egg proteins and the development of gluten strands, ensuring the crumb remains incredibly tender.
Aeration: During the creaming process, the sharp edges of the sugar crystals carve microscopic air pockets into the softened butter. These air pockets are what the baking powder and soda will expand, creating the cake’s rise.
The Dairy: The Magic of Sour Cream
While you could use whole milk, the absolute best liquid to use in a Lemon Bundt cake is full-fat sour cream.
Acidity: Sour cream adds lactic acid to the batter. This acid tenderizes the gluten in the flour, resulting in a remarkably soft, fine crumb.
Fat Content: The high butterfat content of sour cream adds immense richness and a velvety mouthfeel that standard milk simply cannot achieve.
Thickness: The thick, viscous nature of sour cream prevents the batter from becoming too thin and runny, which is essential for a cake that needs to bake for nearly an hour.
Substitution: If you do not have sour cream, full-fat plain Greek yogurt or traditional buttermilk are excellent substitutes that provide similar acidic and textural benefits.
The Eggs: Binders and Emulsifiers
Large, room-temperature eggs are essential. They serve multiple purposes:
Structure: The proteins in the eggs coagulate during baking, providing the “glue” that holds the heavy cake together.
Emulsion: The yolks contain lecithin, a powerful natural emulsifier. The batter for this cake contains a massive amount of fat (butter, oil, sour cream) and a massive amount of liquid (lemon juice, eggs). Water and oil naturally repel each other. The egg yolks force these opposing ingredients to blend into a smooth, homogenous batter that won’t separate or curdle.
The Definitive Guide to Preparing the Bundt Pan
The greatest fear of any baker making a Bundt cake is the moment of inversion. Will it slide out perfectly, or will half the cake remain stubbornly glued to the intricate crevices of the pan? If you follow these exact rules, your cake will release flawlessly every single time.
Rule 1: Pan Selection
Quality matters. Heavy cast-aluminum pans are superior. They conduct heat exceptionally well, ensuring the thick crust of the cake browns evenly. Lighter, cheaper pans can create hot spots that scorch the outside before the inside is cooked. Dark-colored pans absorb more heat and will bake the crust faster and darker than light-colored pans; you may need to reduce your oven temperature by 25°F if using a very dark pan.
Rule 2: The Goop, The Spray, or The Butter
Forget standard cooking spray, and forget trying to butter and flour a highly detailed pan with a pastry brush—it inevitably leaves clumps of flour that bake into ugly white patches on your beautiful cake. You have two foolproof options:
Option A: Baking Spray with Flour. This is not standard Pam. This is a specific baking spray (like Baker’s Joy or PAM Baking) that has flour suspended directly in the oil. It gets into every microscopic crevice evenly. Spray the pan generously right before you pour the batter in. Do not spray it early, or the oil will slide down the sides and pool at the bottom.
Option B: Homemade “Cake Goop”. This is a professional bakery secret. In a jar, aggressively whisk together equal parts (by volume) of shortening, vegetable oil, and all-purpose flour until it forms a smooth, white paste. Use a pastry brush to paint a thick, even layer of this goop into every single nook and cranny of the pan. It is infallible and leaves zero flour residue.
The Step-by-Step Culinary Method
Baking a cake is an exercise in precision and technique. How you mix the ingredients is just as important as what those ingredients are.
Phase 1: Mise en Place and Flavor Extraction
Before you even touch your mixer, every ingredient must be measured, and your cold ingredients (butter, eggs, sour cream) must be at room temperature (about 70°F). If you add cold eggs to room-temperature butter, the butter will immediately harden, breaking the emulsion and resulting in a curdled batter and a dense, greasy cake.
Begin by placing your granulated sugar in your mixing bowl. Zest your fresh lemons directly over the sugar to catch the volatile oils that spray into the air. Using your fingertips, aggressively rub the zest into the sugar for 2-3 minutes. The sugar will become incredibly fragrant, slightly damp, and take on a pale yellow hue. This is the foundation of your flavor.
Phase 2: The Crucial Creaming Method
Add your softened room-temperature butter and neutral oil to the lemon-sugar. Using a stand mixer fitted with the paddle attachment, or a powerful hand mixer, beat this mixture on medium-high speed. Do not rush this step. You must beat the mixture for a minimum of 4 to 5 full minutes. Stop and scrape down the sides and bottom of the bowl with a silicone spatula at least twice. The mixture should transform from a dense, yellow paste into a pale, virtually white, incredibly fluffy, cloud-like consistency. This process is physically forcing millions of microscopic air bubbles into the fat. These bubbles are what will make your dense pound cake light and tender.
Phase 3: The Emulsion (Adding the Eggs)
Turn the mixer down to medium-low. Add the room-temperature eggs one at a time. It is imperative that you wait until each egg is completely incorporated before adding the next. If you dump all the eggs in at once, you will overwhelm the butter, break the emulsion, and the batter will separate and look like curdled cottage cheese. Scrape down the bowl halfway through adding the eggs. Finally, beat in your vanilla extract.
Phase 4: Alternating Dry and Wet
In a separate bowl, whisk together your dry ingredients: flour, baking powder, baking soda, and a generous amount of salt (salt is essential to balance the intense sweetness and enhance the lemon flavor). In a liquid measuring cup, whisk together your room-temperature sour cream and freshly squeezed lemon juice.
With the mixer on the lowest possible speed, you will add the dry ingredients in three additions, alternating with the wet ingredients in two additions. The sequence is: Dry -> Wet -> Dry -> Wet -> Dry.
Why do we do this? If you add all the wet ingredients at once, the batter will curdle. If you add all the dry ingredients at once, the batter will become too thick, and you will be forced to overmix it to hydrate the flour. Overmixing develops gluten, turning your tender cake into tough bread. The moment the final addition of flour is just barely absorbed, turn the mixer off. Do not mix for a second longer. Use a spatula to gently fold in any remaining flour streaks by hand.
Phase 5: The Bake
Spoon the thick batter evenly into your meticulously prepared Bundt pan. Use your spatula to smooth the top. Finally, pick the pan up and tap it firmly against the kitchen counter three or four times. This forces any large, trapped air bubbles to rise to the surface and pop, preventing large holes in the crumb of your finished cake.
Bake in the center of a preheated 350°F (175°C) oven. Bundt cakes take a long time to bake due to the sheer volume of batter. Expect it to take anywhere from 45 to 60 minutes.
The Testing Protocol: Do not rely on time alone; every oven is different. At the 45-minute mark, begin testing. A toothpick inserted into the thickest part of the cake should come out completely clean, or with a few moist crumbs attached. The top of the cake should be deeply golden brown and spring back slightly when gently pressed. If you have an instant-read thermometer, the internal temperature of a perfectly baked pound cake should register between 205°F and 210°F.
Phase 6: The 10-Minute Cooling Rule (Critical!)
When you remove the cake from the oven, place the pan on a wire cooling rack. Set a timer for exactly 10 minutes. Do not try to invert it immediately; the structural crumb is still too hot and fragile, and the cake will tear under its own weight. Do not leave it in the pan for an hour; as it cools, the sugars will harden and act like superglue, cementing the cake to the aluminum walls.
At exactly 10 minutes, place a wire rack over the top of the pan. Using oven mitts, grip the pan and the rack tightly together, and decisively invert them. Gently lift the pan straight up. If prepared correctly, the cake will release effortlessly, steam billowing out, revealing a perfectly sculpted masterpiece. Allow the cake to cool completely to room temperature on the rack before attempting to glaze it.
The Art of the Lemon Glaze
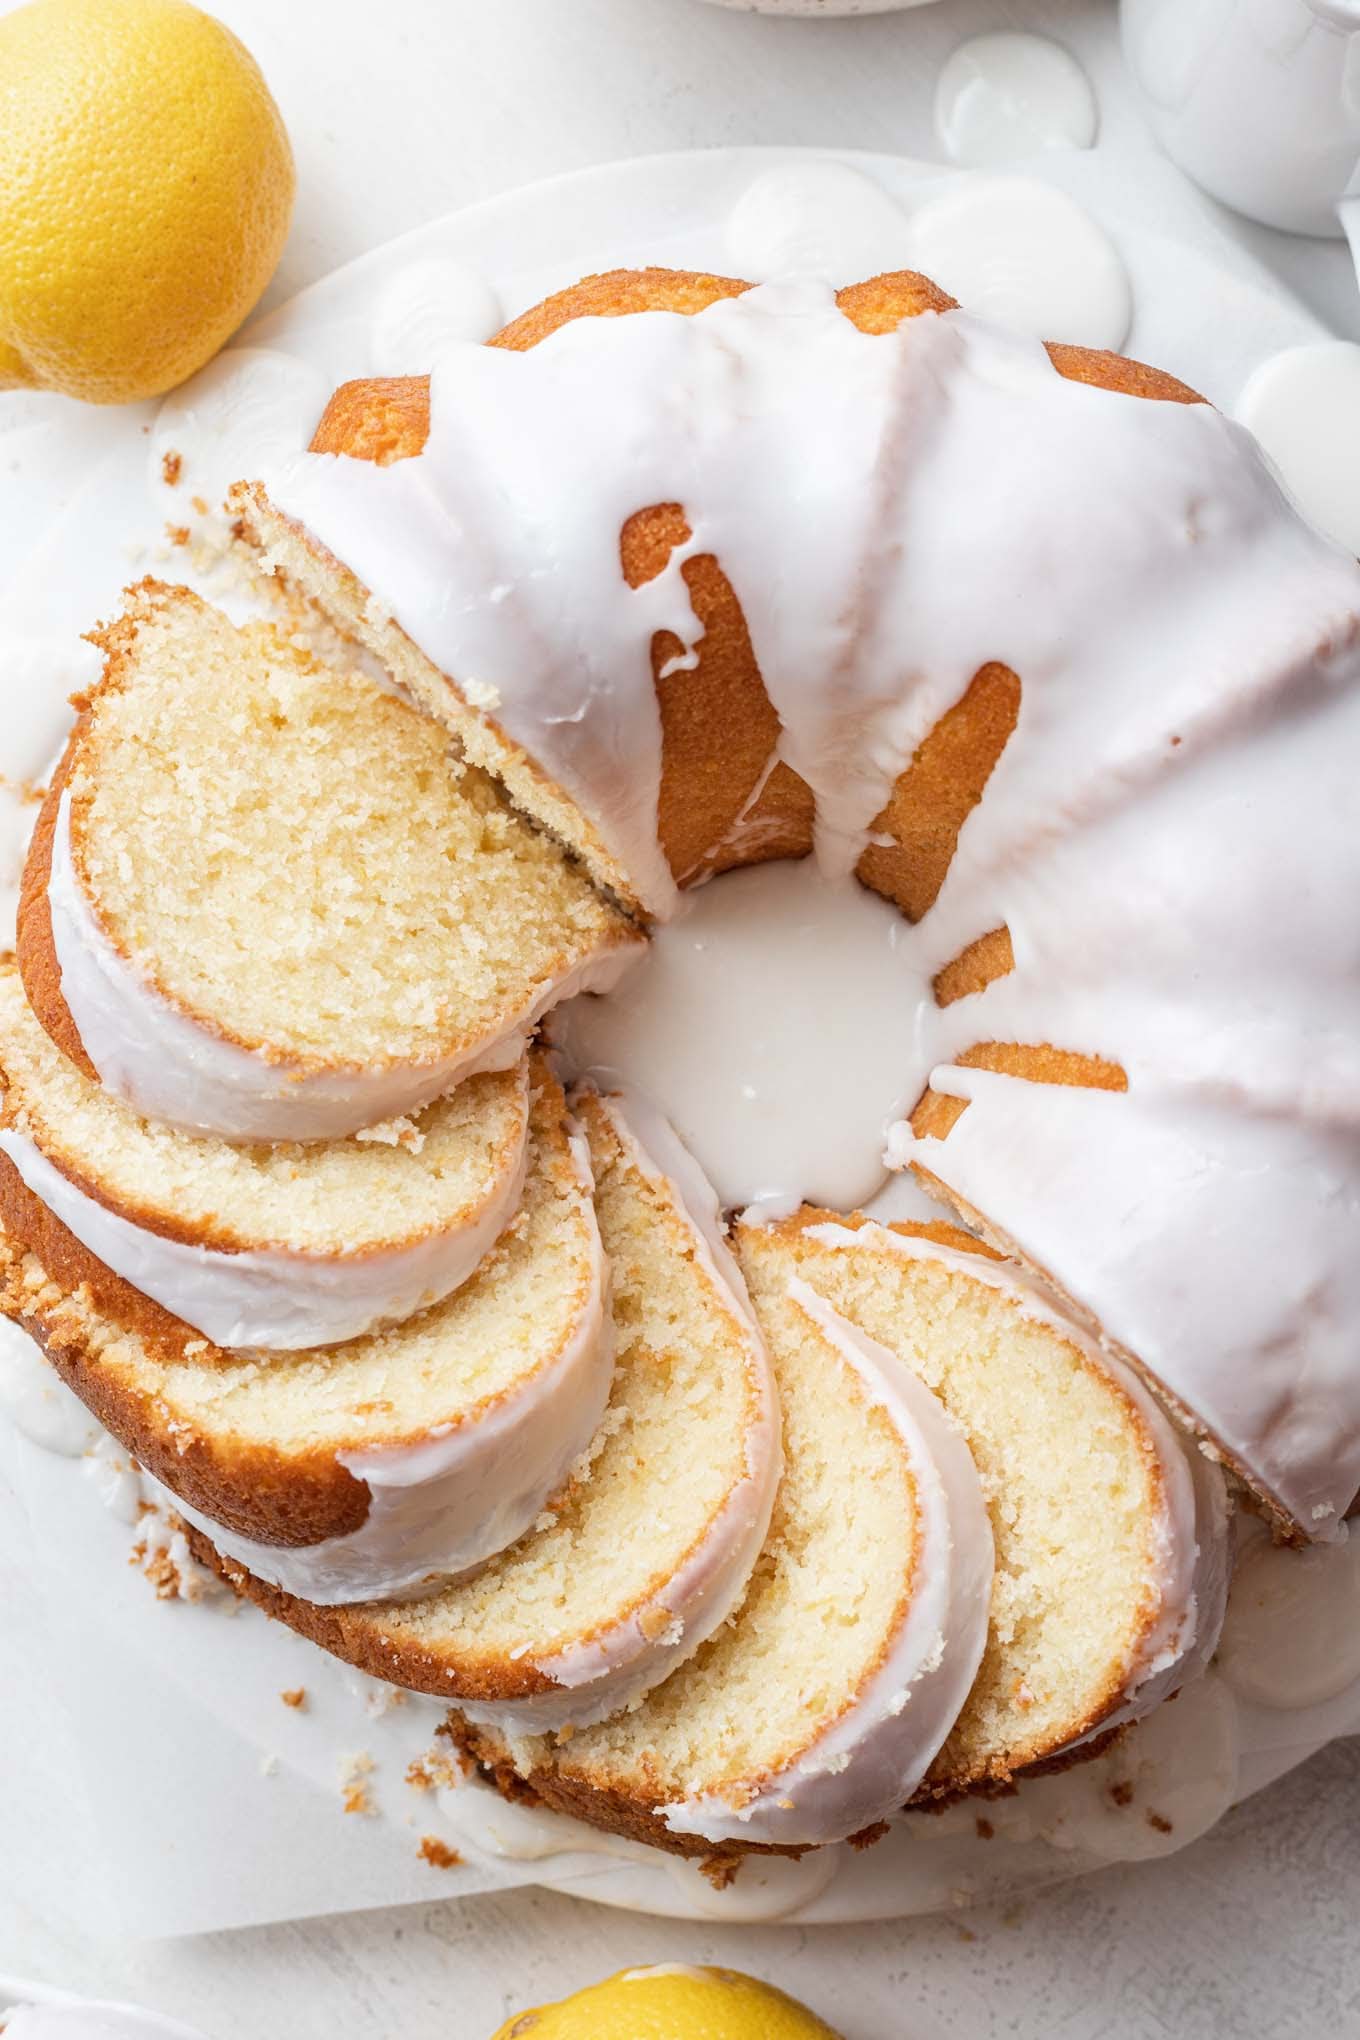
A naked lemon Bundt cake is wonderful, but the glaze is what elevates it to iconic status. As seen in the classic presentation of this dessert, we are aiming for a thick, stark white, beautifully opaque icing that cascades down the fluted edges of the cake.
The Chemistry of Confectioners’ Sugar
Icing is a suspension of microscopic sugar crystals in a tiny amount of liquid. You must use high-quality confectioners’ sugar (powdered sugar). If your powdered sugar has been sitting in the pantry for months, sift it. Lumps in your sugar will result in lumpy icing, as no amount of whisking will dissolve them in such a small amount of cold liquid.
The Ratio for the Perfect Drip
The secret to the perfect, thick, opaque glaze is using significantly less liquid than you think you need. We want an icing with the consistency of thick craft glue or molasses. It should be viscous enough that when you drizzle it over the cake, it slowly, dramatically crawls down the sides, rather than instantly running off and pooling into a thin, transparent puddle at the base.
The ideal ratio is roughly 1 cup of sifted confectioners’ sugar to every 1 to 1.5 tablespoons of fresh lemon juice. You must add the juice incredibly slowly—half a teaspoon at a time—whisking vigorously after each addition. The mixture will seem impossibly dry at first, but keep whisking; the sugar will suddenly yield and melt into a thick paste. If you accidentally add too much liquid and it becomes thin, simply whisk in more sifted sugar until the thick consistency is restored.
For added richness and a brighter white color, you can substitute a small amount of heavy cream or melted butter for a portion of the lemon juice, relying on just a teaspoon of lemon extract or extra zest for the flavor punch.
The Application Technique
The cake must be 100% cold. If the cake is even slightly warm, the heat will melt the butterfat or break the suspension of the icing, causing it to turn translucent and soak right into the cake, ruining the visual impact. Place your cooled cake on its serving platter. Using a spoon or a small liquid measuring cup, slowly pour the thick icing over the highest peaks of the cake ring, allowing gravity to slowly pull it down the valleys. Let the glaze set and dry at room temperature for at least 30 minutes before slicing.
Advanced Variations and Flavor Combinations
Once you have mastered this foundational recipe, the lemon Bundt acts as a brilliant blank canvas for endless culinary creativity.
The Lemon-Blueberry Dream: Gently fold 1.5 cups of fresh (or unthawed frozen) blueberries into the final batter. Crucial tip: Toss the blueberries in a tablespoon of flour before folding them in. This absorbs their excess liquid and prevents them from sinking to the bottom of the pan during baking.
Lemon Poppy Seed Classic: Add 3 to 4 tablespoons of fresh poppy seeds to the dry ingredients. The seeds add a beautiful visual speckling and a subtle, earthy crunch that perfectly complements the bright citrus.
Botanical Twists: Citrus pairs astonishingly well with hearty, woody herbs. Try rubbing a tablespoon of finely chopped fresh thyme or a teaspoon of finely minced fresh rosemary into the sugar along with the lemon zest. The resulting cake has a sophisticated, savory edge perfect for an elegant garden party.
The Lemon-Ginger Zing: Add a tablespoon of freshly grated ginger to the creamed butter mixture, and half a cup of finely diced crystallized ginger folded into the batter at the very end. The spicy heat of the ginger elevates the lemon to a new level.
Storage, Preservation, and Freezing Guide
A Bundt cake is a massive dessert, and unless you are feeding an army, you will likely have leftovers. Due to the high fat content and the acidity of the sour cream, this cake possesses incredible keeping qualities.
Room Temperature Storage: The glazed cake is perfectly safe to keep at room temperature. Place it under a glass cake dome or wrap it gently in plastic wrap (being careful not to ruin the glaze). It will stay incredibly moist and fresh for up to 3 to 4 days. In fact, many bakers believe the flavor and texture of a lemon pound cake actually improve on the second day as the moisture redistributes and the lemon oils mature.
Refrigerator Storage: Refrigeration is generally the enemy of cake, as the cold temperatures cause the starches in the flour to crystallize, prematurely staling and drying out the crumb. However, if your kitchen is exceptionally hot or humid, you may need to chill it. If you do, wrap it incredibly tightly in multiple layers of plastic wrap. Always let a refrigerated slice sit out for at least 30 minutes to come to room temperature before eating, or the butter inside will remain hard and the cake will taste dense and flavorless.
The Freezing Masterclass: Bundt cakes freeze exceptionally well.
To freeze an entire unglazed cake: Let it cool completely. Wrap the bare cake tightly in two layers of plastic wrap, followed by a layer of heavy-duty aluminum foil. Freeze for up to 3 months. Thaw overnight on the counter before glazing and serving.
To freeze leftover slices: Cut the remaining cake into individual portions. Wrap each slice in plastic wrap and place them in an airtight zip-top freezer bag. When a craving hits, simply take out a single slice and let it thaw on the counter for an hour.
Comprehensive Frequently Asked Questions (FAQ)
To guarantee your success, we have compiled the most common questions, fears, and troubleshooting scenarios encountered when baking a lemon Bundt cake.
Q: My cake always sticks to the pan! What went wrong? A: There are three main culprits. 1) You used regular cooking spray (Pam) instead of a baking spray with flour or cake goop. 2) You waited too long to invert the cake; as the sugar cools, it cements to the pan. You must invert at exactly the 10-minute mark. 3) You tried to invert it immediately out of the oven when the crumb was too soft, causing it to tear. Stick to the 10-minute rule and use flour-based pan prep.
Q: My cake turned out dense and heavy, not fluffy. Why? A: This usually stems from the creaming process. If your butter was too cold, or if you only beat the butter and sugar together for 30 seconds, you failed to incorporate the microscopic air bubbles needed for lift. You must beat the butter and sugar for a full 4-5 minutes until exceptionally pale and fluffy. Overmixing the batter after adding the flour can also develop tough gluten strands, leading to a dense cake.
Q: Why did my beautiful thick glaze turn transparent and disappear into the cake? A: The cake was still warm! Even a slightly warm cake will melt the confectioners’ sugar, turning your opaque icing into a thin syrup that soaks directly into the crumb. You must exhibit immense patience and ensure the cake is 100% cool to the touch (which can take 2-3 hours) before applying the glaze.
Q: Can I use bottled lemon juice instead of fresh? A: Technically yes, but gastronomically, absolutely not. Bottled lemon juice has been pasteurized and often contains preservatives. It lacks the bright, fresh, zippy flavor of a freshly squeezed lemon and can impart a flat, almost metallic taste to your baked goods. Since lemon is the star of the show here, buy the fresh fruit. Plus, you need the fresh zest for the primary flavor anyway!
Q: I don’t have sour cream. Can I use milk? A: Standard milk is too thin and lacks the tenderizing acidity of sour cream. If you must substitute, use an equal amount of full-fat plain Greek yogurt or traditional buttermilk. If you only have regular milk, make a quick buttermilk substitute by adding 1 tablespoon of white vinegar or lemon juice to a measuring cup, filling it to the 1-cup mark with whole milk, and letting it sit for 5 minutes to curdle and thicken before using.
Q: How do I get that ultra-yellow color in the cake? A: The natural yellow hue comes from the combination of high-quality butter, the yellow egg yolks, and the lemon zest. If you want a commercially vibrant, neon-yellow cake, you will need to add a few drops of yellow gel food coloring to the batter. However, naturally baked lemon cake is usually a soft, beautiful golden-blonde, not bright yellow.
The Master Recipe: Ultimate Lemon Bundt Cake with Tangy Glaze
Here is the distilled, precise formula to create the masterpiece. Read through the entire recipe before beginning to ensure you have all ingredients prepped and at the correct temperature.
Prep time: 30 minutes Bake time: 45 – 60 minutes Cooling time: 2 hours Yield: One 10-to-12-cup Bundt cake (12-16 servings)
The Ingredient List
For the Lemon Cake Batter:
3 cups (360g) All-Purpose Flour (spooned and leveled)
1 teaspoon Baking Powder
1/2 teaspoon Baking Soda
1 teaspoon Fine Sea Salt
2 cups (400g) Granulated White Sugar
3 to 4 Tablespoons Fresh Lemon Zest (from roughly 3-4 large lemons, packed lightly)
1 cup (226g) Unsalted Butter, perfectly softened to room temperature
1/3 cup (80ml) Neutral Oil (Canola, Vegetable, or Grapeseed)
4 Large Eggs, at room temperature
1 teaspoon Pure Vanilla Extract
1 cup (240g) Full-Fat Sour Cream, at room temperature
1/3 cup (80ml) Freshly Squeezed Lemon Juice, strained of pulp and seeds
For the Thick White Lemon Glaze:
2 cups (240g) Confectioners’ (Powdered) Sugar, sifted
2 to 3 Tablespoons Freshly Squeezed Lemon Juice
1 Tablespoon Heavy Cream or Whole Milk (optional, for richness and opacity)
A tiny pinch of salt
The Step-by-Step Instructions
Oven and Pan Prep: Preheat your oven to 350°F (175°C). Ensure your oven rack is in the center position. Generously coat a 10-to-12-cup capacity heavy cast-aluminum Bundt pan with a baking spray containing flour (like Baker’s Joy), or brush thoroughly with homemade pan goop. Do not miss the central tube.
Extract the Lemon Oils: In the bowl of your stand mixer, add the 2 cups of granulated sugar and the 3-4 tablespoons of fresh lemon zest. Using your clean fingertips, aggressively rub the zest into the sugar for about 2 minutes. The sugar should become incredibly fragrant, clump together slightly like wet sand, and turn a pale yellow color.
Creaming the Fats: Add the softened butter and the neutral oil to the lemon-sugar mixture. Fit the mixer with the paddle attachment. Beat on medium-high speed for a full 4 to 5 minutes. Stop at least twice to scrape down the sides and bottom of the bowl with a silicone spatula. The mixture must look incredibly pale, light, and fluffy.
Incorporate the Eggs: Reduce the mixer speed to medium-low. Add the room-temperature eggs one at a time. Wait until the first egg is completely mixed in and invisible before adding the second. Scrape down the bowl halfway through. Beat in the vanilla extract.
Prep Dry and Wet Mixtures: In a medium bowl, whisk together the flour, baking powder, baking soda, and salt. In a liquid measuring cup, vigorously whisk together the room-temperature sour cream and the fresh lemon juice until smooth.
Alternate Additions: With the mixer on the lowest possible speed, add one-third of the flour mixture. As soon as it is barely incorporated, pour in half of the sour cream mixture. Add the second third of the flour. Add the remaining sour cream mixture. Finish with the final third of the flour. Stop the mixer immediately when a few streaks of flour remain.
Final Fold and Bake: Remove the bowl from the mixer and use your silicone spatula to gently fold the batter a few times by hand, ensuring you scrape the bottom of the bowl to incorporate any hidden pockets of butter or flour. The batter will be thick and voluminous.
Fill the Pan: Spoon the batter evenly into the prepared Bundt pan. Smooth the top with your spatula. Firmly tap the pan onto your kitchen counter 3 or 4 times to dislodge any trapped air bubbles.
The Bake: Place the pan in the preheated oven. Bake for 45 to 60 minutes. Begin checking at the 45-minute mark. The cake is done when a wooden skewer or long toothpick inserted deep into the center comes out clean or with just a few moist, tender crumbs attached.
The Critical Cool and Invert: Remove the pan from the oven and place it on a wire cooling rack. Set a timer for exactly 10 minutes. When the timer goes off, place the wire rack securely over the top of the pan, grip both tightly, and swiftly invert them. Gently lift the pan away. The cake should slide out perfectly. Allow the naked cake to cool entirely to room temperature (at least 2 hours) on the rack.
Prepare the Glaze: Once the cake is completely cool, prepare the icing. In a medium bowl, add the sifted powdered sugar. Add 2 tablespoons of the lemon juice, the cream (if using), and a tiny pinch of salt. Whisk vigorously. It will seem too dry at first, but keep whisking. If it is still a powder, add the remaining tablespoon of lemon juice a few drops at a time until you achieve a very thick, opaque, slow-moving icing.
Glaze and Serve: Transfer the cooled cake to your final serving platter or cake stand. Spoon or pour the thick icing over the top ring of the cake, allowing it to slowly and naturally drip down the inner and outer sides. Allow the glaze to set for 30 minutes before slicing and serving.
Final Thoughts
Baking a spectacular Lemon Bundt Cake is one of the most rewarding culinary projects you can undertake. It is a testament to the magic of taking simple pantry staples—flour, sugar, butter, and eggs—and transforming them with the vibrant, zesty energy of fresh citrus. By understanding the science behind the ingredients, respecting the timing of the process, and executing the techniques with patience, you are no longer just following a recipe; you are practicing the true art of baking. Enjoy every bright, tender, delicious bite!