The Art of the Japanese Soufflé Sponge Cake: A Masterclass in Cloud-Like Baking
In the pantheon of global desserts, few items command as much awe and intimidation as the Japanese Soufflé Sponge Cake. It is a cake that defies the traditional laws of pastry—it is tall yet light, substantial yet ethereal, and possesses a “jiggle” that has made it a viral sensation across social media.
Unlike a dense American butter cake or a traditional French sponge, the Japanese version (often referred to as Cotton Cheesecake or Soufflé Castella) relies on the precise manipulation of egg proteins and a unique “water bath” baking method. The result is a texture that sits somewhere between a chiffon cake and a creamy custard.
This 3,000-word comprehensive guide is designed for the dedicated baker looking to replicate this bakery-style masterpiece at home. We will cover the molecular science of meringues, the importance of temperature control, and provide a foolproof recipe for the perfect cream-filled sponge.
Table of Contents
- The Science of Air: How Soufflé Cakes Rise
- Essential Equipment: More Than Just a Pan
- The Ingredient Deep Dive: Flour, Fats, and Foams
- The Critical Technique: Mastering the Meringue
- Step-by-Step Recipe: The Raspberry & Cream Soufflé Sponge
- The Water Bath (Bain-Marie) Mystery Explained
- Troubleshooting: Why Cakes Shrink, Crack, or Collapse
- Assembling for the “Wow” Factor
- Storage and Serving Etiquette
1. The Science of Air: How Soufflé Cakes Rise
Traditional cakes rely heavily on chemical leaveners like baking powder or baking soda. The Japanese Soufflé Sponge, however, is almost entirely leavened by mechanical aeration.
By whipping egg whites into a stable foam, you are trapping millions of tiny air bubbles within a protein matrix. When placed in the oven, these air bubbles expand due to the heat. Because the batter contains a relatively low amount of flour and a high amount of moisture, the structure remains flexible enough to expand significantly without tearing.
The challenge lies in the “jiggle.” This comes from the high fat and moisture content (from milk and butter) combined with a gentle bake that prevents the crumb from becoming “bread-like.”
2. Essential Equipment
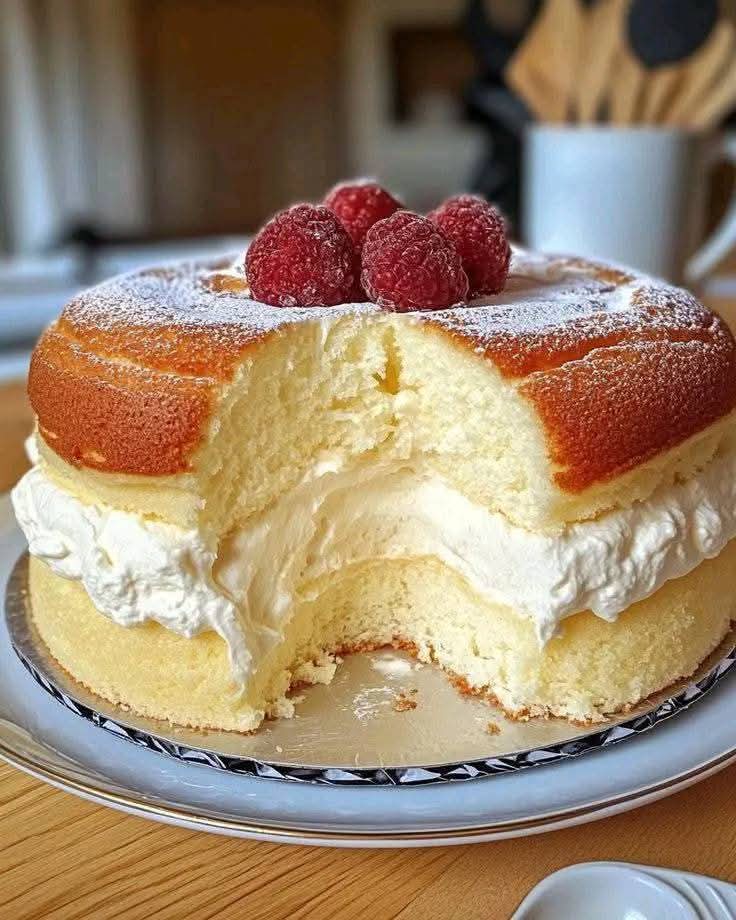
To achieve the height and texture seen in the reference image, your standard kitchen kit needs a few specific additions:
- High-Sided Springform Pan: A 6-inch or 8-inch pan with at least 3 inches of height is ideal. The cake will rise significantly, often climbing above the rim of the pan.
- Parchment Paper (Crucial): You must line both the bottom and the sides of the pan. The side lining should extend 2 inches above the rim to act as a “collar” for the rising cake.
- Electronic Scale: Baking is chemistry. Measuring flour by volume (cups) is too inaccurate for a recipe this sensitive. We use grams.
- Large Baking Tray: For the water bath. It must be deep enough to hold at least an inch of water.
3. The Ingredient Deep Dive
The Flour: Low Protein is Key
Use Cake Flour. Cake flour has a lower protein content (approx. 6-8%) compared to all-purpose flour. Less protein means less gluten development. Gluten is what makes bread chewy; for this cake, we want zero chew—only melt-in-the-mouth tenderness.
The Eggs: Room Temperature vs. Cold
There is a debate here. Cold egg whites are more stable and create smaller, tighter air bubbles (ideal for a smooth surface). However, room-temperature whites whip faster. For this recipe, we recommend cold whites for a more uniform, professional crumb.
The Fat: Butter and Milk
We use a technique called the “cooked dough” method (similar to choux pastry), where we heat the butter and milk before adding the flour. This gelatinizes the starches in the flour, allowing it to absorb more liquid and resulting in a silkier texture.
4. The Critical Technique: Mastering the Meringue
The meringue is the lifeblood of this cake. There are three stages of meringue: soft peaks, firm peaks, and stiff peaks.
For a Japanese Soufflé Cake, you are aiming for “Firm-but-Flexible” peaks.
- If the peaks are too soft, the cake won’t rise.
- If the peaks are too stiff (dry and clumpy), they will be impossible to fold into the batter without deflating, and the cake will likely crack in the oven.
The Sugar Secret: Do not dump all the sugar in at once. Add it in three stages. This allows the sugar to dissolve completely, creating a syrupy film that stabilizes the air bubbles.
5. Step-by-Step Recipe: Raspberry & Cream Soufflé Sponge
The Cake Base
- 70g Unsalted butter
- 80ml Full-fat milk
- 90g Cake flour (sifted twice)
- 6 Large egg yolks
- 1 tsp Vanilla extract
- 1/4 tsp Salt
The Meringue
- 6 Large egg whites (chilled)
- 1/4 tsp Cream of tartar (or 1 tsp lemon juice)
- 90g Superfine (caster) sugar
The Filling & Topping
- 300ml Heavy whipping cream (chilled)
- 30g Powdered sugar
- Fresh raspberries
- Powdered sugar for dusting
Phase 1: The Cooked Batter
- Heat the butter and milk in a saucepan until it just begins to simmer (approx. 65°C/150°F). Do not boil.
- Remove from heat and whisk in the sifted cake flour. It will form a thick paste.
- Add the egg yolks one by one, whisking thoroughly after each addition. Add vanilla and salt. The batter should be smooth, yellow, and glossy. Cover with plastic wrap to prevent a skin from forming.
Phase 2: The Meringue
- In a clean, grease-free bowl, whisk egg whites and cream of tartar on medium speed until foamy.
- Gradually add sugar in three increments, increasing the speed to medium-high.
- Whisk until the whites reach firm peaks—when you lift the whisk, the tip of the peak should curl over slightly like a bird’s beak.
Phase 3: The Fold
- Take one-third of the meringue and whisk it vigorously into the yolk batter. This “lightens” the batter and makes the subsequent folding easier.
- Gently fold the remaining meringue into the batter using a spatula. Use a “cut and fold” motion. Stop the moment no white streaks remain. Over-mixing will destroy the air bubbles.
Phase 4: The Bake
- Pour the batter into your lined pan. Tap the pan on the counter twice to release large air bubbles.
- Place the pan into a larger tray filled with 1 inch of hot (not boiling) water.
- Bake at 300°F (150°C) for 60 minutes, then reduce heat to 285°F (140°C) for another 15-20 minutes.
- The Cooling Hack: Turn off the oven and crack the door open slightly. Let the cake sit in the oven for 10 minutes. Sudden temperature changes cause the cake to shrink rapidly.
6. The Water Bath (Bain-Marie) Mystery
Why is the water bath mandatory? It acts as a temperature regulator. Water cannot exceed 212°F (100°C). By surrounding the cake pan with water, you ensure that the sides of the cake never get hotter than the boiling point.
This gentle heat allows the interior of the cake to cook at the same rate as the exterior, preventing the outside from becoming a “crust” while the inside is still liquid. It is the secret to the uniform, pale-yellow crumb.
7. Troubleshooting: Common Issues
- The Cake Cracked: Your oven was too hot, or your meringue was whipped to “stiff” peaks. High heat causes the air to expand too quickly before the structure is set.
- The Cake Collapsed: This usually means it was underbaked. The internal structure wasn’t strong enough to support its own weight. Always test with a skewer; it should come out clean but moist.
- The “Waistline” Effect: If the cake shrinks inward at the middle, you likely didn’t grease or line the sides of your pan correctly, or you removed it from the oven too abruptly.
8. Assembling for the “Wow” Factor
Once the cake is completely cold (refrigerate for at least 4 hours for the best texture), it’s time to fill it.
- The Slice: Using a long serrated knife, slice the cake horizontally into two even layers.
- The Cream: Whip the heavy cream and powdered sugar until very stiff.
- The Filling: Spread a thick, generous layer of cream on the bottom half. Japanese cakes are known for their high cream-to-sponge ratio.
- The Top: Place the top sponge layer back on.
- The Garnish: Arrange fresh raspberries in the center and give the entire cake a heavy “snowfall” of powdered sugar.
9. Storage and Serving Etiquette
Unlike a dry sponge, this cake is high in moisture and contains fresh cream.
- Always Refrigerate: Store in an airtight container to prevent the cake from absorbing fridge odors. It will stay fresh for 2–3 days.
- Serving: Serve chilled. Use a sharp knife dipped in hot water and wiped dry between every slice to get those clean, bakery-perfect edges.
Final Thoughts for the WordPress Baker
Mastering the Japanese Soufflé Sponge Cake is a rite of passage. It requires patience, a gentle hand, and a respect for the chemistry of eggs. When you post this to your blog, encourage your readers to embrace the process. Even if their first attempt cracks slightly, the flavor—creamy, light, and just sweet enough—will still be a triumph.
The cloud-like texture is waiting. Happy baking!