The Golden Standard: Mastering the Art of Ultimate Southern Fried Chicken
There is a specific sound that defines culinary perfection: the shattering crunch of a perfectly fried chicken crust followed by the succulent hiss of steam escaping tender, juicy meat. This isn’t just fast food; it is a labor of love, a scientific balancing act of heat, moisture, and spice. Southern Fried Chicken is the undisputed heavyweight champion of comfort food, a dish so iconic that it has sparked global obsessions and endless kitchen debates.
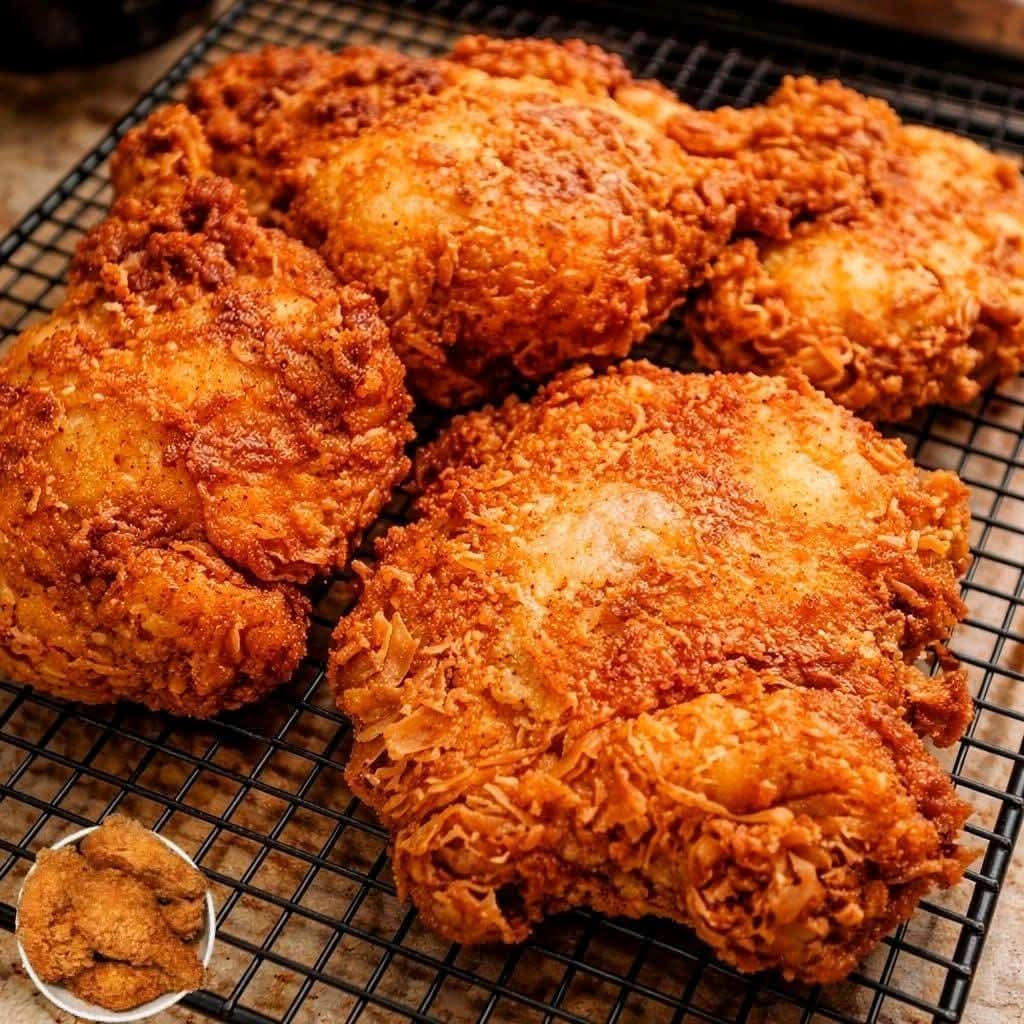
To make chicken like the image above—with those craggy, golden-brown ridges and deep seasoning—you need more than a recipe. You need a manifesto. In this guide, we will break down the history, the chemistry, and the soul of the perfect fry.
The Deep-Fried History: A Global Fusion
While we often view fried chicken as a purely American invention, its lineage is a fascinating blend of cultures.
The Scottish Connection
Early European immigrants from Scotland brought a tradition of deep-frying chicken in fat. Unlike their English neighbors who preferred baked or boiled chicken, the Scots enjoyed the crispy texture of fried fowl, though they often left it unseasoned.
The West African Influence
Enslaved West Africans in the American South took this basic frying technique and transformed it. They introduced a complex array of seasonings—peppers, garlic, and wild herbs—and perfected the breading process. Because chickens were often the only animals enslaved people were allowed to own, the bird became a symbol of entrepreneurship and culinary excellence within the community.
The Modern Era
By the early 20th century, fried chicken moved from a special-occasion Sunday dinner to a global phenomenon. Today, it represents a bridge between high-end culinary technique and humble, soul-stirring satisfaction.
The Ingredients: Your Toolkit for Success
To get that “extra-crispy” texture, every ingredient must serve a structural or flavorful purpose.
The Chicken
- 3-4 lbs Whole Chicken: Cut into 8 or 10 pieces. Using bone-in, skin-on meat is non-negotiable; the bone conducts heat for even cooking, and the skin provides the fat needed to bond with the flour.
The Brine (The Secret to Juiciness)
- 1 quart Buttermilk: The lactic acid tenderizes the meat without making it mushy.
- 1/2 cup Hot Sauce: Adds a subtle tang and “back-of-the-throat” heat.
- 1 tbsp Salt and 1 tbsp Black Pepper.
The Dredge (The Crunch Factor)
- 3 cups All-Purpose Flour: Provides the structure.
- 1/2 cup Cornstarch: This is the secret for a lighter, crispier “shatter.”
- Spices: 2 tbsp Smoked Paprika, 1 tbsp Garlic Powder, 1 tbsp Onion Powder, 1 tsp Cayenne, 1 tbsp Dried Oregano, and 1 tbsp Salt.
The Frying Medium
- Peanut Oil or Vegetable Oil: You need a high smoke point oil. Peanut oil is favored by pros for its clean finish and ability to handle high heat without breaking down.
Detailed Methods: Formation and Execution
Phase 1: The Long Soak (Brining)
Place your chicken pieces in a large bowl and submerge them in the buttermilk and hot sauce mixture. Cover and refrigerate for at least 4 hours, though 12–24 hours is ideal. This process, known as osmosis, draws moisture and seasoning into the muscle fibers, ensuring the chicken isn’t just salty on the outside, but flavorful to the bone.
Phase 2: The Double Dredge
- The Mix: Whisk your flour, cornstarch, and spices in a large shallow dish.
- The “Crag” Technique: Drizzle 2–3 tablespoons of the buttermilk brine into your dry flour mix and stir it with a fork. This creates tiny clumps. When you press the chicken into the flour, these clumps stick to the meat, forming those jagged, extra-crispy bits seen in the photo.
- The Coat: Take a piece of chicken from the brine, let the excess drip off, and bury it in the flour. Press down firmly to ensure the coating adheres. Shake off the excess and place the chicken on a wire rack for 15 minutes before frying. This “set time” allows the flour to hydrate, creating a glue-like bond that prevents the crust from falling off in the oil.
Phase 3: The Fry (Temperature Control)
- Heat: Fill a heavy cast-iron skillet or Dutch oven halfway with oil. Heat to 350°F (175°C). Use a thermometer—consistency is everything.
- The Drop: Carefully place 3–4 pieces in the oil. Do not overcrowd, or the oil temperature will plummet, resulting in greasy, soggy chicken.
- The Timing: Dark meat (thighs/legs) takes about 12–15 minutes. White meat (breasts/wings) takes about 10–12 minutes.
- The Finish: Fry until the internal temperature reaches 165°F (74°C).
Nutritional Profile and Benefits
While fried chicken is an indulgence, it offers significant nutritional value when prepared at home:
- High-Quality Protein: Essential for muscle tissue repair and hormone production.
- Vitamin B12 & Choline: Found in poultry, these are vital for brain health and nervous system function.
- Selenium: An antioxidant that supports thyroid function.
- Mood Boosting: The combination of fats and carbohydrates triggers “comfort” signals in the brain, making it a powerful tool for social bonding and stress relief.
The Lovers of the Dish
Fried chicken attracts a wide variety of “devotees”:
- The Texture Seekers: Those who live for the “crunch” and will pick the skin off first.
- The Picnic Enthusiasts: Because fried chicken is one of the few foods that tastes just as good cold as it does hot.
- The Spice Lovers: Those who serve their golden chicken drizzled with hot honey or extra cayenne.
Conclusion: The Final Crunch
Mastering fried chicken is a rite of passage for any home cook. It requires patience, respect for the oil, and a willingness to get your hands a little floury. By using the buttermilk brine and the “crag” dredging technique, you ensure a result that rivals the best soul food kitchens in the world.
When you lift that first piece out of the oil and see the mahogany-gold crust shimmering, you’ll know the effort was worth it. Serve it with a side of slaw and a cold glass of sweet tea for the full experience.
Pro Tip for WordPress: Remind your readers to never discard their used oil down the sink! Let it cool, strain it, and reuse it once more for an even “meatier” flavor in the next batch.