The Art of the Perfect Slow-Cooker Pulled Pork: A Comprehensive Masterclass
There are few dishes in the culinary world that command as much respect and comfort as a perfectly prepared pulled pork. It is the backbone of backyard barbecues, the star of game-day sliders, and the ultimate “set-it-and-forget-it” meal for busy weeknights.
But pulled pork is more than just throwing meat into a slow cooker and hoping for the best. It is a precise intersection of protein science, flavor balancing, and temperature control. When done right, the result is melt-in-your-mouth tender, deeply savory, and succulent. When done wrong, it can be dry, bland, or mushy.
In this masterclass, we are going to move beyond the basic “dump and cook” recipe. We are going to explore the why and the how so that you can consistently produce restaurant-quality pulled pork in your own kitchen, regardless of your skill level.
1. The Foundation: Choosing Your Cut
The secret to incredible pulled pork starts long before the slow cooker is turned on. It begins at the butcher counter.
The Boston Butt (Pork Shoulder)
Despite the confusing name, the “Boston Butt” does not come from the rear of the pig. It is actually a portion of the shoulder. This cut is non-negotiable for pulled pork.
- Why it works: The shoulder is a hard-working muscle group. It is packed with intramuscular fat (marbling) and, crucially, a significant amount of connective tissue (collagen).
- The Science: As the pork cooks slowly over several hours, that collagen breaks down and transforms into gelatin. This is what gives the meat its silky, moist texture. If you use a lean cut like pork loin, you will end up with dry, stringy meat because loin lacks that connective tissue reserve.
- Bone-In vs. Boneless: Always aim for bone-in if possible. The bone acts as a heat conductor, helping the meat cook more evenly from the inside out, and it imparts a depth of flavor to the juices that a boneless cut cannot match.
2. The Science of the “Low and Slow”
Why does a slow cooker work so well for this? The answer lies in thermodynamics and biology.
To break down the tough connective tissue in a pork shoulder, you need a sustained internal temperature of between 195°F and 205°F (90°C–96°C). In a conventional oven, reaching this temperature without drying out the exterior is a challenge.
The slow cooker acts as a moist-heat vessel (a braising environment). By cooking at a low temperature for 8 to 10 hours, you allow the heat to penetrate the core of the meat slowly, gently denaturing the proteins and melting the collagen. If you rush this process, the proteins tighten up and expel moisture, resulting in toughness. Patience is your most important ingredient.
3. The Ultimate Pulled Pork Rub
The rub is your first layer of flavor. It creates the “bark” or the outer crust that provides the textural contrast to the soft interior.
The Master Rub Ingredients
- Brown Sugar (1/2 cup): The molasses content helps caramelize the exterior and balances the savory notes.
- Smoked Paprika (2 tablespoons): This provides that essential “smoky” flavor profile without needing a commercial smoker.
- Kosher Salt (1 tablespoon): Essential for moisture retention.
- Black Pepper (1 tablespoon): Freshly cracked for the best aroma.
- Garlic Powder & Onion Powder (1 tablespoon each): The aromatic backbone.
- Mustard Powder (1 teaspoon): Provides a slight tang that cuts through the pork fat.
- Optional Kick: A pinch of cayenne or chili flakes if you enjoy heat.
4. The Master Recipe
Equipment
- 6-quart or 8-quart slow cooker
- Large mixing bowl
- Tongs
- Two forks or “meat claws” for shredding
Ingredients
- 4–5 lb Bone-in Pork Shoulder
- 1 tbsp Vegetable or Canola oil (for searing)
- The Master Rub (see above)
- 1 cup liquid base (Chicken broth, apple cider vinegar, or a mix of beer and water)
- Optional: 1 onion, sliced into rings (to act as a rack)
Instructions
- Prep the Meat: Remove the pork from the refrigerator 30 minutes before seasoning. Pat it extremely dry with paper towels. Excess moisture on the surface prevents the rub from adhering and hinders browning.
- The Sear (Pro Step): While optional, searing the meat in a hot pan with oil for 2–3 minutes per side creates the Maillard reaction—a chemical reaction between amino acids and reducing sugars that gives browned food its distinctive flavor. It adds an incredible depth of flavor.
- Rub Application: Generously coat every inch of the pork with your spice rub. Don’t be shy; press the spices into the meat.
- The Bed: Place the sliced onions at the bottom of the slow cooker. This creates a “rack” that lifts the meat out of the liquid, preventing it from boiling in its own drippings and ensuring it stays tender.
- The Liquid: Pour your liquid base (broth/vinegar/beer) into the bottom of the slow cooker. Do not pour it over the meat, or you will wash the rub away.
- The Cook: Cover and cook on LOW for 8–10 hours. Avoid the temptation to lift the lid! Every time you lift the lid, you lose about 20–30 minutes of cooking time due to heat loss.
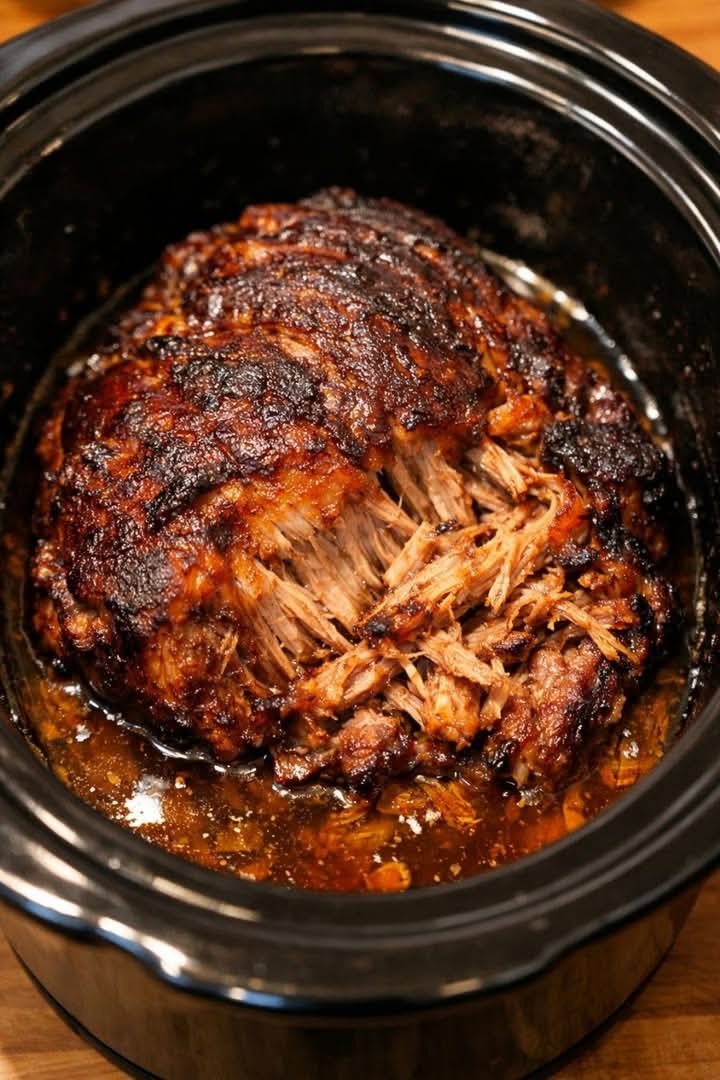
- The Rest: Once the meat is fork-tender (it should pull apart with almost no resistance), remove it from the cooker and place it on a rimmed baking sheet. Let it rest for at least 20 minutes. This allows the juices to redistribute throughout the fibers.
- The Shred: Using two forks, pull the meat apart against the grain. Remove the bone and any large pockets of excess fat as you go.
5. Troubleshooting: Common Pitfalls
Even with a simple recipe, things can go wrong. Here is how to navigate the common issues.
| Problem | Likely Cause | Solution |
|---|---|---|
| Meat is dry/tough | Cooked on High or pulled too early. | Keep it on Low. Use a meat thermometer—it’s done when it hits 205°F internally. |
| Too much liquid | The meat released too much fat/juice. | Strain the liquid, simmer it in a pan to reduce it into a sauce, and pour back over the shredded meat. |
| Bland flavor | Not enough salt in the rub. | Season the final shredded meat with additional salt, pepper, and a splash of vinegar. |
| Burnt edges | Too long on High setting. | Stick to the Low setting. The slow cooker heat is consistent and gentle. |
6. Elevating Your Pork: Flavor Profiles
Once you have mastered the “blank canvas” recipe above, you can pivot the flavor profile depending on your mood.
The Carolina Vinegar Style
This is for the purists. Instead of a thick, sweet sauce, use a vinegar-based sauce.
- The Sauce: Apple cider vinegar, red pepper flakes, a touch of sugar, salt, and cayenne.
- Why it works: The acidity cuts through the richness of the pork, cleansing the palate with every bite.
The Asian-Fusion Twist
- The Rub: Replace the paprika with ginger powder and five-spice powder.
- The Liquid: Replace broth with soy sauce, rice wine vinegar, and a dash of sesame oil.
- Serving: Serve on steamed bao buns with pickled cucumber and hoisin sauce.
The Carnitas Style (Mexican)
- The Rub: Focus on cumin, oregano, and chili powder.
- The Liquid: Add orange juice and lime juice to the bottom of the cooker.
- The Finish: After shredding, spread the pork on a sheet pan and place it under a broiler for 5 minutes until the edges get crispy and charred.
7. Storage, Freezing, and Reheating
Pulled pork is the king of meal prep. It freezes beautifully.
- Refrigerator: Store in an airtight container for up to 4 days.
- Freezer: Shred the meat, let it cool completely, and store it in freezer-safe bags. To prevent freezer burn, squeeze out as much air as possible (a vacuum sealer is ideal). It will stay good for up to 3 months.
- Reheating: Do not microwave large portions, as it will dry out the edges. Place the frozen pork in a saucepan with a splash of water or broth, cover, and warm gently over low heat until heated through.
8. Beyond the Sandwich: Creative Serving Ideas
Don’t feel obligated to stop at a bun. Pulled pork is a versatile protein that can serve as the star ingredient in a dozen other meals.
- Pulled Pork Nachos: Pile corn tortilla chips with pork, black beans, cheddar cheese, jalapeños, and salsa.
- Breakfast Hash: Sauté potatoes, onions, and bell peppers, then toss in leftover pork and top with a fried egg.
- Tacos/Quesadillas: Fold the meat into corn tortillas with salsa verde and cotija cheese.
- Pulled Pork Mac and Cheese: Stir the meat into a creamy homemade mac and cheese for an indulgent comfort meal.
- Loaded Baked Potato: Split a large baked potato and stuff it with pork, sour cream, chives, and sharp cheddar.
9. Frequently Asked Questions (FAQ)
Can I use a leaner cut of pork?
It is not recommended. Lean cuts (like tenderloin) will dry out and turn into a “chalky” texture when cooked for long periods. Stick to the shoulder.
Do I have to sear the meat first?
Technically, no. If you are in a rush, you can skip the searing step. You will still get tender meat, but you will miss out on the complex, caramelized flavor that searing provides.
My sauce is too thin. How do I thicken it?
Once the meat is removed, pour the liquid from the slow cooker into a saucepan and bring it to a boil. Simmer it for 10–15 minutes until it reduces and thickens. You can also mix a teaspoon of cornstarch with cold water (a slurry) and whisk it into the bubbling liquid.
Can I cook this on High to save time?
While you can cook on High for 4–5 hours, the Low setting is vastly superior for collagen breakdown. High heat can sometimes cause the exterior to toughen before the interior is sufficiently tender. If you have the time, stick to Low.
Final Thoughts: The Joy of the Slow Cooker
Cooking a large piece of meat like a pork shoulder serves as a great reminder of why we cook in the first place: to transform simple, raw ingredients into something greater than the sum of their parts through heat, time, and care.
There is an incredible sense of satisfaction in opening that slow cooker lid after a long day to the aroma of savory, tender pork. It represents a promise kept to yourself: that even when life is busy, you can still enjoy a meal that tastes like it took all day to prepare.
So, head to the store, pick out the best-looking shoulder you can find, and get that slow cooker ready. Whether you serve it at a backyard party or just keep it in the freezer for a rainy Tuesday, this recipe is guaranteed to become a staple in your kitchen rotation. Happy cooking!
Do you have a favorite secret ingredient for your pork rub, or a go-to side dish that you think is mandatory for a pulled pork dinner? Let us know in the comments below!