Strawberry Crisp with Vanilla Ice Cream Recipe
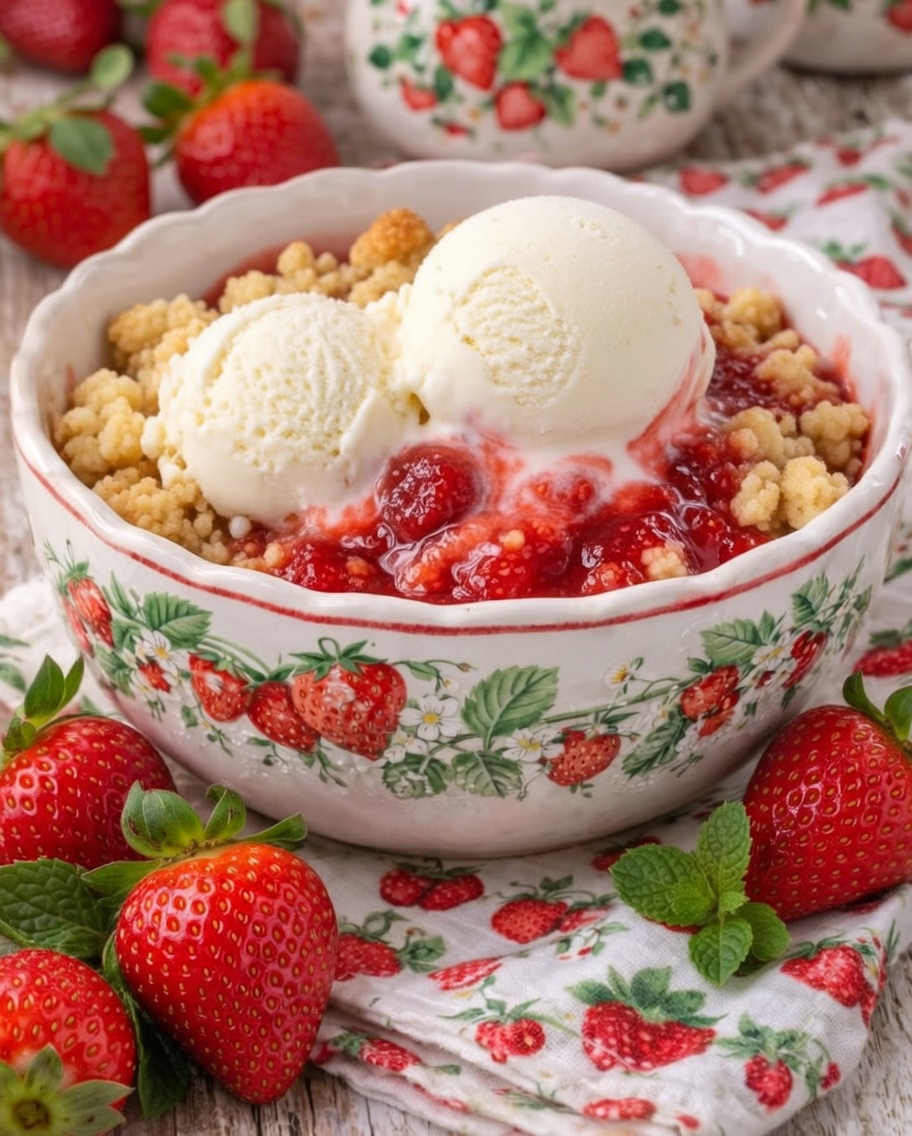
This classic strawberry crisp is the ultimate comforting dessert that celebrates the sweet, juicy flavor of fresh strawberries. With a buttery, golden oat crumble topping and a bubbling strawberry filling, it’s simple to make yet impressive enough for any occasion. Served warm with generous scoops of vanilla ice cream, every bite delivers the perfect balance of tart fruit, sweet streusel, and creamy cold contrast. This is a dessert that feels like a warm hug in a bowl.
Why This Strawberry Crisp Recipe Will Become Your Favorite
- Incredibly easy: Minimal prep time with pantry staples and fresh fruit.
- Irresistible texture: Juicy, jammy strawberries meet a crunchy, buttery topping.
- Versatile: Works with fresh or frozen strawberries and can be adapted year-round.
- Crowd-pleaser: Perfect for family dinners, potlucks, holidays, or casual weeknights.
- Make-ahead friendly: Assemble in advance and bake when ready to serve.
- Customizable: Endless variations to suit your taste or dietary needs.
Ingredients (Serves 8-10)
For the Strawberry Filling:
- 2 pounds (900 g) fresh strawberries, hulled and quartered (or 2.5 pounds frozen, thawed and drained)
- 1/2 cup (100 g) granulated sugar
- 1/4 cup (50 g) packed light brown sugar
- 3 tablespoons cornstarch (or 1/4 cup all-purpose flour for thickening)
- 2 tablespoons fresh lemon juice
- 1 teaspoon vanilla extract
- 1/2 teaspoon ground cinnamon
- 1/4 teaspoon salt
- Optional: 1 teaspoon lemon zest for extra brightness
For the Crisp Topping:
- 1 cup (125 g) all-purpose flour
- 1 cup (90 g) old-fashioned rolled oats (not instant)
- 2/3 cup (135 g) packed brown sugar (light or dark)
- 1/2 cup (100 g) granulated sugar
- 1 teaspoon baking powder
- 1/2 teaspoon ground cinnamon
- 1/4 teaspoon salt
- 3/4 cup (170 g) unsalted butter, melted (or cold cubed for a more traditional streusel)
- 1 teaspoon vanilla extract
- Optional add-ins: 1/2 cup chopped pecans or almonds, 1/4 cup shredded coconut, or 1/2 teaspoon almond extract
For Serving:
- Vanilla ice cream (at least 1-2 scoops per serving)
- Fresh mint leaves for garnish
- Additional fresh strawberries
- Optional: Whipped cream or a drizzle of balsamic glaze
Equipment Needed
- 9×13-inch baking dish (or similar 2-3 quart capacity)
- Large mixing bowls
- Measuring cups and spoons
- Rubber spatula or wooden spoon
- Sharp knife for hulling strawberries
- Oven
Step-by-Step Instructions
- Preheat the Oven: Set your oven to 375°F (190°C). This temperature ensures the topping gets golden and crispy while the filling bubbles perfectly without burning.
- Prepare the Strawberries: Wash the strawberries thoroughly under cool water. Hull them by removing the green leafy tops (use a paring knife or strawberry huller). Quarter or halve larger berries so pieces are roughly uniform in size. This helps them cook evenly and creates a nice texture in the filling. If using frozen strawberries, thaw them completely and drain off excess liquid to prevent a watery crisp.
- Make the Strawberry Filling: In a large bowl, combine the prepared strawberries with granulated sugar, brown sugar, cornstarch, lemon juice, vanilla extract, cinnamon, and salt. Gently toss everything together until the strawberries are evenly coated. Let the mixture sit for 10-15 minutes. This allows the sugars to draw out juices and the cornstarch to begin thickening. The filling should start to look slightly syrupy.
- Prepare the Crisp Topping: In a separate medium bowl, whisk together the flour, rolled oats, brown sugar, granulated sugar, baking powder, cinnamon, and salt. If using melted butter, pour it over the dry ingredients along with the vanilla extract. Stir until the mixture resembles coarse crumbs or wet sand – some larger clumps are desirable for texture. If preferring a more traditional streusel, cut cold butter into the dry ingredients using a pastry cutter or your fingers until it resembles pea-sized crumbs.
- Assemble the Crisp: Pour the strawberry filling into your greased or ungreased 9×13-inch baking dish, spreading it out evenly. Sprinkle the crisp topping generously and evenly over the fruit. Do not press it down too firmly – you want an airy, crumbly layer that will crisp up beautifully in the oven. For extra indulgence, dot the top with a few small pieces of butter.
- Bake the Strawberry Crisp: Place the baking dish on the middle rack of the preheated oven. Bake for 35-45 minutes, or until the topping is golden brown and the strawberry filling is bubbling vigorously around the edges. If the topping browns too quickly, loosely cover with aluminum foil for the last 10 minutes. The filling should be thick and glossy, not runny.
- Cool Slightly: Remove the crisp from the oven and let it rest on a wire rack for at least 15-20 minutes before serving. This cooling time is crucial – it allows the filling to set properly so it doesn’t run all over the plate when scooped.
- Serve Warm: Spoon generous portions into individual bowls. Top each serving with 1-2 large scoops of high-quality vanilla ice cream. The contrast between the warm, juicy strawberries and cold, creamy ice cream is what makes this dessert magical. Garnish with fresh mint leaves and sliced strawberries for a beautiful presentation.
Pro Tips for the Best Strawberry Crisp
- Fresh vs. Frozen Strawberries: Fresh strawberries in season provide the brightest flavor, but high-quality frozen work wonderfully year-round. Just be sure to thaw and drain well.
- Sweetness Adjustment: Taste your strawberries first. Very ripe, sweet berries may need less added sugar, while tart ones benefit from a bit more.
- Thickening Secrets: Cornstarch gives a clearer, glossier filling, while flour creates a slightly cloudier but still delicious result. Adjust based on preference.
- Prevent Soggy Topping: Ensure your fruit isn’t overly juicy before adding the topping. If needed, add an extra tablespoon of cornstarch.
- Make Individual Portions: Divide into ramekins or small baking dishes for elegant single servings. Reduce baking time to 25-30 minutes.
- Butter Temperature: Melted butter creates a more cookie-like crisp topping, while cold butter cut in gives a flakier, streusel-style texture. Both are excellent.
Delicious Flavor Variations
Mixed Berry Crisp: Replace half the strawberries with blueberries, raspberries, or blackberries for a vibrant medley.
Strawberry Rhubarb Crisp: Add 2 cups chopped fresh rhubarb to the filling for a classic tart-sweet combination. Increase sugar slightly.
Strawberry Peach Crisp: Mix in 2-3 sliced fresh peaches for a summery stone fruit twist.
Chocolate Strawberry Crisp: Sprinkle 1/2 cup chocolate chips or chunks over the fruit before adding the topping.
Gluten-Free Strawberry Crisp: Use certified gluten-free oats and replace all-purpose flour with a 1:1 gluten-free baking blend or almond flour.
Vegan Strawberry Crisp: Swap butter for coconut oil or vegan butter. Serve with dairy-free vanilla ice cream.
Spiced Version: Add 1/4 teaspoon ground ginger, cardamom, or nutmeg to the filling for warm depth.
What to Serve Alongside Strawberry Crisp
While vanilla ice cream is the gold standard pairing, consider these options:
- Freshly whipped cream with a touch of vanilla
- Crème fraîche or mascarpone for a tangy contrast
- A light dusting of powdered sugar
- Chopped toasted nuts for crunch
- A drizzle of warm caramel or chocolate sauce
- Fresh mint or basil leaves for herbal brightness
This dessert also pairs beautifully with after-dinner coffee, tea, or even a glass of sparkling wine.
Storage and Reheating Instructions
Room Temperature: The crisp can sit out for up to 2 hours after baking.
Refrigerator: Cover tightly with plastic wrap or foil and store for up to 4 days. The topping may soften slightly but will still taste delicious.
Freezer: For longer storage, bake the crisp fully, cool completely, then wrap tightly and freeze for up to 3 months. Thaw overnight in the refrigerator before reheating.
Reheating:
- Oven: Reheat at 350°F (175°C) for 15-20 minutes until warmed through and the topping re-crisps.
- Microwave: Heat individual portions for 30-60 seconds. The topping won’t be as crisp but the flavors remain wonderful.
Make-Ahead: Assemble the filling and topping separately up to 24 hours in advance. Store the filling in the fridge and topping at room temperature. Combine and bake just before serving for the freshest results.
Nutrition Information (Per Serving, Approximate, Without Ice Cream)
- Calories: 320
- Carbohydrates: 52g
- Fat: 12g
- Protein: 3g
- Fiber: 4g
- Sugar: 35g
Values are estimates and will vary based on exact ingredients and portion sizes. Adding ice cream increases calories significantly.
Frequently Asked Questions
Can I use frozen strawberries?
Yes! Frozen strawberries work excellently. Thaw them first and drain any excess liquid thoroughly to avoid a watery filling.
Why is my crisp runny?
This usually happens if the fruit was too juicy or not enough thickener was used. Next time, add an extra tablespoon of cornstarch and let the fruit mixture sit longer to release juices.
Can I make this ahead for a party?
Absolutely. Prepare the components the day before and bake fresh when guests arrive. Or bake completely and reheat gently.
How do I know when it’s done baking?
Look for deep golden brown topping and bubbling filling visible around the edges. The center should feel set when gently shaken.
Is it better warm or cold?
Warm is best for maximum flavor and texture contrast with ice cream, but leftovers are delicious straight from the fridge too.
Can I reduce the sugar?
Yes. Start with less sugar in the filling and taste as you go. Ripe strawberries are naturally sweet.
Advanced Techniques for Perfect Results
- Macerate the Fruit: Letting the strawberries sit with sugar and lemon juice draws out more flavor and creates a natural syrup.
- Toast the Oats: Lightly toast the rolled oats in the oven or skillet before mixing the topping for deeper, nuttier flavor.
- Layer Strategically: Add a thin layer of topping on the bottom of the dish before the fruit for extra crunch and to prevent sticking.
- Broil for Extra Crisp: In the last 1-2 minutes of baking, switch to broil (watch carefully!) for an even deeper golden color.
- Infuse the Topping: Mix in citrus zest, spices, or extracts directly into the crumble for layered flavors.
Scaling the Recipe
- Smaller Batch (4 servings): Use an 8×8-inch dish, halve all ingredients, and reduce baking time to 25-35 minutes.
- Larger Crowd: Double the recipe and use two 9×13 dishes or a larger roasting pan. Baking time may increase slightly.
Why Strawberry Crisp Beats Other Strawberry Desserts
Unlike strawberry shortcake or pie, this crisp requires no rolling dough or complicated assembly. It’s more forgiving than cake and delivers big flavor with less effort. The oat topping provides satisfying chew and crunch that fruit pies often lack, while the simple fruit base highlights the star ingredient without masking it.
This recipe has been passed down and adapted through generations, evolving into the foolproof version presented here. The combination of warm, juicy strawberries with buttery crumble and melting ice cream creates a sensory experience that’s hard to beat.
Whether you’re using peak-season farmers’ market strawberries or convenient frozen berries in winter, this strawberry crisp delivers consistent, delicious results every time. It’s the kind of dessert that brings people back for seconds – and has them asking for the recipe.
Prepare to fill your kitchen with the irresistible aroma of baking strawberries and buttery oats. Your family and friends will thank you, and this may quickly become your signature dessert.
Enjoy every spoonful of this comforting, vibrant treat!