Introduction
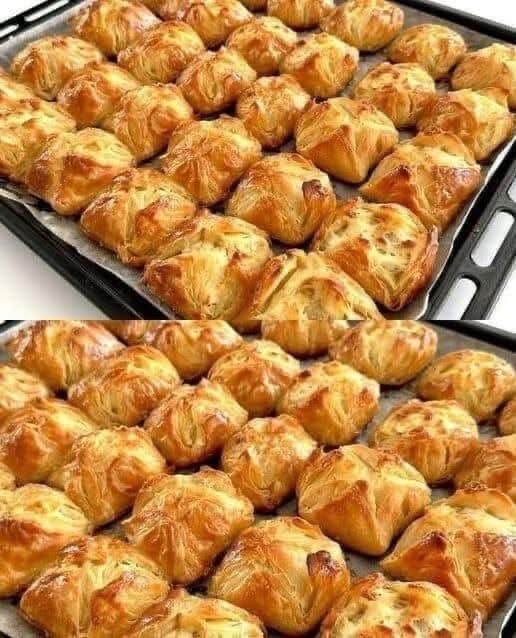
Prepare to fall in love with the ultimate crowd-pleaser: Mini Puff Pastry Parcels! These golden, flaky bites are the epitome of effortless elegance, transforming simple ingredients into something truly spectacular. Imagine delicate, buttery layers of pastry encasing a burst of savory or sweet filling, baked to a perfect golden brown. They’re impressive enough for a dinner party, yet easy enough for a weeknight snack, making them a versatile star in any culinary repertoire.
What exactly are these delightful creations? Simply put, mini puff pastry parcels are small, single-serving portions of puff pastry folded around a delicious filling, then baked until beautifully puffed and golden. Their charm lies in their irresistible texture – that satisfying crunch of flaky pastry giving way to a warm, flavorful center. Whether you’re hosting a gathering, looking for a quick appetizer, or simply craving a delightful treat, these parcels are your go-to. They demand minimal effort but deliver maximum impact, making you look like a seasoned chef without hours in the kitchen.
There are countless reasons to add this recipe to your favorites. They’re incredibly easy to customize, allowing you to cater to any taste preference or dietary need. Their individual size makes them perfect for portion control and easy serving, ideal for parties where guests can simply grab and go. Plus, the sheer joy of biting into a warm, flaky parcel is unparalleled. Get ready to embark on a culinary adventure that promises delicious results with a straightforward, step-by-step guide to crafting your own batch of these irresistible golden treasures.
Nutritional Information
Per serving (approximate values for a cheese & herb parcel):
- Calories: 180 kcal
- Protein: 5g
- Carbohydrates: 12g
- Fat: 13g
- Fiber: 1g
- Sodium: 250mg
Ingredients
- 1 sheet (17.3 oz / 490g) frozen puff pastry, thawed
- 1 large egg
- 1 tablespoon water or milk
- For Savory Cheese & Herb Filling:
- 4 oz (115g) cream cheese, softened
- 1/2 cup (50g) shredded cheddar cheese
- 2 tablespoons fresh chives, finely chopped
- 1/4 teaspoon garlic powder
- Pinch of black pepper
- Optional: 1/4 cup (30g) finely chopped cooked spinach (squeezed dry)
- Optional: Sesame seeds or poppy seeds for sprinkling
Instructions
- Thaw the Puff Pastry: Remove the frozen puff pastry sheet from its packaging and let it thaw in the refrigerator for at least 4 hours, or at room temperature for about 30-40 minutes, until it’s pliable but still cold. Do not let it get warm and sticky.
- Prepare the Filling: In a medium bowl, combine the softened cream cheese, shredded cheddar cheese, fresh chives, garlic powder, and black pepper. If using spinach, add it now. Mix well until all ingredients are evenly incorporated and the filling is smooth and spreadable.
- Preheat Oven and Prepare Baking Sheet: Preheat your oven to 400°F (200°C). Line a large baking sheet with parchment paper. This prevents sticking and makes cleanup easier.
- Prepare Egg Wash: In a small bowl, whisk together the large egg with 1 tablespoon of water or milk until well combined. This will be used to create that beautiful golden-brown crust.
- Unroll and Cut the Pastry: Gently unroll the thawed puff pastry sheet onto a lightly floured surface or directly onto your parchment-lined baking sheet. Using a sharp knife or a pizza cutter, carefully cut the pastry into 12 equal squares. For a standard 9×13 inch pastry sheet, this would typically be three cuts lengthwise and two cuts widthwise, creating a grid.
- Portion the Filling: Place about 1 to 1.5 teaspoons of your prepared filling in the center of each puff pastry square. Avoid overfilling, as this can lead to leakage during baking.
- Fold the Parcels: There are a few ways to fold them:
- Simple Fold: Bring one corner of the square over to the opposite corner, forming a triangle. Press the edges firmly to seal.
- Envelope Fold (Recommended for this recipe): Bring all four corners of the square to meet in the center, directly over the filling. Gently press them together to form a small “envelope” or “parcel” shape. Ensure the edges are well sealed to prevent the filling from escaping.
- Rectangular Fold: If you cut rectangles, fold one half over the other to create a smaller rectangle, pressing the edges to seal.
- Seal the Edges: Once folded, use the tines of a fork to crimp the edges of each parcel. This not only helps to seal them securely but also adds a decorative touch.
- Arrange on Baking Sheet:Carefully transfer the sealed parcels to your prepared baking sheet, leaving about 1 inch of space between each one to allow for puffing.
- Apply Egg Wash: Lightly brush the tops and visible sides of each mini puff pastry parcel with the egg wash. This will give them a beautiful golden sheen and help them brown evenly. If desired, sprinkle with sesame seeds or poppy seeds now.
- Bake: Place the baking sheet in the preheated oven. Bake for 15-20 minutes, or until the puff pastry is beautifully puffed, golden brown, and cooked through. Baking times can vary depending on your oven, so keep an eye on them.
- Cool and Serve: Once baked, remove the parcels from the oven and let them cool on the baking sheet for a few minutes before transferring them to a wire rack. Serve warm or at room temperature.
Cooking Tips and Variations
Achieving perfectly flaky, golden mini puff pastry parcels is surprisingly simple, but a few key tips can elevate your results from good to absolutely outstanding. The most crucial factor is keeping your puff pastry cold. When the pastry is cold, the butter layers remain solid, creating steam during baking that separates the layers and gives you that signature flakiness. If your pastry gets too warm and sticky, the butter can melt before baking, resulting in a less airy and more dense texture. Work quickly, and if you notice the pastry becoming difficult to handle, pop it back into the refrigerator for 10-15 minutes to chill before continuing. Don’t overwork the dough; gentle handling is key to maintaining its delicate structure.
Another common pitfall is overfilling. While it’s tempting to cram as much delicious filling as possible into each parcel, too much can lead to leakage during baking. This not only makes a mess but can also cause your parcels to lose their shape and become soggy. Aim for about 1 to 1.5 teaspoons of filling per square, ensuring there’s enough space around the edges to create a secure seal. Speaking of sealing, take your time to firmly crimp the edges with a fork or pinch them together well. A good seal is your best defense against escaped filling and ensures your parcels hold their delightful shape.
The egg wash is not just for show; it plays a vital role in achieving that irresistible golden-brown color and a subtle sheen. A simple whisked egg with a splash of water or milk brushed over the pastry before baking makes all the difference. For an even deeper golden hue, you can use just the egg yolk mixed with a little water. If you’re looking for a slightly less shiny finish, a milk wash can also work. For an extra layer of flavor and texture, consider sprinkling the egg-washed parcels with sesame seeds, poppy seeds, everything bagel seasoning, or even a pinch of flaky sea salt.
The beauty of these mini parcels lies in their incredible versatility when it comes to fillings. Don’t be afraid to experiment beyond the classic cheese and herb. For savory options, consider a Mediterranean twist with crumbled feta, chopped sun-dried tomatoes, and a sprinkle of oregano. A quick sauté of finely diced mushrooms and onions, seasoned with thyme, makes a fantastic earthy filling. Leftover cooked chicken or ground meat can be mixed with a little BBQ sauce or curry paste for a heartier parcel. For a truly decadent savory treat, try a small dollop of brie with a thin slice of pear or a cranberry sauce. Remember to always ensure savory fillings are not too wet, as excess moisture can make the pastry soggy.
On the sweet side, the possibilities are equally endless. Transform them into miniature fruit pies by using a spoonful of apple pie filling, cherry pie filling, or a mix of fresh berries (tossed with a little sugar and cornstarch to thicken). A dollop of cream cheese mixed with a tablespoon of your favorite jam or fruit preserves creates a delightful sweet and tangy contrast. For chocolate lovers, a square of chocolate or a spoonful of Nutella can be heavenly. You can even combine sweet and savory elements, like goat cheese with fig jam. When creating sweet fillings, ensure they are not overly liquidy to prevent seepage. After baking sweet parcels, a dusting of powdered sugar or a light drizzle of glaze can add the perfect finishing touch.
Finally, remember that ovens can vary. Keep an eye on your parcels during the last few minutes of baking. If you notice one side browning faster than the other, rotate your baking sheet halfway through to ensure even cooking. The parcels are done when they are significantly puffed, deeply golden brown, and feel firm to the touch. Let them cool slightly on the baking sheet before transferring to a wire rack; this allows the pastry to set and prevents the bottoms from getting soggy.
Storage and Reheating
Mini Puff Pastry Parcels are best enjoyed fresh out of the oven, when their flakiness is at its peak and the filling is warm and gooey. However, they can certainly be made ahead of time or stored for later enjoyment. For optimal freshness, allow any leftover parcels to cool completely to room temperature before storing. This prevents condensation from building up and making the pastry soggy.
To store, place the cooled parcels in an airtight container. They can be kept at room temperature for up to 1 day, especially if your filling is not highly perishable (like a simple cheese or vegetable mix). For longer storage, or if your filling contains meat, cream cheese, or fresh dairy, it’s best to refrigerate them. In the refrigerator, they will last for 2-3 days. While the pastry may lose a bit of its crispness, the flavors will still be delicious.
For longer-term storage, mini puff pastry parcels freeze beautifully. After baking, allow them to cool completely. Arrange them in a single layer on a baking sheet and freeze until solid (this prevents them from sticking together). Once frozen, transfer them to a freezer-safe bag or airtight container. They can be stored in the freezer for up to 1-2 months. When freezing, it’s a good idea to label the container with the date and type of filling.
Reheating is key to restoring some of their original glory. The microwave is generally not recommended for reheating puff pastry, as it tends to make it soft and chewy rather than crispy. The best method for reheating baked parcels is in the oven or a toaster oven. Preheat your oven to 300-325°F (150-160°C). Place the parcels on a baking sheet and heat for 8-15 minutes, or until warmed through and the pastry has crisped up again. If reheating from frozen, you can often go directly from freezer to oven; just increase the baking time to 20-30 minutes, or until hot in the center. Keep an eye on them to prevent over-browning. You can also reheat them in an air fryer at 300°F (150°C) for 5-10 minutes, checking frequently.
Frequently Asked Questions
What kind of puff pastry should I use?
For convenience and consistent results, store-bought frozen puff pastry sheets are highly recommended for this recipe. They are readily available in most grocery stores and thaw quickly. Look for brands made with butter for the best flavor and flakiness, though all-vegetable shortening versions also work well. While homemade puff pastry is an option for experienced bakers, it’s a time-consuming process and not necessary to achieve delicious results for these mini parcels.
Can I prepare these ahead of time?
Absolutely! You have a couple of options for making these ahead. You can prepare the filling a day or two in advance and store it in an airtight container in the refrigerator. Alternatively, you can assemble the entire parcels (cut, fill, fold, and crimp) and then place them on a parchment-lined baking sheet in the freezer until solid. Once frozen, transfer them to a freezer-safe bag. When ready to bake, you can bake them directly from frozen, adding an extra 10-15 minutes to the baking time, or until golden brown and puffed. You can also refrigerate assembled, unbaked parcels for a few hours, but baking immediately after assembly yields the best puff.
Why didn’t my puff pastry puff up?
Several factors can prevent puff pastry from rising properly. The most common reason is that the pastry got too warm during handling. If the butter layers melt before baking, they won’t create the steam needed to separate the layers. Always work with cold pastry. Other reasons include overworking the dough (which can break down the layers), using too much flour when rolling (which can make it tough), or an oven that isn’t hot enough. Ensure your oven is preheated to the correct temperature, and avoid opening the oven door too frequently during the initial baking phase, as this can cause temperature fluctuations.
Can I make these gluten-free or vegan?
Yes, you can! Many brands now offer gluten-free puff pastry sheets, which can be substituted directly into this recipe. Just be sure to check the specific baking instructions for the gluten-free pastry, as they can sometimes vary slightly. For a vegan version, look for puff pastry made with vegetable shortening or vegan butter (ensure it’s clearly labeled vegan, as some regular puff pastries can contain dairy). For the filling, you would need to use vegan cream cheese, vegan shredded cheese, and any other vegan-friendly ingredients for your chosen filling. The egg wash can be replaced with a plant-based milk (like almond or soy milk) mixed with a tiny bit of maple syrup or olive oil for color and shine.