Preserving Whole Fresh Tomatoes for Up to 2 Years Without Vinegar: The Traditional Infallible Home Method
Imagine opening a jar in the middle of winter and finding tomatoes that still burst with the bright, fresh taste of summer — firm, colorful, and ready to use just like the day you preserved them. This method, popular in many European home kitchens (especially in French-speaking regions), promises exactly that: whole or halved fresh tomatoes conserved for up to 24 months without any vinegar, lemon juice, citric acid, or other strong acidifiers.
This approach relies on careful selection of ripe tomatoes, proper packing in sterilized jars, a light brine (very mild salted water), thorough heat processing (water bath sterilization), and perfect sealing to create an anaerobic environment that prevents spoilage. Many home preservers report success with this technique over generations, especially when using firm varieties like Roma or plum tomatoes.
Important Safety Note
Modern official guidelines from organizations like the USDA and National Center for Home Food Preservation strongly recommend adding acid (lemon juice, citric acid, or vinegar) when canning tomatoes in a water bath to guarantee a safe pH level below 4.6 and prevent the risk of botulism, even though tomatoes are naturally acidic. Acidity can vary depending on variety, ripeness, and growing conditions. This “no-vinegar” method uses only a very mild brine and relies on proper sterilization — it is a traditional folk method that works well for many experienced canners but is not officially tested or recommended by current U.S. extension services for guaranteed safety. Always prioritize your health: if you’re new to canning, consider adding the recommended acid, or use a pressure canner for low-acid foods. Check jars carefully before opening, and discard any with signs of spoilage (bulging lids, off odors, mold, or unusual bubbling).
Why This Method Works (According to Traditional Wisdom)
- Firm, ripe tomatoes have natural acidity and low water content.
- Mild brine (about 1 tsp salt per liter) adds slight preservation without overpowering flavor.
- Boiling water bath sterilization (long processing time) kills microorganisms.
- Hermetic sealing creates a vacuum that prevents oxygen-loving bacteria and mold.
- Cool, dark storage slows any remaining chemical changes.
The result? Tomatoes that remain surprisingly whole and fresh-tasting — perfect for sauces, salads, stews, or quick winter meals.
Ingredients (for about 6–8 one-liter / quart jars — scale as needed)
- 10–12 kg (22–26 lbs) fresh, ripe, firm tomatoes (Roma/plum varieties preferred — they hold shape better)
- Filtered or spring water (enough to fill jars — about 4–6 liters)
- Fine sea salt or canning salt — 1 teaspoon per liter of water (very mild; no iodine)
- Optional: a few fresh basil leaves, garlic cloves, or peppercorns per jar (for subtle flavor — traditional versions often keep it plain)
Equipment Needed
- Large canning jars with new lids and bands (1L/quart size ideal for whole tomatoes)
- Large stockpot or water bath canner (deep enough for jars covered by 5–8 cm / 2–3 inches water)
- Jar lifter tongs
- Funnel, ladle, bubble remover (chopstick works)
- Clean kitchen towels
Step-by-Step Instructions: The Full Traditional Method
1. Selecting and Preparing the Tomatoes (45–60 minutes)
Choose only the best tomatoes: fully ripe but still firm, no bruises, cracks, soft spots, or signs of disease. Overripe or watery tomatoes increase spoilage risk.
- Wash tomatoes thoroughly under cool running water.
- Remove stems and any green parts.
- Optional but recommended: blanch for peeling (many prefer peeled for better texture and safer canning).
Bring a large pot of water to a rolling boil.
Score a small “X” on the bottom of each tomato.
Drop 8–10 tomatoes at a time into boiling water for 30–60 seconds until skins start to split.
Immediately transfer to a bowl of ice water.
Slip off skins — they should come away easily. Leave small cherry tomatoes whole and unpeeled if desired. - Core tomatoes (remove tough stem area) and halve larger ones if they don’t fit whole.
2. Sterilizing the Jars and Lids (20–30 minutes)
- Wash jars, lids, and bands in hot soapy water; rinse well.
- Place jars in the canner or large pot, cover with water, and bring to a simmer (180°F / 82°C) for at least 10 minutes to sterilize.
- Keep jars hot until ready to fill.
- Simmer lids in hot water (do not boil modern lids too long).
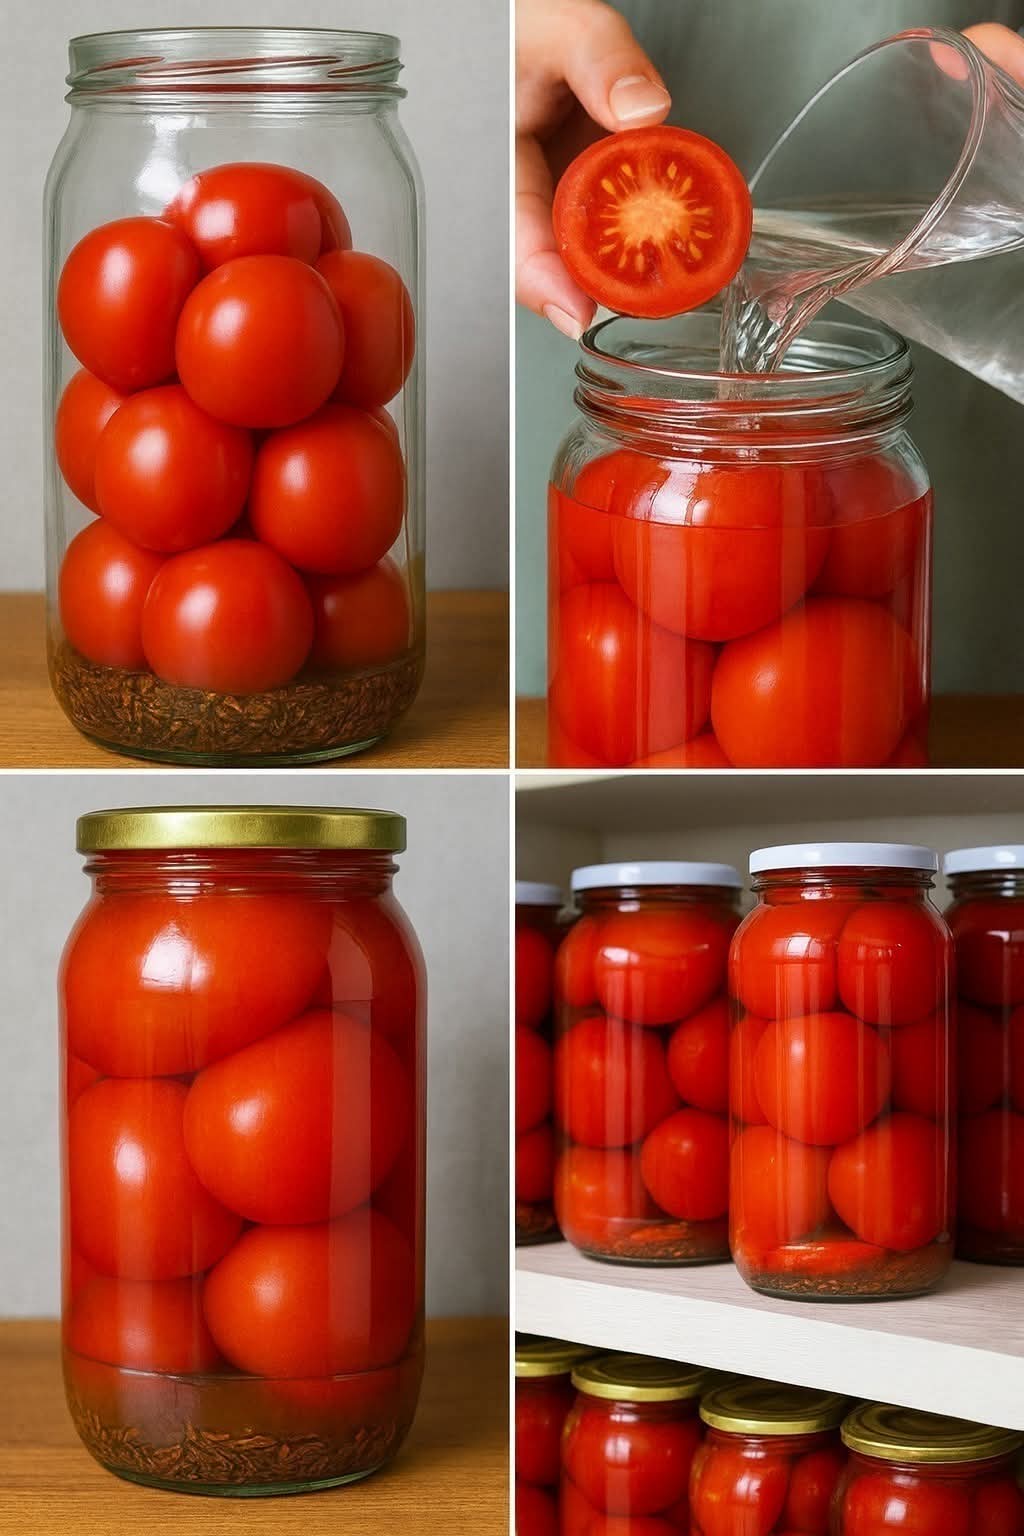
3. Packing the Jars (the Raw Pack Method)
- Remove hot jars from water (keep water boiling for later).
- Pack tomatoes tightly but gently into jars — whole or halved, pressing down lightly to remove air pockets without crushing.
- Leave about 2–3 cm (1 inch) headspace at the top.
- If using, add optional flavorings (1–2 basil leaves or a garlic clove per jar).
- Prepare the mild brine:
Boil water, let it cool slightly to warm (not boiling hot — prevents cracking jars).
Dissolve 1 tsp salt per liter of water (very light — about 0.5–1% salinity). - Pour warm salted water over tomatoes, covering completely while maintaining 2 cm headspace.
- Run a bubble remover or chopstick around the inside to release trapped air.
- Wipe rims meticulously with a clean damp cloth — any residue prevents sealing.
4. Sealing and Processing (Water Bath Sterilization — 60–90 minutes)
- Place lids on jars and screw bands finger-tight (not too tight — allow air to escape).
- Lower jars into the boiling water bath using tongs.
- Ensure water covers jars by at least 5 cm (2 inches).
- Bring back to a full rolling boil.
- Process for 60–90 minutes depending on jar size and altitude:
- 1L/quart jars: 75–90 minutes at sea level
- Add 5–10 minutes per 300 m / 1000 ft above sea level
(Traditional recipes often use longer times for extra safety without added acid.) - Maintain a gentle boil — add hot water if level drops.
- After processing, turn off heat and let jars sit in water 5 minutes.
- Remove jars and place on a towel-covered surface — do not disturb for 12–24 hours.
5. Checking Seals and Storage (Next Day)
- Press the center of each lid — it should not flex (concave seal).
- Remove bands (they can rust if left on) and wipe jars.
- Store in a cool (10–15°C / 50–59°F), dark, dry place like a basement or pantry.
- Label with date — use within 18–24 months for best quality.
Using Your Preserved Tomatoes
These tomatoes stay remarkably firm and fresh-tasting — ideal for:
- Quick pasta sauces (simmer with garlic, onion, herbs)
- Winter salads or bruschetta
- Stews, soups, chili
- Stuffed peppers or ratatouille
- As a base for homemade ketchup or salsa
Before eating, always inspect: no bulging, hissing, off smells, or mold. Boil contents 10 minutes as extra precaution if concerned.
Tips for Success and Variations
- Best varieties — Roma, San Marzano, Amish Paste (meaty, less juice).
- No brine version (even stricter traditional) — Some pack peeled tomatoes dry (their own juice) and process longer.
- Flavor boosts — Add a bay leaf, thyme sprig, or peppercorns.
- Smaller batches — Start with 4–5 kg to test your setup.
- Troubleshooting — Failed seal? Refrigerate and use within days. Cloudy brine? Normal at first; settles over time.
This method captures summer’s essence in a jar — simple, natural, and rewarding. Enjoy your homemade pantry treasure all year long! 🍅