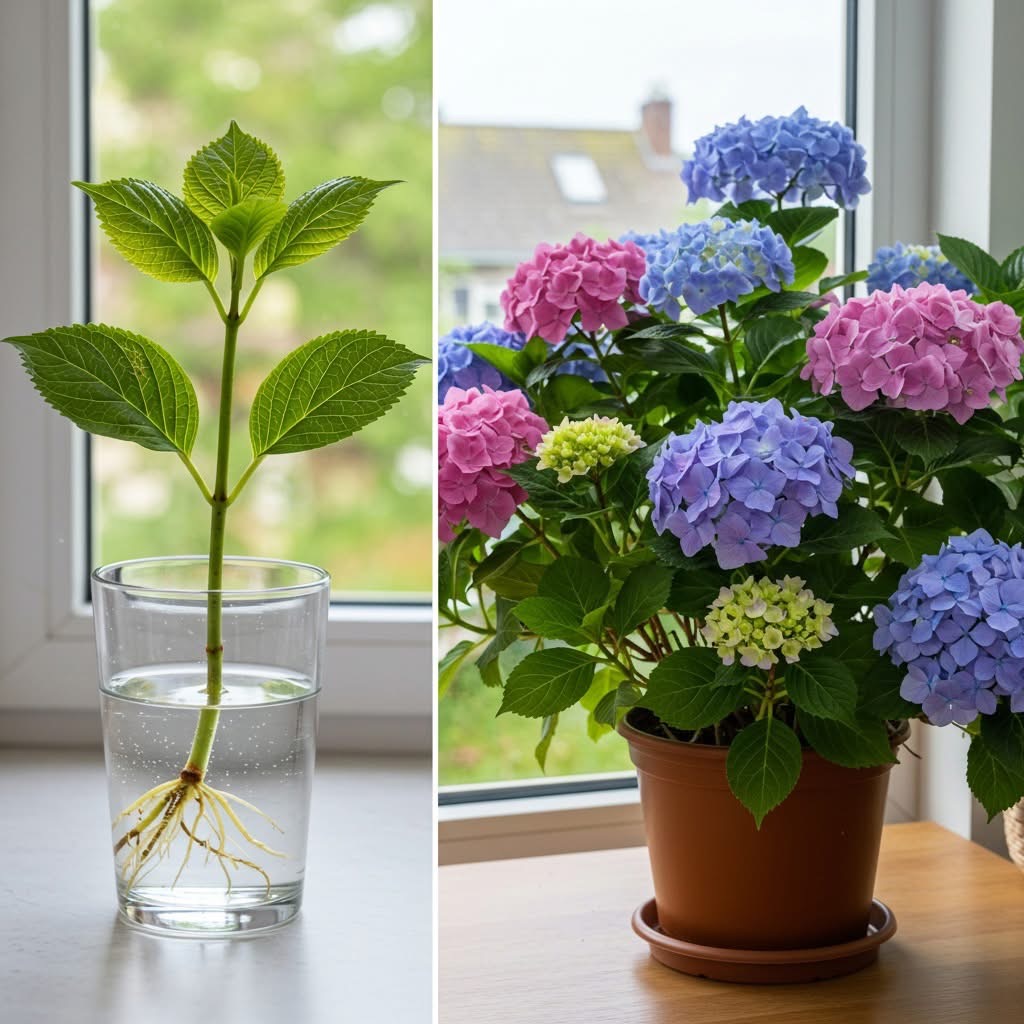
Hydrangeas are among the most beloved flowering shrubs, admired for their lush blooms that range from deep blue to soft pink and even creamy white. While many people buy potted hydrangeas from nurseries, a cost-effective and rewarding way to expand your garden is to propagate them yourself from cuttings. The process may seem daunting at first, but with the right steps, you can turn a single cutting into a thriving, blooming hydrangea plant.
Why Propagate Hydrangeas?
- Cost-Effective Gardening – Instead of buying multiple plants, you can create new ones from a single healthy hydrangea.
- Sustainability – Propagation reduces waste and supports eco-friendly gardening practices.
- Preservation of Varieties – If you have a hydrangea you especially love, propagation ensures you can keep it for years.
- Gift-Giving – A homegrown potted hydrangea makes a meaningful gift for friends and family.
Step 1: Selecting the Cutting
- Choose a healthy, non-flowering stem from your hydrangea plant.
- The cutting should be about 4–6 inches long and contain at least two to three sets of leaves.
- Snip the stem just below a node (the small bump where leaves grow out).
Step 2: Rooting the Cutting
The image shows a cutting rooted in a glass of water, which is one of the simplest and most effective methods.
- Remove the Lower Leaves – Strip away the bottom leaves, leaving just the top set or two.
- Place in Water – Put the cutting in a glass of clean water, ensuring the stem node is submerged but the leaves remain above water.
- Change Water Regularly – Refresh the water every 2–3 days to prevent bacteria buildup.
- Wait for Roots – In 2–4 weeks, small white roots will start to appear. Wait until the roots are at least 1–2 inches long before planting in soil.
Alternative: You can also plant the cutting directly into moist potting soil using rooting hormone for faster results. Cover with a plastic bag to maintain humidity.
Step 3: Transplanting into Soil
Once the cutting has strong roots:
- Fill a small pot with well-draining potting mix.
- Gently plant the rooted cutting and water thoroughly.
- Keep the soil moist but not soggy.
- Place the pot in a bright location with indirect sunlight.
Step 4: Caring for Your Young Hydrangea
- Watering – Hydrangeas love moisture. Keep soil consistently damp, especially in summer.
- Sunlight – Morning sun with afternoon shade is ideal. Too much direct sunlight can scorch leaves.
- Fertilizer – Use a balanced fertilizer every 4–6 weeks during the growing season.
- Repotting/Transplanting Outdoors – After 6–12 months, move the hydrangea to a larger pot or into the garden.
The Magic of Bloom Colors
One of the most fascinating aspects of hydrangeas is their ability to change bloom color depending on the soil pH:
- Acidic soil (pH below 6.0) → Blue flowers
- Neutral soil (pH 6.0–7.0) → Purple/lavender flowers
- Alkaline soil (pH above 7.0) → Pink flowers
Gardeners often adjust soil acidity with lime (to raise pH) or aluminum sulfate (to lower pH) to achieve their desired color.
Benefits of Growing Hydrangeas at Home
- Aesthetic Appeal – Their large clusters of blooms enhance any garden or indoor space.
- Low Maintenance – With proper watering and occasional pruning, hydrangeas thrive for many years.
- Wildlife Friendly – Hydrangea blooms attract bees, butterflies, and pollinators.
- Stress Relief – Caring for plants has proven mental health benefits, reducing stress and improving mood.
Conclusion
Growing hydrangeas from cuttings is a simple yet rewarding gardening project. With just a small glass of water and some patience, you can transform a single stem into a flourishing hydrangea that will grace your home with vibrant blooms for years. Whether you’re propagating for yourself, gifting to loved ones, or filling your garden with color, hydrangeas are a timeless choice that bring joy and beauty to any space.
From water to roots, and from roots to blossoms — your hydrangea journey starts with just one cutting