General Method to Grow Vegetables in 5 Gallon Buckets

Materials Needed:
- 5-gallon plastic bucket (food-safe if possible)
- Potting soil or a high-quality garden soil mix
- Compost or organic fertilizer
- Seeds or starter plants (e.g., cucumbers, tomatoes, peppers)
- Watering can or hose
- Drill (for drainage holes)
- Optional: mulch, trellis or support cages
Step-by-Step Preparation & Planting
1. Prepare the Bucket:
- Drill 5–7 holes (about ½ inch in diameter) in the bottom of the bucket for drainage.
- You can add a few holes on the sides near the bottom for extra airflow.
- Place a layer of small rocks or gravel at the bottom (optional) to aid drainage.
2. Mix and Add Soil:
- Fill the bucket with a mix of:
- 60% potting soil
- 20% compost
- 20% perlite or vermiculite for aeration
- Mix thoroughly to ensure nutrients and drainage.
3. Planting Seeds or Seedlings:
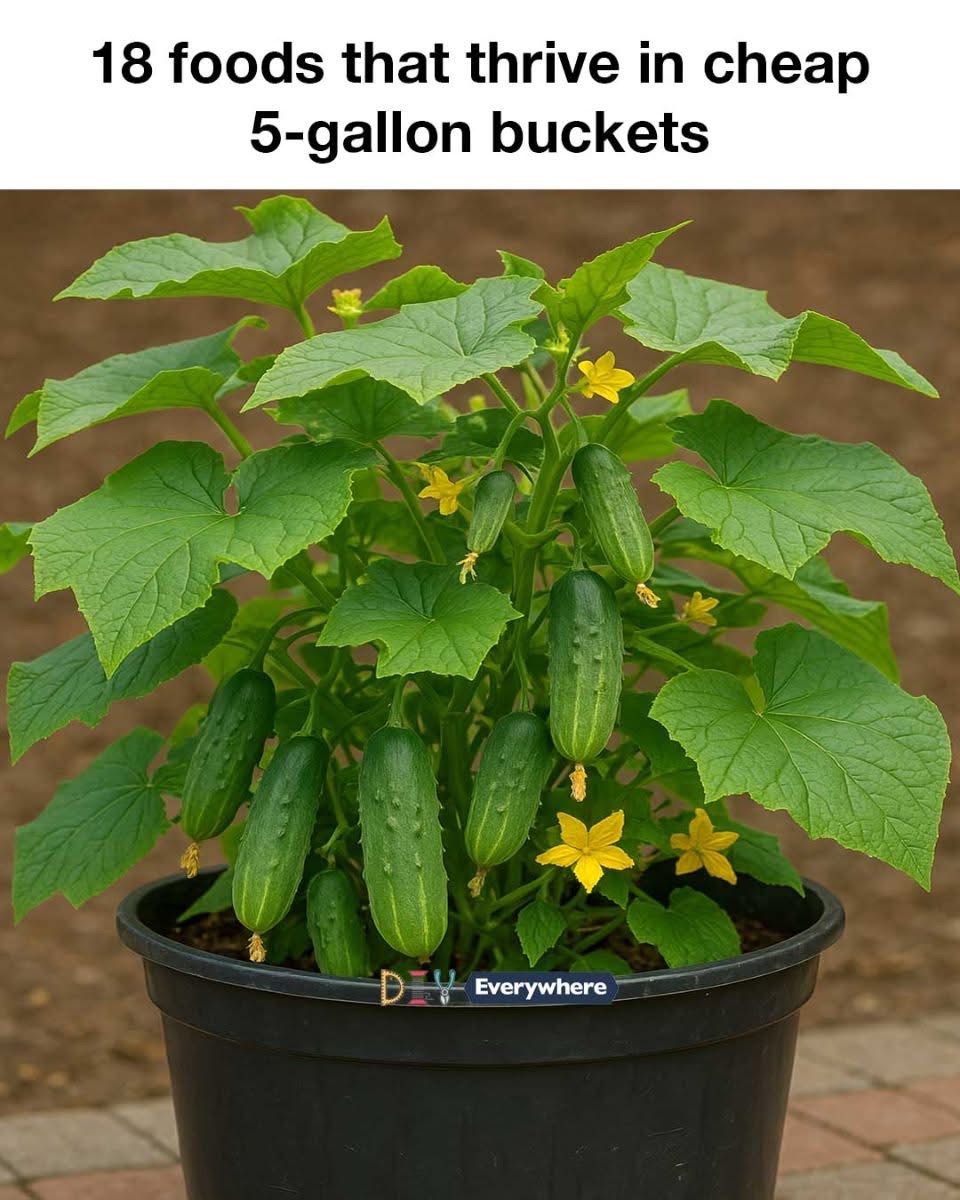
- For cucumbers (as shown in the image), plant 2–3 seeds or one healthy seedling per bucket.
- If using seeds, plant them 1 inch deep and water gently.
- Thin to the healthiest plant once sprouted.
4. Provide Support:
- Cucumbers, tomatoes, and pole beans need a trellis or cage.
- Insert the support system into the bucket early to avoid disturbing roots later.
5. Watering and Care:
- Water deeply when the top inch of soil feels dry.
- Ensure the bucket drains well and never sits in standing water.
- Fertilize every 2–3 weeks with a balanced liquid fertilizer or compost tea.
6. Sunlight and Placement:
- Place the bucket where it gets at least 6–8 hours of sunlight per day.
- Rotate buckets occasionally for even growth if needed.
Foods That Thrive in 5-Gallon Buckets (examples):
- Tomatoes
- Peppers
- Cucumbers
- Lettuce
- Spinach
- Kale
- Green beans
- Carrots
- Radishes
- Onions
- Garlic
- Beets
- Potatoes
- Swiss chard
- Eggplants
- Zucchini
- Herbs (basil, parsley, cilantro)
- Strawberries
Instructions for Growing Food in 5-Gallon Buckets
Step 1: Choose Your Bucket
- Use a clean, food-grade 5-gallon plastic bucket.
- Drill 5–10 drainage holes (¼”–½”) in the bottom to prevent root rot.
- Optional: Drill a few holes around the lower sides for extra drainage.
Step 2: Prepare the Soil
Mix together:
- 60% potting soil
- 20% compost (or organic matter)
- 20% perlite or vermiculite (for drainage and aeration)
Optional: Add a slow-release vegetable fertilizer to the mix.
Step 3: Fill the Bucket
- Fill the bucket with the soil mix, leaving about 2 inches of space at the top.
- Lightly water the soil to moisten it before planting.
Step 4: Plant Your Seeds or Seedlings
Here’s how many plants to grow per bucket:
| Crop | Seeds/Plants per Bucket |
|---|---|
| Tomato | 1 plant |
| Cucumber | 1–2 plants |
| Pepper | 1–2 plants |
| Lettuce | 3–4 plants |
| Carrots | 10–12 seeds |
| Radish | 10–15 seeds |
| Beans (Bush) | 3–4 seeds |
| Spinach | 4–6 seeds |
| Herbs (Basil, etc.) | 3–4 plants |
- Plant seeds at the depth listed on the packet.
- If using transplants, gently place them in and pat soil around roots.
Step 5: Watering
- Water until it drains from the bottom.
- Keep the soil consistently moist, but not soaked.
- Hot weather = water daily. Cool weather = every 2–3 days.
Step 6: Sunlight
- Place your buckets where they get 6–8 hours of full sun daily.
- Use plant caddies or trays for easy moving if needed.
Step 7: Support (if needed)
- Add tomato cages or stakes early for tomatoes, cucumbers, and beans.
- This avoids damaging roots later.
Step 8: Fertilizing
- Use a balanced liquid fertilizer every 2–3 weeks (or according to product instructions).
- Compost tea or worm castings also work great for organic gardening.
Step 9: Mulch (Optional)
- Add a layer of mulch (like straw or bark) to keep moisture in and weeds out.
Step 10: Harvesting
Regular harvesting encourages more production, especially for beans and cucumbers.
Harvest vegetables when mature (check seed packets for maturity days).