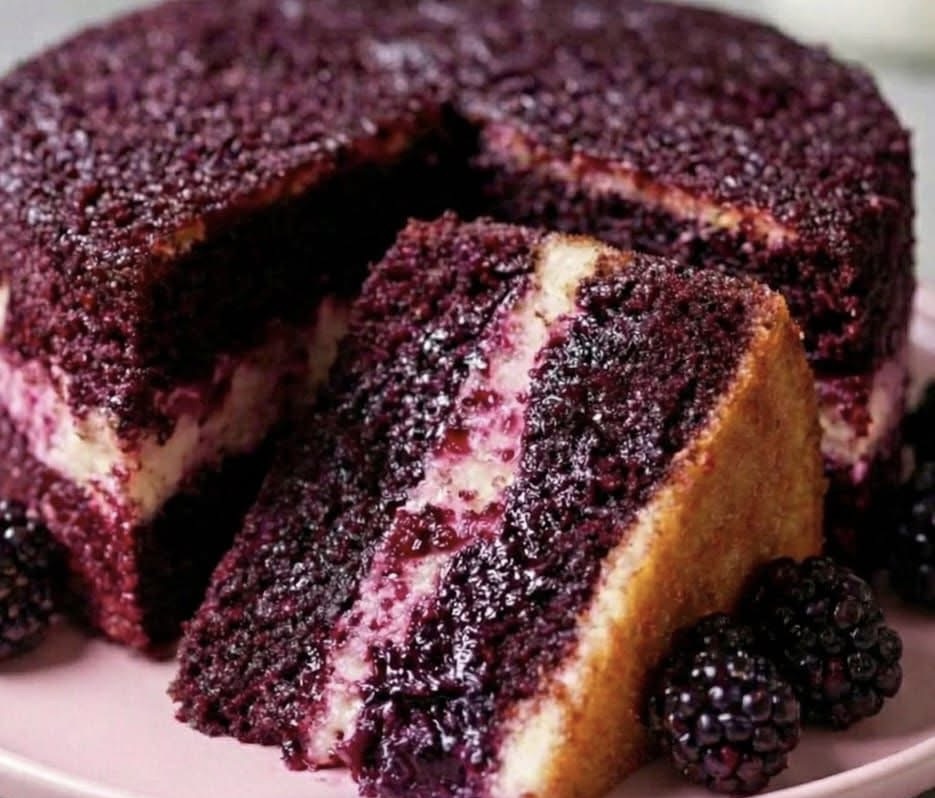
The Dreamiest Blackberry Velvet Cake
INTRODUCTION
This Blackberry Velvet Cake is a rich, moist, jewel-colored dessert that blends the softness of classic velvet cake with the deep, fruity flavor of fresh blackberries. Its natural purple hue, tender crumb, and creamy filling make it perfect for celebrations, tea time, or whenever you want a show-stopping homemade cake. The blackberry flavor adds freshness while balancing the sweetness of the cake and cream layer.
HISTORY
Velvet cakes became popular in the early 1900s for their soft, fine crumb and smooth texture. Traditionally made with cocoa or red coloring, modern versions use fruits such as berries to create natural color and flavor. Blackberry velvet cake is a creative twist inspired by summer harvests and rustic berry desserts, combining cake and fruit preserves in one elegant dessert.
INGREDIENTS
For the Cake
2 1/2 cups all-purpose flour
1 3/4 cups granulated sugar
3 large eggs, room temperature
1 1/2 cups fresh blackberries (pureed)
1 cup buttermilk
3/4 cup vegetable oil
1 tablespoon lemon juice
2 teaspoons vanilla extract
1 teaspoon baking soda
1 teaspoon baking powder
1/2 teaspoon salt
For the Blackberry Filling
1 1/2 cups blackberries
1/3 cup sugar
1 tablespoon cornstarch
2 tablespoons water
1 teaspoon lemon juice
For the Cream Layer (or Frosting)
8 oz cream cheese, softened
1/2 cup unsalted butter, softened
3 cups powdered sugar
1 teaspoon vanilla extract
METHOD
Step 1: Prepare the Blackberry Puree
Blend fresh blackberries until smooth. Strain to remove seeds if desired. Measure 1 1/2 cups puree for the cake batter.
Step 2: Make the Cake Batter
In a large bowl, whisk flour, baking powder, baking soda, and salt.
In another bowl, beat eggs with sugar until light and fluffy. Add oil, vanilla, lemon juice, and blackberry puree. Mix well.
Add dry ingredients alternately with buttermilk, mixing gently until smooth.
Step 3: Bake
Preheat oven to 175°C (350°F).
Grease and line two 9-inch round cake pans.
Divide batter evenly and bake for 30–35 minutes or until a toothpick inserted comes out clean.
Cool completely before filling and frosting.
Step 4: Prepare the Blackberry Filling
Cook blackberries, sugar, and lemon juice over medium heat.
Mix cornstarch with water and add to the pan.
Simmer until thick and jam-like. Cool completely.
Step 5: Prepare the Cream Layer
Beat cream cheese and butter until smooth.
Add powdered sugar gradually, then vanilla. Beat until fluffy.
ASSEMBLY
Place one cake layer on a serving plate.
Spread blackberry filling evenly over the top.
Add a layer of cream frosting over the filling.
Place the second cake layer on top.
Cover the entire cake with remaining cream frosting or leave the sides semi-naked for a rustic look.
Decorate with fresh blackberries if desired.
BENEFITS
Blackberries are rich in antioxidants
Good source of vitamin C and fiber
Natural color without artificial dyes
Moist texture from fruit puree
Balanced sweetness with fresh berry flavor
NUTRITION (Approximate per slice)
Calories: 350–400
Carbohydrates: 50 g
Fat: 18 g
Protein: 5 g
Fiber: 3 g
FORMATION
This cake forms its deep purple color from natural blackberry pigments. The acidity of berries reacts gently with baking soda to create a tender crumb and vibrant shade. The cream layer adds contrast, making each slice visually striking and flavorful.
SERVING METHODS
Serve chilled or at room temperature
Pair with vanilla ice cream
Drizzle with extra berry sauce
Serve with tea or coffee
Add whipped cream for extra softness
CONCLUSION
Blackberry Velvet Cake is a perfect harmony of fruit and cake, beauty and flavor. Its soft texture, rich color, and creamy layers make it a dessert that looks luxurious but is simple to prepare at home. Every slice feels like a special occasion dessert.
WITH LOVE FOR DESSERT LOVERS
If you love fruity cakes with a soft velvet crumb and creamy layers, this Blackberry Velvet Cake will steal your heart. One bite is sweet, tangy, and comforting all at once — a true bakery-style treat made in your own kitchen.