Juicy Herb-Roasted Chicken Breast: The Ultimate Guide to Perfectly Cooked Chicken Every Single Time
Why This Herb-Roasted Chicken Breast Recipe Works
Chicken breast is notoriously tricky. It’s lean, which means it can dry out quickly if overcooked by even a few minutes. This recipe solves that problem with a combination of smart techniques:
- A flavorful brine (optional but highly recommended) that locks in moisture
- A rich herb butter rub that adds taste and keeps the meat basted as it cooks
- Precise oven temperature control with a two-stage roasting method (high heat for browning, lower heat for gentle cooking)
- Resting time after cooking to redistribute juices
The result? Chicken that’s moist, packed with flavor, and incredibly versatile. It pairs beautifully with roasted vegetables, rice, salads, pasta, or can be sliced thin for sandwiches and wraps.
Ingredients (Serves 6–8 Generous Portions)
For the Chicken
- 4 large boneless, skinless chicken breasts (about 2.5–3 lbs / 1.1–1.4 kg total)
- 2 tablespoons olive oil (or avocado oil for higher smoke point)
For the Herb Butter Rub
- 4 tablespoons unsalted butter, softened to room temperature
- 4 cloves garlic, minced (or 1 teaspoon garlic powder)
- 2 tablespoons fresh rosemary, finely chopped
- 2 tablespoons fresh thyme leaves
- 1 tablespoon fresh parsley, chopped
- 1 teaspoon smoked paprika
- 1 teaspoon dried oregano
- 1 teaspoon onion powder
- ½ teaspoon ground black pepper
- 1 teaspoon salt (use less if brining)
Optional Brine
- 4 cups (1 liter) cold water
- ¼ cup kosher salt
- 2 tablespoons brown sugar
- 2 bay leaves
- 1 teaspoon black peppercorns
- 2 sprigs fresh rosemary or thyme
For Roasting
- 1 large onion, sliced into thick rounds
- 2 carrots, cut into sticks (optional, for a built-in side)
- 1 lemon, sliced
- Extra fresh herbs for garnish
Pro Tip: Choose chicken breasts that are similar in thickness (about 1–1.5 inches thick at the thickest part). If they vary wildly, pound the thicker parts gently with a meat mallet between plastic wrap to even them out.
Step-by-Step Instructions
Step 1: Optional Brining (30 minutes to 4 hours – Highly Recommended)
Brining is the secret to juicy chicken breast. It seasons the meat from the inside and helps it retain moisture during cooking.
- In a large bowl or zip-top bag, dissolve ¼ cup kosher salt and 2 tablespoons brown sugar in 4 cups cold water.
- Add bay leaves, peppercorns, and fresh herbs.
- Submerge the chicken breasts completely. If they float, place a plate on top to weigh them down.
- Refrigerate for at least 30 minutes (for quick results) or up to 4 hours. Do not exceed 6 hours or the chicken may become too salty.
- Remove chicken from brine, rinse briefly under cold water, and pat very dry with paper towels. This drying step is crucial for crispy edges.
If you skip brining, simply season generously with salt on both sides and let the chicken sit at room temperature for 20–30 minutes before cooking. This allows for more even cooking.
Step 2: Prepare the Herb Butter Rub
While the chicken is brining (or coming to room temperature), make the flavored butter:
- In a small bowl, combine softened butter, minced garlic, chopped rosemary, thyme, parsley, smoked paprika, oregano, onion powder, black pepper, and salt.
- Mix thoroughly until it forms a smooth, spreadable paste. The butter should be soft enough to spread easily but not melted.
This herb butter does double duty: it adds incredible flavor and creates a protective layer that bastes the chicken as it melts in the oven.
Step 3: Season and Prepare the Chicken
- Preheat your oven to 425°F (220°C) for the initial high-heat sear. Position the rack in the upper third of the oven.
- Place the dried chicken breasts on a clean cutting board or plate.
- Rub each breast generously on both sides with the herb butter mixture. Use your fingers to get into any crevices. Don’t be shy — use about 1 tablespoon per breast.
- Drizzle with 2 tablespoons olive oil and rub it in to help with browning.
Step 4: Set Up the Roasting Pan
- In a large baking dish or rimmed sheet pan, arrange sliced onions, carrot sticks (if using), and lemon slices to create a bed for the chicken. This prevents the chicken from sitting directly in its juices and adds flavor to the pan drippings.
- Place the seasoned chicken breasts on top of the vegetable bed, leaving space between each piece for air circulation.
- If desired, tuck a few extra herb sprigs around the chicken.
Step 5: Roast the Chicken (Two-Stage Method)
This two-stage cooking is what gives you crispy skin-like edges on skinless breasts while keeping the interior perfectly juicy.
- Place the pan in the preheated 425°F (220°C) oven and roast for 12–15 minutes. This high heat promotes beautiful browning and caramelization.
- After 12–15 minutes, reduce the oven temperature to 375°F (190°C).
- Continue roasting for another 10–18 minutes, depending on thickness.
- Use an instant-read meat thermometer for perfect results. Insert it into the thickest part of the breast.
- Remove the chicken when the internal temperature reaches 160°F (71°C). It will continue to rise to the safe 165°F (74°C) while resting.
Total cooking time: Usually 25–35 minutes, but always rely on temperature rather than time.
Step 6: Rest the Chicken
This is the most important step many people skip!
- Remove the baking dish from the oven.
- Transfer the chicken breasts to a clean cutting board or plate. Tent loosely with aluminum foil.
- Let the chicken rest for 8–10 minutes. During this time, the juices redistribute throughout the meat, making every slice incredibly moist.
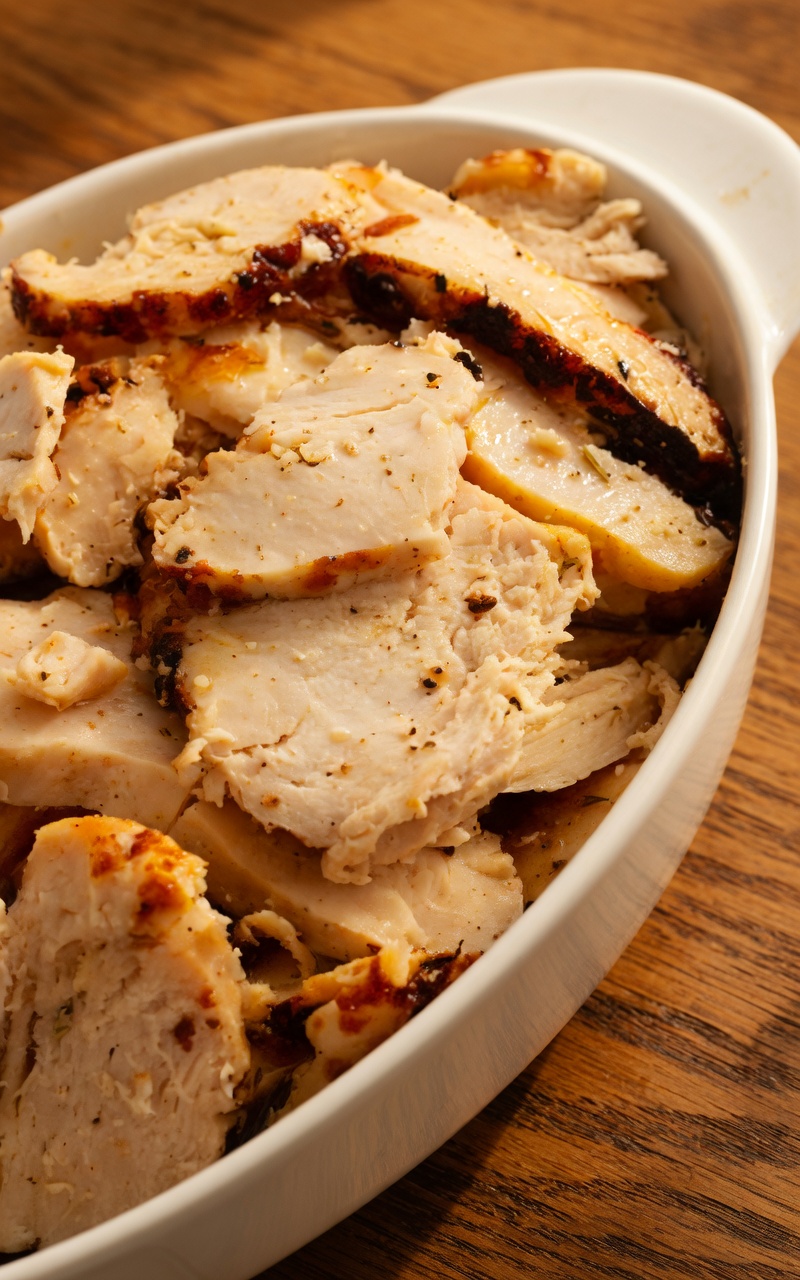
Step 7: Slice and Serve
- After resting, slice the chicken against the grain into ½-inch thick slices.
- Arrange on a serving platter and spoon any pan juices (or make a quick pan sauce — see below) over the top.
- Garnish with fresh chopped parsley, thyme, or lemon wedges.
How to Make a Quick Pan Sauce (Optional but Delicious)
While the chicken rests, turn the pan juices into a simple sauce:
- Place the roasting pan on the stovetop over medium heat (use two burners if it’s a large pan).
- Add ½ cup chicken broth or white wine and scrape up all the browned bits.
- Simmer for 2–3 minutes until slightly reduced.
- Stir in 1 tablespoon butter and a squeeze of lemon juice.
- Taste and adjust seasoning. Pour over sliced chicken or serve on the side.
Delicious Variations
1. Lemon Garlic Herb Chicken
Add zest of 2 lemons to the herb butter and squeeze extra lemon juice over the chicken before roasting.
2. Spicy Cajun Roasted Chicken
Replace the herb rub with a mix of Cajun seasoning, cayenne pepper, and smoked paprika. Omit rosemary and thyme.
3. Mediterranean Style
Use olive tapenade or sun-dried tomatoes in the butter. Add oregano, basil, and serve with tzatziki.
4. Honey Mustard Glazed
Mix 2 tablespoons honey and 1 tablespoon Dijon mustard into the butter for a sweet-savory crust.
5. Italian Herb & Parmesan
Add ¼ cup grated Parmesan to the herb butter and use Italian seasoning blend.
6. Low-Carb Keto Version
Skip any sugar in the brine and serve with roasted broccoli, cauliflower, or a big green salad with avocado.
7. Meal-Prep Friendly
Double the recipe and portion sliced chicken into containers with quinoa, rice, or roasted sweet potatoes for easy lunches.
Common Mistakes & How to Avoid Them
- Dry chicken: Overcooking or not resting. Always use a meat thermometer.
- Uneven cooking: Pound breasts to even thickness.
- No browning: Make sure the chicken is very dry before rubbing with oil/butter and start with high heat.
- Too salty: If you brine, rinse and don’t add extra salt to the rub.
- Rub falling off: Press the herb butter firmly into the meat.
Serving Suggestions
This versatile chicken pairs with almost anything:
Classic Sides:
- Creamy mashed potatoes with garlic
- Roasted asparagus or Brussels sprouts
- Butter rice or wild rice pilaf
- Fresh garden salad with vinaigrette
Healthier Options:
- Cauliflower rice
- Zucchini noodles
- Quinoa salad with cucumber and feta
- Steamed broccoli with lemon
For Entertaining:
- Serve family-style on a large platter with roasted root vegetables and crusty bread to soak up the juices.
Storage & Reheating Instructions
Refrigerator: Store leftover sliced chicken in an airtight container for up to 4 days.
Freezer: Freeze individual portions in freezer bags for up to 3 months. Thaw overnight in the refrigerator.
Reheating Tips:
- Oven: 325°F (165°C) for 10–12 minutes with a splash of broth to keep moist.
- Microwave: Cover with a damp paper towel and heat on medium power in 30-second intervals.
- Avoid high heat — it will dry out the chicken.
Pro Tip for Leftovers: Use sliced chicken in salads, wraps, quesadillas, pasta dishes, or even chicken salad with mayo, celery, and grapes.
Nutritional Information (Per Serving – Approximate)
Based on 6 servings from 3 lbs chicken:
- Calories: 285
- Protein: 38g
- Fat: 12g
- Carbohydrates: 3g (mostly from vegetables and herbs)
- Sodium: Varies significantly depending on brining
This recipe is naturally high in protein and low in carbs, making it excellent for weight management, muscle building, or general healthy eating.
Frequently Asked Questions (FAQ)
Can I use bone-in chicken breasts instead?
Yes! Increase cooking time by 10–15 minutes and ensure internal temperature reaches 165°F.
Can I make this on the grill?
Absolutely. Use indirect heat at 375°F and grill for 20–30 minutes, flipping once.
Is it possible to make this ahead?
Yes. Prepare the herb butter and brine the chicken the night before. Roast just before serving.
What if I don’t have fresh herbs?
Use dried herbs — reduce quantities by half (1 tablespoon dried = 2 tablespoons fresh).
Can I use chicken thighs instead?
Chicken thighs are more forgiving and stay juicier. Reduce initial high-heat time slightly.
Advanced Tips from the Test Kitchen
- Temperature is everything. Invest in a good instant-read thermometer. It’s the single best tool for perfect chicken.
- Air circulation matters. Don’t overcrowd the pan. If cooking a large batch, use two pans.
- Resting is non-negotiable. Those 8–10 minutes make the difference between good and exceptional.
- Experiment with wood chips if you have a smoker attachment for your oven or grill for extra smoky flavor.
- Save the bones and scraps to make homemade chicken stock.
The Science Behind Juicy Chicken
Chicken breast is over 70% water. When heated, proteins contract and squeeze out moisture. Brining adds salt that alters protein structure to hold more water. The herb butter creates a barrier and adds fat that keeps the lean meat from drying out. Finally, resting allows the muscle fibers to relax and reabsorb juices.
Understanding these principles helps you adapt the recipe confidently for different situations.
Why Homemade Roasted Chicken Beats Store-Bought
Store-bought rotisserie chicken is convenient, but it often contains additives, excessive sodium, and can be inconsistent in quality. This homemade version lets you control every ingredient, adjust spice levels to your family’s preference, and achieve that fresh-from-the-oven aroma that fills your home with warmth.
Many readers report that once they master this technique, they stop buying pre-cooked chicken entirely.
Final Thoughts
Mastering the perfect herb-roasted chicken breast is a foundational skill that opens the door to hundreds of meals. It’s healthy, affordable, and impressive enough for company. With the detailed instructions, tips, and variations in this guide, you now have everything you need to succeed every single time.
The next time you’re staring at a package of chicken breasts wondering what to make, remember this recipe. Your family will thank you, and you’ll never go back to dry, flavorless chicken again.
Enjoy your cooking journey, and don’t forget to share your results in the comments below — we love hearing how your roasted chicken turned o