Homemade Vanilla Ice Cream Sandwiches with Graham-Style Cookies Recipe
Introduction
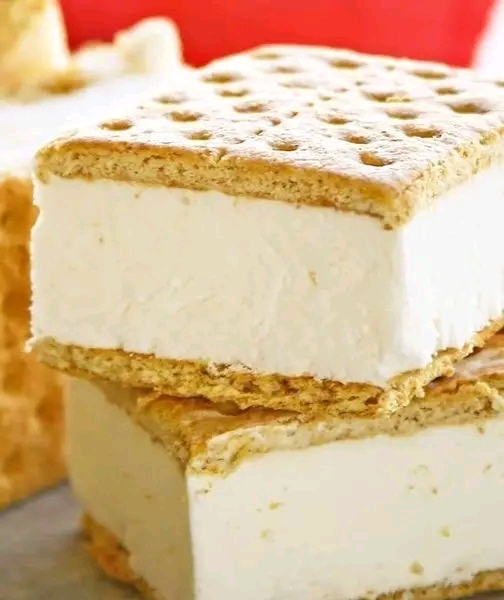
Nothing captures the joy of summer quite like biting into a classic ice cream sandwich — that perfect combination of soft, slightly chewy cookies embracing a thick layer of creamy vanilla ice cream. This Homemade Vanilla Ice Cream Sandwiches recipe takes the beloved treat to the next level with lightly sweetened, buttery graham-style cookies that have a signature perforated top, just like the nostalgic store-bought versions, but made fresh in your own kitchen.
These sandwiches feature two rectangular cookies sandwiching a generous layer of smooth, vanilla bean-flecked ice cream that stays perfectly scoopable yet firm enough to hold its shape. The cookies are tender with a subtle honey and cinnamon warmth, providing the ideal contrast to the cold, creamy filling. Each bite delivers a satisfying crunch from the cookie edges followed by the luxurious melt of real vanilla ice cream.
Whether you’re making them for backyard barbecues, kids’ birthday parties, poolside snacks, or simply as a special freezer treat for the family, these homemade ice cream sandwiches are guaranteed to disappear fast. They’re far superior to anything you’ll find in the grocery aisle because you control every ingredient — no artificial flavors, no preservatives, just pure, delicious homemade goodness.
This recipe makes about 12–16 generous ice cream sandwiches, depending on how thick you cut the ice cream layer. It’s make-ahead friendly, as the sandwiches store beautifully in the freezer for weeks. You can customize the ice cream flavor or add mix-ins like mini chocolate chips, crushed cookies, or fruit swirls for endless variations.
Perfect for warm weather but enjoyable year-round, these treats bring back childhood memories while offering the satisfaction of baking from scratch. Let’s dive into everything you need to know to create these irresistible frozen delights.
Why You’ll Love This Homemade Ice Cream Sandwich Recipe
Bakery-Quality Results at Home: The cookies have that perfect soft-yet-sturdy texture that holds up to the ice cream without becoming soggy or too hard.
Real Ingredients: Skip the mystery additives in store-bought versions. Use high-quality vanilla, fresh butter, and real cream for superior taste.
Customizable Fun: Choose your favorite ice cream flavor or make your own no-churn version. Roll the sides in sprinkles, chocolate chips, or nuts for extra flair.
Kid-Friendly Activity: Older children can help assemble the sandwiches — it’s a fun family project that creates sweet memories.
Make-Ahead Convenience: Prepare the cookies and ice cream days in advance, then assemble when ready. The sandwiches keep well in the freezer for up to one month.
Crowd-Pleasing Dessert: Ideal for parties, picnics, or as an after-dinner treat. They look impressive on a platter but require minimal last-minute effort.
Nostalgic Yet Elevated: The perforated top on the cookies gives them that classic look, while the homemade touch makes them taste gourmet.
Ingredients
For the Graham-Style Cookies (makes about 24–32 rectangular cookies for 12–16 sandwiches):
- 2½ cups (315g) all-purpose flour
- 1 cup (120g) whole wheat flour or graham flour (for authentic flavor and slight nuttiness)
- 1 teaspoon baking soda
- ½ teaspoon baking powder
- ½ teaspoon salt
- 1 teaspoon ground cinnamon
- 1 cup (226g) unsalted butter, softened to room temperature
- ¾ cup (150g) granulated sugar
- ½ cup (100g) light brown sugar, packed
- ¼ cup (85g) honey
- 2 large eggs, room temperature
- 2 teaspoons pure vanilla extract
- 2 tablespoons milk (if needed for dough consistency)
For the Vanilla Ice Cream Filling:
- 2 quarts (about 1.9 liters) high-quality store-bought vanilla bean ice cream, slightly softened (or use the homemade no-churn recipe below)
- OR Homemade No-Churn Vanilla Ice Cream:
- 2 cups (480ml) heavy whipping cream, cold
- 1 can (14 ounces / 397g) sweetened condensed milk
- 2 teaspoons pure vanilla extract or seeds from 1 vanilla bean
- ¼ teaspoon salt
- Optional mix-ins: ½ cup mini chocolate chips, crushed graham crackers, or fruit puree
For Assembly and Optional Coatings:
- Parchment paper or wax paper for wrapping
- Mini chocolate chips, rainbow sprinkles, chopped nuts, or crushed cookies for rolling the edges (about 1–2 cups total)
- Powdered sugar for light dusting (optional)
Equipment Needed
- Two large baking sheets
- Parchment paper or silicone baking mats
- Electric hand mixer or stand mixer
- Rolling pin
- Ruler or straight edge for cutting uniform rectangles
- Fork (for perforating the tops)
- Sharp knife or bench scraper
- Large offset spatula or ice cream scoop
- Shallow baking pan or rimmed sheet for freezing ice cream slab (9×13-inch works well)
- Plastic wrap and freezer bags for storage
- Mixing bowls and measuring cups/spoons
Instructions
Step 1: Prepare the Cookie Dough
In a medium bowl, whisk together the all-purpose flour, whole wheat or graham flour, baking soda, baking powder, salt, and ground cinnamon. Set this dry mixture aside.
In the bowl of a stand mixer fitted with the paddle attachment (or a large mixing bowl with an electric hand mixer), beat the softened butter, granulated sugar, and brown sugar on medium speed until light and fluffy, about 3–4 minutes. Scrape down the sides of the bowl as needed.
Add the honey, eggs one at a time, and vanilla extract. Beat until well combined and smooth. The mixture may look slightly curdled at this stage — that’s normal.
Gradually add the dry ingredients to the wet ingredients on low speed, mixing just until a soft dough forms. If the dough seems too dry and crumbly, add milk one tablespoon at a time until it comes together into a cohesive but not sticky dough.
Divide the dough into two equal portions, flatten each into a disk, wrap in plastic wrap, and refrigerate for at least 1 hour (or up to 2 days). Chilling prevents the cookies from spreading too much during baking and makes rolling easier.
Step 2: Bake the Cookies
Preheat your oven to 350°F (175°C). Line two large baking sheets with parchment paper.
Remove one dough disk from the refrigerator and roll it out on a lightly floured surface to about ⅛-inch to ¼-inch thickness. Aim for a large rectangle roughly 12×16 inches so you can cut uniform pieces later.
Using a fork, gently prick the entire surface of the dough in neat rows to create the classic perforated look. This also helps prevent the cookies from puffing up unevenly.
Cut the dough into rectangles approximately 3×4 inches (or whatever size you prefer for your sandwiches). A pizza cutter or sharp knife works well for clean edges. Carefully transfer the rectangles to the prepared baking sheets, spacing them about 1 inch apart.
Bake for 8–11 minutes, or until the edges are lightly golden but the centers are still pale. The cookies should feel set but still soft — they will firm up as they cool. Do not overbake, or they will become too crisp and may crack when sandwiching the ice cream.
Repeat with the remaining dough. Allow the cookies to cool completely on the baking sheets for 5 minutes, then transfer to a wire rack to cool fully. You should end up with 24–32 cookies.
Step 3: Prepare the Ice Cream Layer
If using store-bought ice cream, let it soften at room temperature for 10–15 minutes until it’s scoopable but not melted. Line a 9×13-inch pan with parchment paper, leaving overhang on the sides for easy removal.
Spread the softened ice cream evenly into the pan to a thickness of about ¾ to 1 inch. Smooth the top with an offset spatula. Cover tightly with plastic wrap and freeze for at least 2–3 hours until very firm (overnight is best).
For the homemade no-churn version: In a large bowl, whip the cold heavy cream with an electric mixer until stiff peaks form, about 3–4 minutes. In another bowl, stir together the sweetened condensed milk, vanilla, and salt. Gently fold the condensed milk mixture into the whipped cream until no streaks remain. Add any desired mix-ins at this stage.
Pour the mixture into the prepared parchment-lined pan, smooth the top, cover, and freeze for 4–6 hours or until solid.
Step 4: Assemble the Ice Cream Sandwiches
Once the ice cream slab is fully frozen and the cookies are completely cool, it’s time to assemble.
Remove the ice cream from the freezer and lift it out using the parchment overhang. Working quickly, use a sharp knife or cookie cutter to cut the ice cream into rectangles that match the size of your cookies. If the ice cream is too hard, let it sit for 1–2 minutes.
Place one cookie (perforated side up) on a flat surface. Top with an ice cream rectangle, then gently press a second cookie on top (perforated side up). Press lightly but firmly so the ice cream reaches the edges without squeezing out too much.
If desired, roll the exposed ice cream edges in mini chocolate chips, sprinkles, chopped nuts, or crushed cookies for a fun, decorative finish and added texture.
Repeat with the remaining cookies and ice cream. Work in batches if your kitchen is warm, returning the ice cream slab to the freezer between batches to keep it firm.
Step 5: Freeze and Store
Wrap each assembled sandwich individually in parchment paper or plastic wrap, then place them in a large freezer bag or airtight container. Freeze for at least 1–2 hours to allow everything to set firmly together.
The sandwiches are best enjoyed within the first two weeks but will keep well for up to one month. For the best texture, let them sit at room temperature for 2–3 minutes before eating so the cookies soften slightly and the ice cream becomes perfectly creamy.
Homemade No-Churn Vanilla Ice Cream Variations
- Chocolate Chip: Fold in ¾ cup mini semi-sweet chocolate chips.
- Strawberry Swirl: Swirl in ½ cup strawberry puree or jam before freezing.
- Cookie Crumble: Add crushed graham crackers or chocolate sandwich cookies.
- Coffee: Add 2 teaspoons instant espresso powder to the condensed milk mixture.
- Mint Chocolate: Add peppermint extract and chocolate chips for a refreshing twist.
Serving Suggestions
Serve these homemade ice cream sandwiches straight from the freezer on a hot day. They pair wonderfully with:
- Fresh berries or a fruit salad for a lighter contrast.
- A drizzle of chocolate or caramel sauce over the top just before eating.
- A tall glass of cold milk or iced coffee.
- At parties, arrange them on a chilled platter with colorful sprinkles scattered around.
For an elegant presentation, dust lightly with powdered sugar right before serving, though the natural look of the perforated cookies is already charming.
Make-Ahead and Storage Tips
- Cookies: Bake up to 5 days in advance and store in an airtight container at room temperature.
- Ice Cream Slab: Prepare up to 1 week ahead and keep frozen.
- Fully Assembled Sandwiches: Store wrapped in the freezer for up to 1 month. Label with the date for best quality.
- Softening Tip: If the sandwiches become too hard after long storage, let them thaw for 5 minutes at room temperature before enjoying.
Variations and Customizations
- Chocolate Cookies: Replace ½ cup of the all-purpose flour with unsweetened cocoa powder and add 1 teaspoon espresso powder for deeper chocolate flavor.
- Lemon Zest Twist: Add zest of one lemon to the cookie dough and use lemon curd swirled into the ice cream.
- S’mores Style: Use chocolate ice cream and roll edges in crushed graham crackers and mini marshmallows.
- Gluten-Free Version: Substitute a 1:1 gluten-free flour blend and certified gluten-free graham-style crackers if desired (or omit whole wheat flour).
- Mini Sandwiches: Cut smaller rectangles or use a round cutter for bite-sized treats perfect for parties.
- Dipped Edges: Melt chocolate and dip half of each finished sandwich for a fancy touch.
- Fruit-Infused: Layer thin slices of fresh strawberries or banana between the cookie and ice cream before freezing.
Troubleshooting Common Issues
- Cookies Too Crispy: Reduce baking time by 1–2 minutes next time. They should be set but still slightly soft in the center.
- Ice Cream Melting Too Fast During Assembly: Work in a cool kitchen, keep the slab in the freezer between batches, and have everything ready beforehand.
- Dough Too Sticky: Chill longer or add a bit more flour when rolling.
- Cookies Cracking When Assembling: Make sure cookies are fully cooled and ice cream isn’t too hard. Press gently and evenly.
- Ice Cream Not Firm Enough: Freeze the slab longer or use a higher-fat ice cream that holds shape better.
Nutritional Information (Approximate, Per Sandwich)
Based on 12–16 servings using homemade no-churn ice cream:
- Calories: 380–450
- Total Fat: 22–26g
- Saturated Fat: 13–15g
- Carbohydrates: 42–48g
- Sugars: 28–32g
- Protein: 6–8g
- Fiber: 2–3g
Note: Values vary depending on exact portion sizes, ice cream thickness, and any added mix-ins or coatings. This is an indulgent frozen treat best enjoyed occasionally as part of a balanced diet.
Frequently Asked Questions
Can I use store-bought cookies instead of homemade?
Yes, high-quality graham crackers or shortbread cookies work in a pinch, but the homemade version offers superior flavor and texture that holds up better to the ice cream.
Do I have to make the ice cream from scratch?
Not at all. Any good-quality vanilla bean ice cream from the store works beautifully. The no-churn recipe is included for those who want full control or don’t have an ice cream maker.
How do I get the perfect perforated look on top?
Use a fork and prick in even rows before baking. Don’t press too hard — just enough to create small holes without going all the way through.
Can these be made dairy-free?
Yes — use dairy-free butter for the cookies and a coconut milk-based or other plant-based ice cream. Results may vary slightly in texture.
How long do the sandwiches need to freeze after assembly?
At least 1–2 hours for the ice cream to firm up again and bond with the cookies. Longer is better for cleaner eating.
Conclusion
These Homemade Vanilla Ice Cream Sandwiches with their signature perforated graham-style cookies deliver everything you love about the classic frozen treat — and more. The buttery, lightly spiced cookies provide the perfect vessel for creamy vanilla ice cream, creating a handheld dessert that’s both nostalgic and freshly exciting.
With simple ingredients, straightforward steps, and plenty of room for personalization, this recipe is one you’ll return to again and again. Make a big batch on a weekend afternoon and enjoy them throughout the week (or share with neighbors and friends for instant smiles).
Whether it’s a sunny summer day or a cozy winter evening when you’re craving something sweet and cold, these ice cream sandwiches bring pure joy in every bite. Treat yourself and your loved ones to this homemade delight — you deserve it.
Enjoy every creamy, cookie-filled moment!