
How to Deep-Clean Gas Stove Burner Heads for Maximum Heat and a Spotless Kitchen
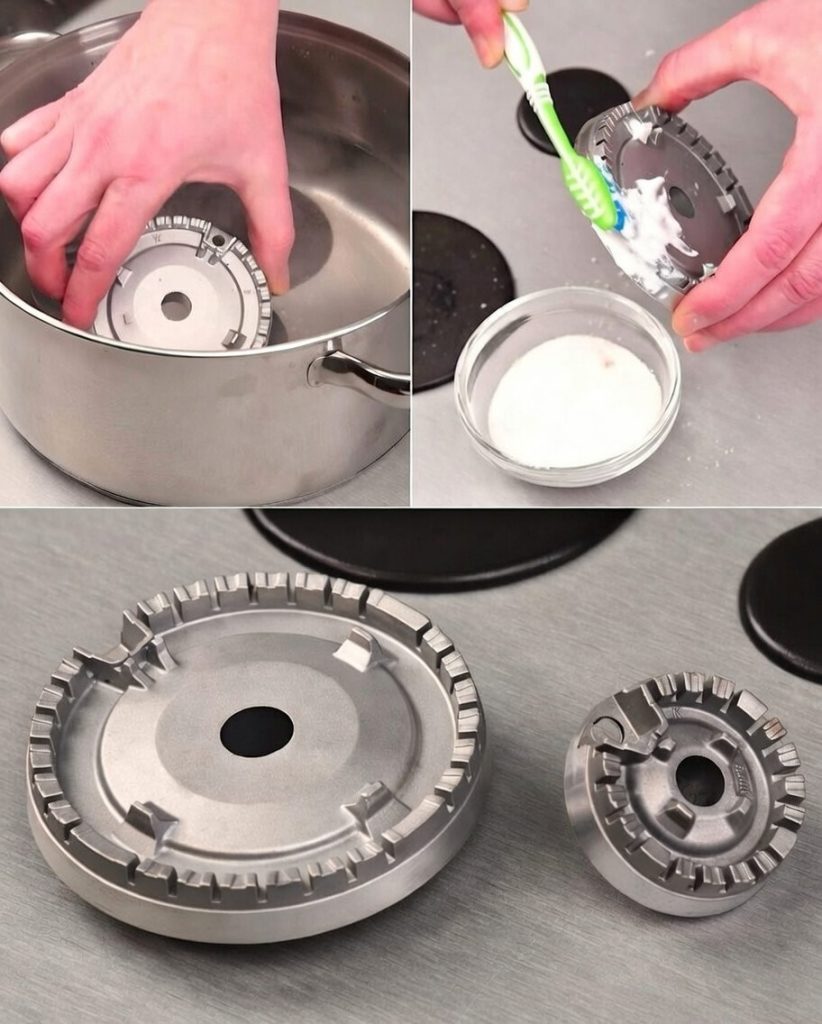
Gas stove burners are one of the most overlooked parts of the kitchen when it comes to cleaning. Over time, grease, food spills, and carbon buildup clog the burner ports, affecting flame quality and even causing uneven cooking. The image above shows a simple but powerful method to restore burner heads to like-new condition using basic household items.
This guide will walk you through why burner cleaning matters, what you need, step-by-step instructions, extra tips, and long-term benefits.
Why Cleaning Burner Heads Is So Important
Burner heads play a critical role in how your stove performs. When they’re dirty:
- Flames become weak or uneven
- Gas flow is partially blocked
- Cooking takes longer
- Food heats inconsistently
- Your stove looks old and neglected
Regular deep cleaning improves performance, safety, and efficiency, while also extending the life of your stove.
What You’ll Need
Simple tools, nothing fancy:
- A large pot
- Water
- Baking soda or mild dish soap
- White vinegar (optional but effective)
- An old toothbrush or small cleaning brush
- A small bowl
- A soft cloth or paper towels
Step-by-Step Deep Cleaning Method
1. Remove the Burner Heads
Carefully lift the burner caps and heads off the stove once they’re completely cool. Separate any removable parts.
2. Boil to Loosen Grease
Place the burner heads in a large pot and cover them with water.
Bring to a gentle boil and let them simmer for 10–15 minutes.
This step:
- Softens hardened grease
- Loosens carbon buildup
- Makes scrubbing much easier
Optional: Add 1–2 tablespoons of baking soda or a splash of vinegar for extra cleaning power.
3. Scrub the Details
Remove the burners from the pot and let them cool slightly.
Dip a toothbrush into a small bowl of baking soda paste or dish soap and scrub:
- The ridged edges
- Gas holes and ports
- Underside surfaces
Pay extra attention to blocked holes—this is where flame problems usually start.
4. Rinse and Dry Completely
Rinse thoroughly under warm water.
Dry completely with a towel and let them air-dry for at least 30 minutes.
Important: Moisture left inside burner holes can affect ignition.
5. Reassemble and Test
Place everything back on the stove correctly.
Turn on the burner and check for:
- Even blue flames
- Faster ignition
- Strong, consistent heat
You’ll notice the difference immediately.
Extra Pro Tips for Best Results
- Use a toothpick or wooden skewer to gently clear stubborn burner holes
- Never use metal pins—they can damage the ports
- Clean burners once a month if you cook often
- Wipe spills immediately to avoid hard buildup
- Avoid harsh chemicals that can discolor metal
Benefits of Clean Burner Heads
- Better flame control
- Faster cooking times
- Lower gas usage
- Improved kitchen hygiene
- A stove that looks brand new
- Longer appliance lifespan
Final Thoughts
Deep-cleaning gas stove burners is one of those small kitchen habits that makes a huge difference. With just boiling water, a toothbrush, and a little patience, you can restore your burners to peak performance—no expensive cleaners required.