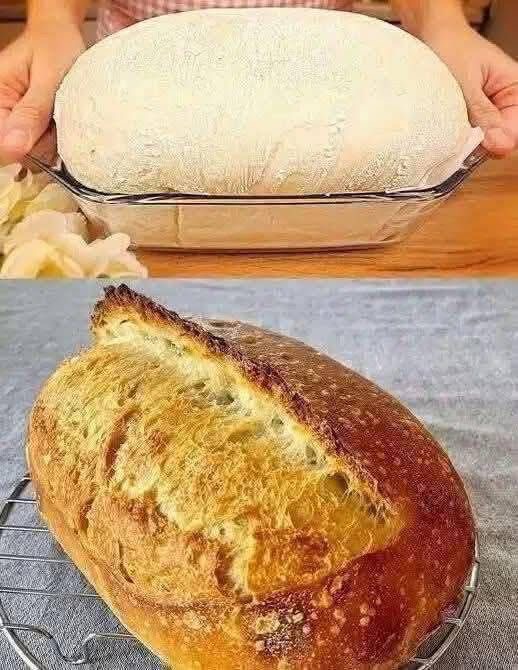
Much Better Than Store-Bought: 100-Year-Old Homemade Bread Recipe from Grandma
Introduction**
This rustic, old-fashioned bread recipe has been passed down through generations. With a crisp crust, tender crumb, and deep flavor, it’s far better than anything you’ll find in stores. Grandma’s 100-year-old recipe uses simple ingredients, slow fermentation, and lots of love. Perfect for sandwiches, toasts, or fresh with butter.
Ingredients** (Makes 2 large loaves)
- 1.5 kg (about 10 cups) all-purpose flour or bread flour
- 1 tbsp salt
- 1 tbsp sugar (optional, for flavor)
- 1 packet (7g or 2 ¼ tsp) active dry yeast or 30g fresh yeast
- 750 ml (3 cups) warm water (around 40°C or 105°F)
- 2 tbsp vegetable oil or melted lard (traditional option)
- Extra flour for kneading
- Butter or milk for brushing (optional, for soft crust)
Instructions**
1. Activate the Yeast
In a bowl, mix the warm water with the sugar and yeast. Let it sit for 10–15 minutes until frothy. This ensures the yeast is alive and ready.
2. Make the Dough
In a large mixing bowl (or stand mixer), add the flour and salt. Gradually pour in the yeast mixture. Add the oil or lard. Mix until it comes together into a sticky dough.
3. Knead the Dough
Knead the dough on a floured surface for 10–15 minutes (or 8 minutes with a dough hook) until smooth and elastic. The dough should bounce back when poked.
4. First Rise (Proofing)
Place the dough in a lightly greased bowl. Cover with a damp cloth and let it rise in a warm place for 1–2 hours, until doubled in size.
5. Shape the Loaves
Punch down the dough to release air. Divide in half. Shape each portion into a loaf—either round (boule) or oval (batard). Place in floured baskets or on parchment paper.
6. Second Rise
Cover the shaped loaves and let them rise again for 45 minutes to 1 hour.
7. Preheat the Oven
Preheat your oven to 220°C (430°F). If using a baking stone or Dutch oven, place it inside while preheating. You can also place a pan of water in the oven for steam (helps create a crisp crust).
8. Score and Bake
Score the tops with a sharp knife. Bake for 35–45 minutes until golden brown and the bread sounds hollow when tapped on the bottom.
9. Cool Down
Let the loaves cool on a wire rack for at least 30 minutes before slicing. This helps finish the internal cooking.
Tips & Tricks**
- For extra flavor, replace ½ cup water with yogurt or buttermilk.
- Add herbs, seeds, or grains to the dough if desired.
- Store in a bread bag or freeze after cooling for long-term use.
History of the Recipe**
This bread dates back over a century, made in rural kitchens using fire ovens and wooden troughs. Hungarian grandmothers used instinct instead of measurements, trusting feel and tradition. It was often baked once a week in large batches for the whole family.
Benefits**
- No preservatives or additives
- Supports gut health with slow fermentation
- Very cost-effective
- Better texture and taste than commercial bread
Who Will Love It**
- Bread lovers
- Families
- Traditional food enthusiasts
- Anyone seeking comfort in food
Conclusion**
This 100-year-old bread isn’t just food—it’s history, warmth, and nourishment. Biting into it connects you to generations past. It’s truly much better than store-bought, and now you have the recipe to keep the tradition alive.