Heaven in a Jar Homemade Mixed Berry Jam
Introduction:
There’s something magical about homemade jam — the aroma of simmering berries filling your kitchen, the satisfying pop of sealed jars, and the pride in preserving something so pure and delicious. Whether it’s spread over warm toast, spooned into yogurt, or layered in desserts, homemade berry jam is a timeless treasure. This recipe combines the sweet tartness of mixed berries with just the right amount of sugar and citrus to create a jam that bursts with fresh, fruity flavor.
This recipe is for small-batch canning, ideal for families who want wholesome goodness without the preservatives. Let’s dive deep into how to make it, the benefits, and how to savor every spoonful!
Ingredients (for 8–10 half-pint jars):
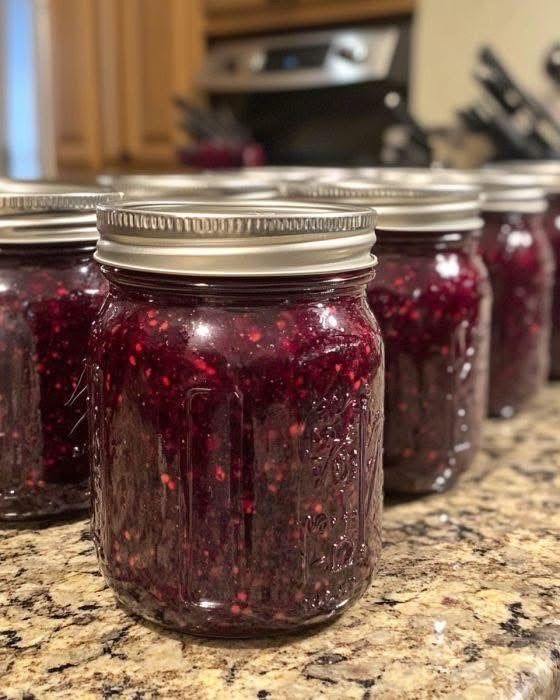
- 6 cups mixed berries (strawberries, raspberries, blueberries, and blackberries; fresh or frozen)
- 4 cups granulated sugar
- 1/4 cup lemon juice (freshly squeezed)
- 1 packet (1.75 oz) fruit pectin (optional for a firmer set)
- 1 tsp butter (optional; reduces foaming)
Instructions and Methods:
Step 1: Sterilize the Jars
- Wash jars, lids, and bands in hot soapy water.
- Place jars in a large pot of boiling water for 10 minutes or run them through a dishwasher cycle on sterilize.
- Keep them warm until ready to fill.
Step 2: Prepare the Berries
- Rinse and dry fresh berries. If using frozen, thaw and drain excess liquid.
- Gently mash berries with a potato masher or pulse in a food processor for a chunky texture.
Step 3: Cook the Jam
- In a large, deep pot, combine mashed berries and lemon juice.
- If using pectin, mix it with 1/4 cup sugar and stir it into the berries.
- Bring to a boil over medium-high heat, stirring constantly.
- Add remaining sugar all at once. Stir well and bring to a rolling boil (one that doesn’t stop when stirred).
- Boil hard for 1–2 minutes while stirring. Skim off foam with a spoon.
Step 4: Test the Set
- Place a plate in the freezer beforehand.
- Drop a spoonful of jam onto the cold plate, let sit 1 minute, then run a finger through it.
- If it wrinkles, it’s ready. If not, boil for 1–2 more minutes.
Step 5: Fill the Jars
- Use a funnel to ladle hot jam into warm jars, leaving 1/4 inch of headspace.
- Wipe rims with a clean cloth. Add lids and tighten bands until fingertip-tight.
Step 6: Process the Jars
- Place jars in a water bath canner with at least 1 inch of water above the jars.
- Boil for 10 minutes (adjust time for altitude).
- Remove jars, place on a towel, and let cool undisturbed for 12–24 hours.
Formation and Storage:
- Check the lids after 24 hours. If the center is firm and doesn’t pop, the seal is successful.
- Label jars with date.
- Store in a cool, dark place for up to 1 year.
- Opened jars should be refrigerated and used within 3 weeks.
Nutrition (per tablespoon):
| Nutrient | Approx. Value |
|---|---|
| Calories | 45 |
| Sugar | 11g |
| Vitamin C | 6% DV |
| Fiber | 0.6g |
| Carbs | 12g |
| Fat | 0g |
| Protein | 0g |
Note: Sugar can be reduced or substituted with natural sweeteners, but it may affect preservation and texture.
Benefits:
1. Wholesome Ingredients:
You control what goes into your jam — no high-fructose corn syrup, no artificial preservatives.
2. Packed with Antioxidants:
Berries are rich in antioxidants, particularly anthocyanins, which support heart health and fight inflammation.
3. Fiber and Vitamins:
Berries are an excellent source of dietary fiber and vitamin C, boosting immunity and digestion.
4. Long Shelf Life:
Properly sealed and stored, your homemade jam will last up to a year — no need to refrigerate until opened
Love in Every Jar (Lovera Section):
Homemade jam isn’t just food — it’s love preserved. It’s the memory of sun-warmed berries, the laughter in the kitchen, the clinking of jars on the counter. Giving someone a jar of jam is like gifting them a spoonful of your heart. Wrap a ribbon around the lid, tuck it into a basket, and you’ve got a thoughtful homemade gift anyone will adore.
Conclusion:
Making your own mixed berry jam is a deliciously rewarding experience. From plump juicy berries to a beautifully set preserve, every step is worth the effort. Whether you’re spreading it on toast, baking it into pastries, or giving it as a gift, this jam captures the essence of summer in a jar.
It’s not just about preserving fruit — it’s about preserving joy. So grab those berries, sterilize those jars, and let’s jam!