Cherry Pie Bars
Introduction
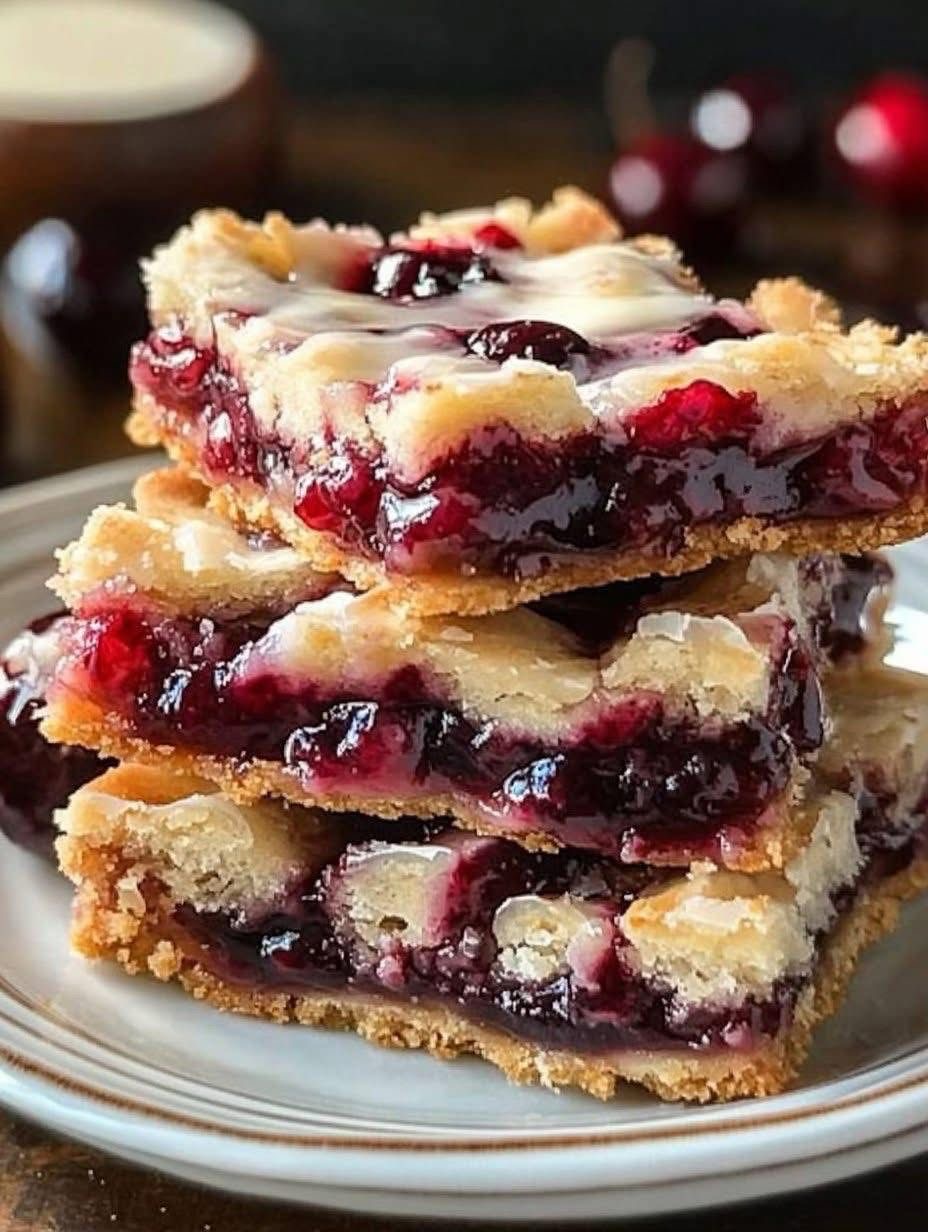
Cherry Pie Bars are a delightful twist on traditional cherry pie. Easier to serve, fun to eat, and just as nostalgic, these bars blend the flaky goodness of pie crust with the ease of a handheld treat. Perfect for potlucks, family gatherings, or a cozy afternoon indulgence, this dessert will win over cherry lovers in no time.
History
The roots of cherry pie go back centuries, with the earliest recorded recipes appearing in 16th-century England. When settlers came to America, they brought the concept with them, and cherry pies became iconic, especially with sour cherries grown in Michigan and Wisconsin. Cherry Pie Bars are a more modern invention, emerging in American kitchens in the mid-20th century as home bakers looked for quicker, more portable versions of their favorite pies.
Ingredients
For the Crust and Topping:
- 1 cup (2 sticks) unsalted butter, softened
- 1 3/4 cups granulated sugar
- 1/2 tsp salt
- 4 large eggs
- 1 tsp vanilla extract
- 3 cups all-purpose flour
- 1 tsp baking powder
For the Filling:
- 2 cans (21 oz each) cherry pie filling (or homemade if you like)
For the Glaze:
- 1 cup powdered sugar
- 2 tbsp milk (or as needed)
- 1/2 tsp almond extract or vanilla extract
Instructions & Method
Step 1: Prepare the Batter
- Preheat oven to 350°F (175°C).
- Grease a 15×10-inch jelly roll pan or line it with parchment paper.
- In a large mixing bowl, cream together softened butter and sugar until light and fluffy.
- Add eggs one at a time, beating well after each addition. Stir in vanilla.
- In another bowl, whisk together flour, salt, and baking powder.
- Gradually add dry ingredients to the wet mixture and mix until fully combined.
Step 2: Assemble
- Spread about two-thirds of the batter evenly into the prepared pan.
- Spoon cherry pie filling over the batter, spreading it gently to cover the surface.
- Drop the remaining batter by spoonfuls over the cherry filling—don’t worry about covering every inch; it’ll spread a bit while baking.
Step 3: Bake
- Bake for 35–40 minutes or until the top is lightly golden and a toothpick comes out clean (except for the gooey cherry filling).
- Cool completely in the pan on a wire rack.
Step 4: Glaze
- In a small bowl, whisk together powdered sugar, milk, and almond/vanilla extract until smooth.
- Drizzle the glaze over the cooled bars.
Benefits
- Portable: No fork required—great for parties, picnics, and school lunches.
- Crowd-pleaser: Makes a large batch to feed a group.
- Versatile: Can be made with different fruit fillings like blueberry, peach, or apple.
- Nostalgic flavor: Tastes like a cherry pie your grandma might have made.
- Simple ingredients: Likely already in your pantry.
Formation
These bars are formed in layers:
- Crust/base – rich, buttery shortbread-like dough
- Cherry layer – juicy, sweet, and slightly tart filling
- Topping – dollops of the reserved dough that bake into a golden finish
- Icing – sweet drizzle that ties it all together
Nutrition (Per Bar – Approx.)
- Calories: 270
- Carbohydrates: 38g
- Fat: 12g
- Protein: 3g
- Sugar: 25g
- Fiber: 1g
- Cholesterol: 45mg
- Sodium: 120mg
Conclusion
Cherry Pie Bars are a beautiful blend of nostalgia, flavor, and simplicity. They bring joy to every bite with their soft, buttery crust and jammy cherry center. Whether you’re serving them at a family barbecue or enjoying one with a cup of coffee on a rainy afternoon, these bars are bound to become a staple in your dessert rotation.
Lovers of Cherry Pie Bars
These are for:
- Fruit dessert fanatics who love a sweet-tart bite.
- Home bakers who want to impress without a fuss.
- Parents looking for an easy treat for school functions.
- Holiday enthusiasts who need a red-hued dessert for festive tables.