Classic Homemade White Bread Recipe
Introduction
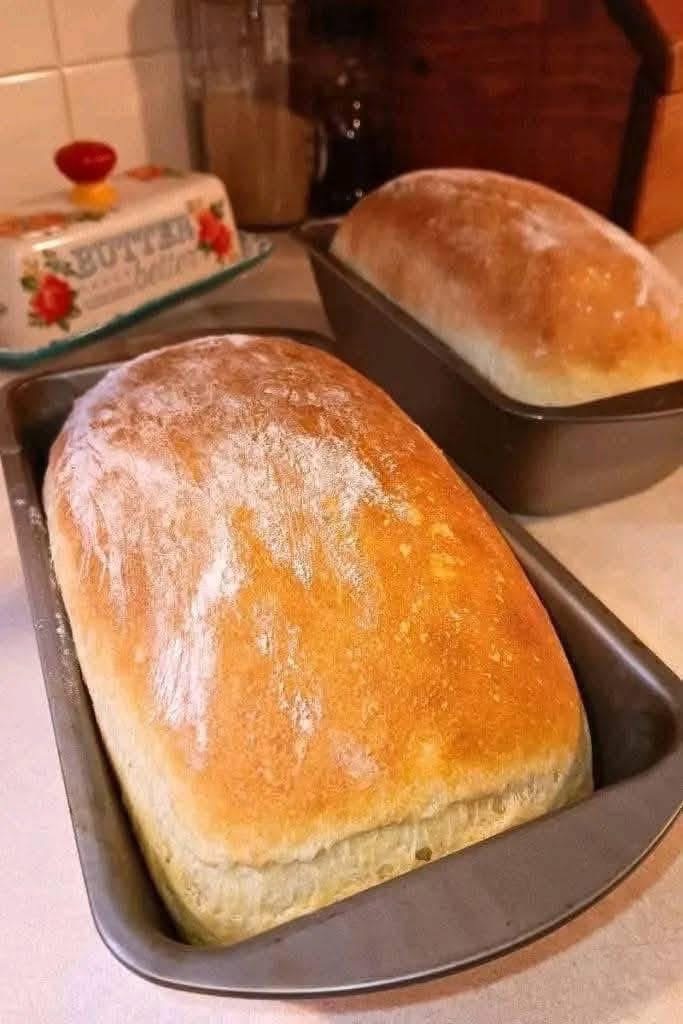
Nothing beats the aroma of fresh, homemade bread filling your kitchen. This classic white bread recipe is soft, fluffy, and perfect for sandwiches, toast, or enjoying with butter and jam. With simple ingredients and an easy method, you can create bakery-quality bread right at home.
History of White Bread
White bread has been a staple food for centuries. Its origins trace back to ancient Egypt, where wheat cultivation led to the first forms of leavened bread. Over time, bread-making evolved, with refined white flour becoming popular in Europe during the 19th century. Today, homemade white bread remains a beloved classic, offering a fresher and healthier alternative to store-bought versions.
Ingredients
(Makes 2 loaves)
- 5 to 6 cups all-purpose or bread flour
- 2 ¼ teaspoons (1 packet) active dry yeast
- 2 cups warm water (110°F/45°C)
- 2 tablespoons sugar or honey
- 2 teaspoons salt
- 2 tablespoons butter, softened
- Extra flour for dusting
Instructions
Step 1: Activate the Yeast
- In a large mixing bowl, combine warm water and sugar/honey. Stir to dissolve.
- Sprinkle the yeast over the water and let it sit for 5–10 minutes until frothy. This ensures the yeast is active.
Step 2: Mix the Dough
- Add softened butter and salt to the yeast mixture. Stir well.
- Gradually add flour, one cup at a time, mixing continuously.
- Once the dough starts coming together, transfer it to a floured surface.
Step 3: Knead the Dough
- Knead the dough for about 8–10 minutes until it becomes smooth and elastic.
- To check if it’s ready, poke it gently; it should spring back.
Step 4: First Rise
- Place the dough in a greased bowl, cover with a damp towel, and let it rise in a warm place for 1–1.5 hours or until doubled in size.
Step 5: Shape the Loaves
- Punch down the dough to release air bubbles.
- Divide it into two equal portions and shape each into a loaf.
- Place the loaves into greased bread pans.
Step 6: Second Rise
- Cover and let them rise for another 30–45 minutes until puffy.
Step 7: Bake the Bread
- Preheat your oven to 375°F (190°C).
- Bake for 25–30 minutes until golden brown. The loaves should sound hollow when tapped.
Step 8: Cool & Enjoy
- Let the bread cool in the pans for 10 minutes, then transfer to a wire rack.
- Slice and enjoy warm with butter, jam, or your favorite spread!
Methods Used
- Kneading – Develops gluten, making the bread soft and chewy.
- Proofing – Allowing the dough to rise for a light and airy texture.
- Baking – Achieving a golden crust while keeping the inside fluffy.
Making homemade bread is a rewarding process that involves a few key steps: mixing, kneading, proofing, shaping, and baking. Below is a step-by-step guide to ensure you get soft, fluffy, and delicious homemade bread every time.
Method 1: Traditional Hand Kneading
- Mixing the Ingredients
- In a large bowl, combine warm water (110°F/45°C), sugar, and yeast. Let it sit for 5–10 minutes until it becomes foamy.
- Add salt, butter, and flour gradually, stirring until a rough dough forms.
- Kneading the Dough
- Transfer the dough to a floured surface and knead for 8–10 minutes until it becomes smooth and elastic.
- If the dough is too sticky, sprinkle a little flour while kneading.
- First Rise (Proofing)
- Place the kneaded dough in a greased bowl, cover with a damp towel, and let it rise in a warm place for 1–2 hours until doubled in size.
- Shaping the Dough
- Punch down the risen dough to release air.
- Divide it into two equal portions and shape each into a loaf.
- Place the loaves into greased loaf pans.
- Second Rise (Final Proofing)
- Cover and let the shaped loaves rise again for 30–45 minutes until they puff up.
- Baking the Bread
- Preheat your oven to 375°F (190°C).
- Bake for 25–30 minutes or until golden brown.
- Tap the top of the loaf—if it sounds hollow, it’s done!
- Cooling & Storing
- Remove from the pans and cool on a wire rack before slicing.
- Store in an airtight container at room temperature for up to 3 days, or freeze for longer storage.
Method 2: Stand Mixer (Faster & Easier)
- Use a stand mixer with a dough hook to mix and knead the dough for 5–7 minutes instead of kneading by hand.
- Follow the same proofing, shaping, and baking steps as above.
Method 3: Bread Machine (Effortless Baking)
- Add ingredients to the bread machine in the order recommended by the manufacturer.
- Select the “Basic Bread” setting.
- Let the machine knead, proof, and bake automatically.
- Remove and let it cool before slicing.
Each method produces delicious homemade bread, and you can choose the one that fits your preference and available time. Do you want any variations like whole wheat or herb-infused bread
Benefits of Homemade White Bread
- Healthier than store-bought bread with no preservatives.
- Customizable – Adjust ingredients to taste, such as whole wheat or herbs.
- Budget-Friendly – Costs much less than bakery bread.
- Therapeutic – Kneading dough is a stress-relieving activity
Benefits of Homemade White Bread
Making your own bread at home has numerous advantages, from health benefits to cost savings and beyond. Here’s why homemade bread is a great choice:
1. Healthier than Store-Bought Bread
- No artificial preservatives, additives, or chemicals.
- Free from unnecessary sugars and unhealthy fats.
- Control over ingredients—you decide what goes in!
2. Freshness & Better Taste
- Nothing beats the aroma and taste of freshly baked bread.
- Soft, warm, and flavorful—better than pre-packaged bread that sits on shelves for days.
3. Customizable to Your Preferences
- Adjust the sweetness, salt level, or texture.
- Add healthy ingredients like seeds, nuts, or whole grains.
- Experiment with different flours, herbs, and flavors.
4. Budget-Friendly
- Cheaper than constantly buying store-bought loaves.
- Uses simple pantry staples—flour, yeast, water, and salt.
- One batch makes multiple loaves, saving money over time.
5. Higher Nutritional Value
- More fiber, vitamins, and minerals compared to mass-produced bread.
- Whole grain or enriched flour options provide extra nutrients.
6. Lower in Sodium & Sugar
- Many store-bought breads contain excessive salt and sugar.
- Homemade versions let you control these levels to suit your diet.
7. Great for Digestion
- Freshly baked bread with natural ingredients is easier to digest.
- Can be made with gut-friendly options like sourdough for probiotics.
8. No More Wasted Bread
- Store-bought bread often goes stale quickly.
- Homemade bread can be stored, frozen, or repurposed into croutons, breadcrumbs, or toast.
9. Therapeutic & Rewarding
- Kneading dough is a great stress reliever!
- The joy of baking from scratch is unmatched.
- A fun and engaging activity for families and kids.
10. A Staple for Every Meal
- Perfect for sandwiches, toast, French toast, bread pudding, and more.
- Complements soups, salads, and breakfast spreads.
Homemade bread isn’t just food—it’s an experience! You get to enjoy better quality, improved nutrition, and the satisfaction of baking something with your own hands.
Nutrition (Per Slice, Approx.)
- Calories: 120
- Carbs: 22g
- Protein: 4g
- Fat: 2g
- Fiber: 1g
Homemade bread provides essential nutrients while avoiding preservatives and additives found in store-bought varieties. Below is the approximate nutrition breakdown per one slice (about 50g) of homemade white bread.
Nutritional Breakdown (Per Slice – 50g)
- Calories: 130 kcal
- Carbohydrates: 25g
- Protein: 4g
- Fat: 2g
- Fiber: 1g
- Sugar: 1.5g (depends on recipe)
- Sodium: 200mg (varies based on salt used)
Key Nutrients & Their Benefits
Carbohydrates – Provide energy and fuel for daily activities.
Protein – Essential for muscle repair, growth, and immune function.
Fiber – Supports digestion and gut health (can be increased with whole wheat flour).
Healthy Fats – Small amounts help with vitamin absorption.
Calcium & Magnesium – Strengthen bones and support nerve function.
Iron – Helps in oxygen transportation through the blood.
B Vitamins (B1, B2, B3) – Aid in energy production and metabolism.
How to Make It Even Healthier?
- Use whole wheat flour for more fiber and nutrients.
- Reduce salt and sugar for a heart-healthier version.
- Add seeds (chia, flax, sunflower) for extra protein and Omega-3s.
- Swap butter for olive oil for healthier fats.
-
Homemade bread offers a balanced nutritional profile, and when made with whole grains, it can be an excellent addition to a healthy diet! Would you like a specific variation for a healthier twist
Bread Lovers’ Perspective
Homemade bread is adored worldwide. Some love it fresh out of the oven with butter, while others use it for hearty sandwiches. Whether you prefer it toasted or as a base for French toast, this recipe is sure to satisfy.
Conclusion
This classic homemade white bread recipe is easy, delicious, and rewarding. Whether you’re a beginner or an experienced baker, making bread from scratch is a skill worth mastering. Try it once, and you’ll never go back to store-bought