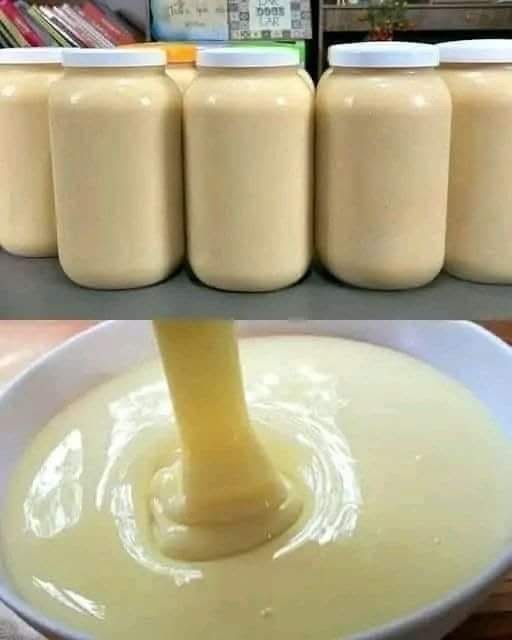
Homemade Sweetened Condensed Milk

Introduction
Sweetened condensed milk has been a kitchen staple for over a century, loved for its versatility and rich, creamy texture. From traditional fudge and caramel to modern lattes and ice creams, condensed milk adds sweetness and depth to countless recipes. While store-bought versions are convenient, homemade condensed milk is fresher, richer, and can be tailored to your sweetness preference.
This recipe is perfect for dessert enthusiasts and culinary experimenters alike!
Ingredients
- 1 liter whole milk (or substitute with evaporated milk for quicker results)
- 1 cup granulated sugar (adjust to taste)
- 2 tablespoons unsalted butter (for extra creaminess, optional)
- 1/2 teaspoon vanilla extract (optional, for flavor depth)
- A pinch of baking soda (to prevent curdling)
Instructions
Step 1: Combine Ingredients
- In a large, heavy-bottomed saucepan, pour the milk and sugar.
- Stir to dissolve the sugar completely.
Step 2: Heat and Simmer
- Set the saucepan over medium heat and bring the mixture to a gentle boil.
- Once it boils, lower the heat to a gentle simmer. Stir occasionally to prevent scorching.
Step 3: Reduce the Milk
- Allow the milk to simmer for 45-60 minutes. You’ll notice it thickening and reducing to about one-third of its original volume.
- Stir frequently to ensure the sugar dissolves evenly and the bottom doesn’t burn.
Step 4: Add Final Touches
- Stir in the butter and vanilla extract, if using, for added flavor and creaminess.
- Add a pinch of baking soda to stabilize the mixture.
Step 5: Cool and Store
- Once the condensed milk reaches your desired consistency, remove it from heat and let it cool slightly.
- Transfer to sterilized jars or airtight containers. It will thicken further as it cools.
- Store in the refrigerator for up to 2 weeks.
History
The origin of condensed milk dates back to 1856 when Gail Borden patented the process to preserve milk by condensing it with sugar. It was initially created as a way to store milk without refrigeration. Condensed milk played a crucial role during wars and expeditions, providing a long-lasting source of nutrition. Today, it’s a beloved ingredient in desserts worldwide, from Brazilian brigadeiros to Thai tea.
Benefits
- Homemade Quality: Fresher and free from additives or preservatives.
- Customizable Sweetness: Adjust the sugar to your taste preference.
- Cost-Effective: More economical than store-bought versions.
- Versatile Usage: Perfect for baking, beverages, or drizzling over desserts.
Formation
The magic of condensed milk lies in reducing milk to a thick consistency while infusing it with sugar. This process intensifies its flavor, giving it the characteristic creamy sweetness we love.
Uses for Sweetened Condensed Milk
- Drizzle over pancakes, waffles, or toast.
- Add to coffee or tea for a creamy, sweet twist.
- Use as a base for fudge, caramel, or no-bake desserts.
- Mix with fruit for an instant tropical treat.
Nutrition Information (Per Tablespoon)
- Calories: ~60 kcal
- Protein: 1g
- Carbohydrates: 10g
- Fat: 1.5g
- Sugar: 10g
Conclusion
Making sweetened condensed milk at home is an enjoyable and rewarding process. It allows you to control the ingredients, ensuring a purer and richer product. Whether you’re using it for desserts, beverages, or simply savoring a spoonful, homemade condensed milk is a treat worth trying.
For Dessert Lovers
If you’re a fan of creamy, dreamy textures and bold sweetness, this recipe is a must-have. It’s a game-changer for dessert lovers and culinary enthusiasts who appreciate the charm of homemade staples.
Enjoy the process and savor the results! Let me know how your homemade condensed milk turns out!