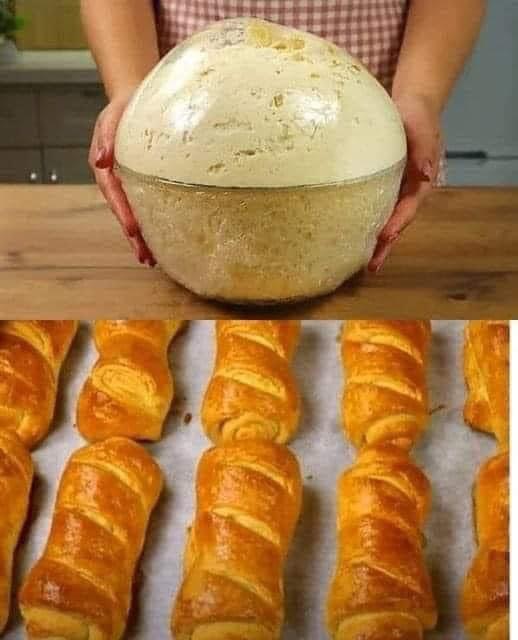
Grandma’s Timeless Homemade Bread Recipe

Introduction
Bread, often referred to as the “staff of life,” has been a staple in human diets for thousands of years. It symbolizes comfort, sustenance, and togetherness. The recipe I’m about to share with you comes from my grandmother, a master of home baking. Her bread is soft, flavorful, and perfect for any meal. This recipe is not just about making bread; it’s about connecting with tradition and savoring the simple pleasures of life. Once you try it, you’ll see why it’s a family favorite.
Ingredients
- 3/4 cup warm water: Activates the yeast, starting the fermentation process.
- 3/4 cup hot milk: Adds richness to the dough, creating a soft texture.
- 2 1/2 teaspoons dry yeast: Leavens the bread, giving it a light and airy structure.
- 2 tablespoons sugar: Feeds the yeast, enhancing the fermentation process and adding a subtle sweetness.
- 7 tablespoons plus 1 teaspoon sunflower seed oil: Adds moisture and a slight nuttiness to the bread.
- 1 teaspoon fine salt: Enhances the flavor and strengthens the gluten in the dough.
- 6 cups wheat flour: Forms the structure of the bread, creating a chewy and satisfying texture.
- Butter, to taste: Optional, for a rich, buttery finish on top of the loaves.
Method
- Prepare the Yeast Mixture:
- In a large mixing bowl, combine 3/4 cup warm water, 3/4 cup hot milk, 2 1/2 teaspoons dry yeast, and 2 tablespoons sugar. Stir gently to dissolve the yeast and sugar.
- Let the mixture sit for about 5-10 minutes until it becomes frothy. This indicates that the yeast is active and ready to work.
- Incorporate the Oil and Salt:
- Add 7 tablespoons plus 1 teaspoon sunflower seed oil and 1 teaspoon fine salt to the yeast mixture. Stir well to combine.
- Mix in the Flour:
- Gradually add 6 cups wheat flour to the liquid mixture, stirring continuously until a rough dough forms.
- Turn the dough out onto a floured surface and knead it for about 10 minutes until it’s smooth and elastic. If the dough is too sticky, add a little more flour.
- Shape the Dough:
- Divide the dough into 10 equal pieces. Shape each piece into a loaf or roll, depending on your preference.
- Place the shaped loaves on a greased or parchment-lined baking sheet.
- First Rise:
- Lightly brush the tops of the loaves with sunflower seed oil.
- Add a small pat of butter on top of each loaf for extra richness.
- Cover the loaves with a clean kitchen towel and let them rise in a warm place for about 15 minutes. They should slightly puff up during this time.
- Prepare for Baking:
- Preheat your oven to 190°C (375°F).
- Once the loaves have risen, brush them with a beaten egg for a glossy finish.
- Use a sharp knife to make small cuts on the top of each loaf. This helps the bread expand evenly while baking.
- Bake:
- Place the loaves in the preheated oven and bake for about 25 minutes, or until they are golden brown and sound hollow when tapped on the bottom.
- Cool and Enjoy:
- Remove the bread from the oven and let it cool on a wire rack. If you can resist, let it cool completely before slicing to maintain the best texture.
- Serve the bread warm with a spread of butter or your favorite topping.
Benefits
- Nutritional Value: Homemade bread is free from preservatives and additives, making it a healthier option. The use of wheat flour provides fiber, vitamins, and minerals.
- Customization: You can easily adapt this recipe to suit your tastes—add herbs, seeds, or even swap in whole wheat flour for a more rustic loaf.
- Cost-Effective: Baking bread at home is often cheaper than buying artisan loaves from the store, and it’s far more rewarding.
- Family Tradition: This recipe not only nourishes the body but also the soul. It’s a wonderful way to pass down traditions and create lasting memories with loved ones.
History
Bread baking is one of the oldest culinary traditions, dating back over 10,000 years. Early civilizations discovered that a simple mixture of flour and water, when left to ferment, would produce a leavened product—a precursor to the bread we know today. Over centuries, bread evolved into a symbol of sustenance, often being the cornerstone of meals across various cultures.
This particular recipe has been in my family for generations, passed down from my great-grandmother to my grandmother, and now to me. Each loaf carries with it stories of family gatherings, holidays, and the simple joys of a warm kitchen. It’s a connection to our past and a gift to our future.
Fans of This Recipe
This bread recipe has garnered fans across generations in my family. Every time it’s baked, the entire household is filled with the irresistible aroma of freshly baked bread, drawing everyone to the kitchen. My grandmother used to say that the true test of a good loaf is how quickly it disappears—and in our home, it never lasts long.
Conclusion
Grandma’s homemade bread is more than just a recipe; it’s a piece of family history, a connection to the past, and a source of comfort in the present. It’s a recipe that teaches patience, rewards effort, and fills the heart and home with warmth. Whether you’re a seasoned baker or just starting, this bread will become a cherished part of your baking repertoire. Enjoy every slice, and remember that with every bite, you’re sharing in a tradition that’s been loved for generations.